1st Build Making a Spartan III, 3D Printed and Custom Under Suit

Christmas Craft Time Part 2!

Gungnir Shoulder
Nerdforgedesigns model indexed a little lower than I personally wanted - see this post. So, I needed to do some plastic surgery. I measure and marked out the area I needed to remove. Then I took a rotary tool to cut through the print's walls. After a few extra cuts, I used plyers to start ripping things apart. The main thing was clearing out enough printed infill so I could make a flat surface. Satisfied with the new shape, I inserted some plastic card to make a new surface then finished off with some magnets.

View attachment 340147View attachment 340148View attachment 340149View attachment 340150

I'm definitely liking where it is sitting now. I might go back and rip out some the plastic card and fill in some epoxy or putty instead/combo. Right now, the card flexes too much under the weight of the print.

Bonus Bicep Bit
I finally got around to cutting out some black nylon webbing to make the bicep harness straps. I strung them through the bicep tab things, which have little magnets to help keep them in place. Those a kinda working. I think I'll be revisiting those once I get the whole harnessed rigged and tested.
View attachment 340152
love the security shoulder man those are some smooth lines. awesome job man i will be watching this build
 
With the new orcaslicer update there is a 4 plus profile included or you could get on Uncle Jessy's patreon and get his version of the profile for 2$ which I have and it's fine.
 
Finishing up the thigh gaskets and some strapping!

Thighs
With the foam cut out and the notch details added, I pulled out the rotary tool with a sanding drum and went to town making EVA foam snow (don't catch this stuff on your tongue). I rounded out the edges and lowered the high places created by some darts. After the dust had been cleaned off, I cut general shapes out of the Optic Black Faux Leather. Using some spray contact adhesive, I sprayed the fabric and the foam of each ring then pressed them together. For the details and edged, I pushed and stretched the fabric in to place to help create a smooth look.
IMG_2498.jpg
IMG_2502.jpg
IMG_2503.jpg
IMG_2506.jpg


Strapping
Before I glued down the faux leather, I temporarily assembled a thigh, slipped it on, and figured out where I wanted my straps to come through. Since the top ring of the gasket will actually be attached to my shorts and not the thigh armor, I cut two holes in each top ring for buckles and webbing to feed through. After the faux leather was glued, I cut through it in an X shape and glued the new flaps to the inside of the holes. I'll later use some black paint to help hide the exposed white in the holes (if I'm not lazy).

I took webbing thread through the female portion of the buckle (a center press square design that is thin and flat) and glued it down to the inside of the armor. I did this in my bicep armor, so refer there to extra info.
IMG_2508.jpg


Here is to hoping that having two straps per thigh will help keep the armor from swinging too much or spinning around. With the foam rings, the armor snugs up really nice which makes it feel pretty good to wear (so far). Up next for the thighs is a strapping to connect to the shins, then I'll start working on my shorts which the top ring of foam will be permanently attached too.

Next update will be all the work I've been doing on the chest and the chest under suit. That has been an interesting journey in patience...

Also, hopefully the next chapter of Tales of the UNSC Valkyries will be finished soon, but grad courses have started again so that project might get slowed down.
 
P.S. Learn from me, make sure to spray some of that water proof bead thingy for boots/shoes on the parts that you wrap with the faux leather/cloth, also that is looking extra clean, good job!
 
P.S. Learn from me, make sure to spray some of that water proof bead thingy for boots/shoes on the parts that you wrap with the faux leather/cloth, also that is looking extra clean, good job!
What is the benefit?
 
Just came across this thread, glad I read through it. You're doing some amazing work!! Can't wait to see the finished product!
 
Glad I found this thread! I'm doing a Mark VII, but so much of this is extremely helpful for my build. It's looking incredible so far!
 
Working out the lower harness and strapping up the shins. (The next update will be the chest armor and under suit progress, promise.)

Shins
I wanted to finish setting up the lower harness this weekend, and to do that I need to finish out the shins. I heavily padded out the inside using packaging foam. Then I glued in a strap in buckle. The buckle falls just below my knee where the knee-guard will hopefully cover it up. On a test fit, I noticed when the strap got taught it pivoted the lower shin forward, so I added a foam pad just above my heel. The foam pads will need to be reinforced since they are thin and stick out pretty far for my lanky legs.
IMG_2522.jpg


Lower Harness
A quick reminder of the design for this section. Everything will be attached to a belt around my waist. This should hopefully keep everything positioned correctly but also put a majority of the weight on my hips for comfort. On thing that has changed is that instead of having both the thigh and shin straps be on the same line, I am going to have each attach to the belt separately. Disperse the amount of stress across the belt.
image0 (3).jpeg


Using sewing pins to hold the loops and buckles in place, I connected the armor pieces with nylon webbing to my belt. I used black webbing for the thighs because there is a potential they will be visible. Also, I am wearing the short that I will adjust and dye to become my under suit. The belt might change though. You can ignore the high socks. It's winter time here and I wanted my toes warm while I crafted.
IMG_2538.PNG


Something I noticed on the first test fit is that the shin strap was getting tight when I moved. If I loosened it too much the shin would fall and the strap would bounce around. So, I attached a piece of elastic webbing to the male end of the buckle and pinned it to the existing strap. I re-did the strap so that the elastic was under a bit of tension when I stood up straight at rest. This is so that if I bend over, the elastic is still engaged and is shorting the strap as I bend, therefore not flopping about.
IMG_2520.jpg


Time for a test fit. I wanted to see how the waist armor sat with all the leg parts on, test mobility, and make sure there was enough room for everything. I used hot glue to tack weld in the rest of the thigh gasket. Since the waist armor is properly strapped yet, I had to pull it on first then clutch it to my chest while I got everything else on... do not recommend. Also, it will be Velcroed in place when its time comes. I think getting that armor belt strapping made will be my next project.

Once everything was on, I did a walk around the house. I'm definitely walking like a cowboy as the thigh gaskets rub together, and the boots are bit awkward for their size in proportion to me. That being said, walking was easy and I could even do a fast walk. Apologies that I didn't shoot a video, next test fit.
IMG_2533.PNG
IMG_2530.PNG
IMG_2531.PNG

IMG_25311.png
Untitled.png


Best part of all of this, I can put this all on and take it all off by myself (with a bit of huffing and puffing, and a reminder I really need to be doing some yoga)!!!

A few things on the adjustment list. 1) I think I will drop the thighs just a centimeter or two, so that the waist armor can be lowered. 2) I need to trim some of the padding in the shins to get them to sit slightly different. 3) The big fix and problem to solve is the bottom of the boots. As I feared, the cardboard broke free from the armor. Since the material is just a bunch of layers of paper, the layer actually glued stayed with the armor, but the rest popped free around the edges in certain spots when the inner shoe stressed it at odd angles.

A change I wish I had time to play with is having the shin strap run down the back of my leg instead of the front. As of now, when I need to bend my leg, the strap needs to shift over the side my knee which it won't be able to do once I get the knee sleeve made.

After doing a little tuning, the thighs and shins will be ready for sanding and painting!
 
Last edited:
Time to show off some chest armor.

Chest Armor
I printed out the chest armor in many pieces then used superglue and left-over wooden dowels from self-assembly furniture. Orca slicer has the ability to add peg and/or holes where you cut 3d model, so I just made sure those matched in diameter. The Titlewave models come with spots for magnets, so I added some of those. Sadly, the chest clamshell pops open rather easily. I've had to tap the pieces together while I work to keep them from falling and breaking... again. Either my magnets aren't strong enough or there just isn't enough slots for them. If you get these files, I'd suggest drilling out a few more magnet spots. My solution will be using Velcro on the under suit/Chest Gasket to help stabilize everything.
image3 (1).jpeg
(missing a picture of the lower half.)

Chest Gasket
This part was an interesting adventure. Since this leaves a huge cavity on me, decided to make the whole chest have a foam gasket besides just the shoulders. To do this I needed a template. Titlewave provides a Pepakura file, but I couldn't be bothered to print it out, so I made one by hand. I really should just buy a normal paper printer.

I started by taping paper inside the chest and out the arm hole, cutting darts wherever I needed to match the geometry. Once that was done, I started sketching out and cutting away excess paper. I only did this for half of the chest since I am going to mirror the pattern. Registration marks marked out the center line.
image6 (1).jpeg
IMG_2461.jpg
IMG_2463.jpg
IMG_2465.jpg


Once I cut out the template, I made rough guess where I was going to need to separate it so that the pattern would lay flat. First cuts were made in 5mm EVA foam, then contact glued together. I tried pre-beveling edges where I knew two planes would meet, but I think I over did it on the first time. This left harsh edges I'll need to shave down later.

I repeated all the previous steps of templating but this time with the new gasket piece because I wanted to increase the thickness of the foam. I really should have just invested in 10mm foam. I used tape this time since I was working with a smooth surface. So, with painter's tape on the inside, I did some marking, some cutting, and boom I had a second pattern. I should have double layered the tape, because it kept separating and I'd have to guess how it all went back together. I glued the shells together along the edges, then double that foam creation to make a whole chest gasket. It was a very tedious process, but luckily crafting experience of previous failures helped guide me and it was at the end of the day a totally do-able project.
IMG_2467.jpg
IMG_2469.jpg
IMG_2470.jpg
IMG_2472.jpg


It was a very tedious process, but luckily crafting experience of previous failures helped guide me and it was at the end of the day a totally do-able project. Overall, I'm pretty happy with the result.
IMG_2485.jpg
IMG_2486.jpg
IMG_2487.jpg
IMG_2490.jpg
IMG_2495.PNG


Pop That Collar
Oh, we aren't done. Next up was the collar and some detail work. The curve of the inside neck whole was just giving me a headache. I resorted to just hacking and gluing foam together until I got close. However, I wasn't happy with the geometry, so I called in my secret weapon. My incredible spouse. It took her 3 seconds (not hyperbole) for her to look at a picture of Spartan Carter then at my armor and point out the issue. I needed to treat the armor collar as a cylinder for a neck and head, not an extension of the armor's geometry. That fixed I made patterns for both 5mm and 3mm foam. Again, I should have just bought 10mm.
IMG_2509.jpg

For that collar bone detail I cut out the shapes then glued them back in halfway down. This created a recess. I did some additional trimming here and there. Some EVA foam clay has been added to smooth out transitions. Boom, collar done.
IMG_2534.jpg
IMG_2535.jpg


I need to break out the rotary tool and clean up the edges. Do some more glueing. Foam clay needs some sanding. I added some foam spacers to lift the whole chest up a touch (something I might reverse). I need to add additional spacers and foam cushion to get the chest to sit right. Of course I need to do the shoulder gasket next. After which I can wrap this sucker in faux leathers.

This portion of the build was difficult but also really encouraging as I saw my skills come together. Not by luck, but by intention. That's a great feeling.

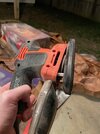
That said. I almost scrapped everything shortly after I finished this piece. And it was while taking this picture that night I almost quit the entire project.
IMG_2537.PNG


But I'll leave it on that cliff hanger for now.
 
A smaller update to show off the suspenders I made.

Harness
I've been putting off sewing because my machine... is something... Not sure if its in need of a tuning or I just really need to learn the special touch it requires. That said, I did manage to get some sewing down to make the chest harness/suspenders. It's a combination of Nylon webbing, Elastic Ribbon, and buckles. I pretty much free handed this sucker and kind of got lucky. I've also started using lots of small sections of elastic to allow for flexibility but also tension, so no harness bits are just flapping around loose. Tension everywhere, all the time!
IMG_2568.jpg
IMG_2567.jpg
IMG_2556.jpg


I need to do some fiddling and add a few quality of life improvements, but the harness held everything close to where I want it during a near full suit up. The biceps are heavy with the chunky attachments added, causing them to spin around on my arm. Once other portions of the under suit are completed, that should help keep things in their desired location. Hopefully...

Now that the sewing machine and I are on speaking terms again, I'd really enjoy sewing up some of the finer details that really add some punch to a costume. Also, I'm tired of contact cement.
 
Lots of quality of life updates.

Chest
So, the last time I talked about the chest armor I teased that it almost made me quit the project. This is because when I test fitted the top half of my armor, I confirmed a sneaking suspicion that was plaguing the back of my mind. The chest piece is a touch to big it seems. The issue this creates is when I let my arms rest, the rib section of the chest piece gets in the way causing discomfort and the potential for extreme damage. While I was taking my selfie, all I could think of was how miserable it would be to be suited up for long periods of time or how much of a pain it would be to reprint the chest and repattern out the under suit - which was a monster in itself. I very much wanted to drop the project at that moment, feel discouraged in my skills and unexcited about the future headaches that awaited me.

After a breather, I decided to trust the process... mostly. I came up with a new strategy. Hack and slash. I would hack out the rib section of the chest armor and replace it with flexible EVA foam. But before I did that, I would need to create a template of the shape. To do this, I wrapped the section in painters tape, marked out the geometry and planned cuts. Luckily, the shape was rather cubic so it could be unfolded easy-ish. Template made I cute and glued two foam pieces (seen later).
IMG_2562.jpg


Before I could install them, I needed to do some hacking with a rotary tool. I also used this hacking session to clear up space for wiring to pass through other sections of the chest. I marked off the areas I was planning to cut with a silver chalk pen (these things are awesome, grab one).
IMG_2569.jpg
IMG_2570.jpg


A bit of hot glue, super glue, and magnets, the plastic rib sections are replaced with foam. They aren't as flexible as I was hoping, but they are at least soft.

Harness
To help keep the chest in place, I attached some buckles to the shoulders of the chest piece and connected them with nylon to the harness near the chest buckle. I cut holes in the chest under suit for the buckles to pass through. No elastic this time, but I probably should have found away to incorporate some.
IMG_2577.jpg


Under Suit - Chest
To actually take the under suit on and off, I cut free the planned sections on the front of the EVA foam to then add back in some velcro. To make sure that the velcro strips didn't add to much volume, I cut out EVA foam where the velcro was going to be then glued it back in recessed. I used contact cement and hot glue to pull this off.

I also added velcro to the under suit and inside armor. This is to help index the armor, but also help hold the clamshell design together. Sadly, the magnetic forces just aren't enough to hold the chest together, especially once there is any jostling.
IMG_2578.jpg
IMG_2583.jpg


I'm not a beefy man, so I needed to add some bulk inside the chest under suit to make sure everything fits right. I added roughly 2-4 inches of upholstery foam to the chest and back.
IMG_2584.jpg


I also used the rotary tool to do some sanding here and there on the edges of the foam. I still need to do some gap filling and finishing touches before the under-suit foam can be wrapped in fabric. Also need to do to start the shoulder gasket soon. As you can see, Jasper has been workout and has a much fuller chest than me.

Here is a partial suit up before I cut out the rib section (excuse my goofy posture, none of the chest padding or harness had been done at this time).
IMG_2559.PNG
 
This thread is excellent. As someone who just started their build, I can't state how helpful this is. Great write up and excellent work. Looking forward to seeing the finished product.
 
This thread is excellent. As someone who just started their build, I can't state how helpful this is. Great write up and excellent work. Looking forward to seeing the finished product.
Best of luck, I'll keep up with your progress.
 
Time for a helmet update!

Helmet
I want to have some air circulations for cooling and to help with fogging (fingers crossed there big time). To do this I purchased to 40mmx10mmx10mm directional fans (similar listing to what I used) to pull air from the modeled vent features. This meant some rotary surgery. I drilled small holes in each corner and then a large hole in the center of each "vent", then used a rotary bit to slowly carve out the rest. Later, I followed up with hand fills to sharpen the corners and smooth the edges. Bottom vent is for air in, top vent is for air "out" (really just an increase in circulation near my mouth).
IMG_2587.jpg
IMG_2589.jpg


To help get the air flow going where I wanted, which was over the back of my head and down visor, I then took plastic card and slowly templated out on one side the shape of the duct work. I also used air dry eva clay to make seals for any odd shapes. Once one side was constructed. I took the mighty painters tape and made a pattern to transfer and cut from more plastic card.
IMG_2593.jpg
IMG_2599.jpg
IMG_2601.jpg


I left space in the duct work for the fans to be removed and replaced. To make this happen I took the fans and glued them to some plastic card, then used hot glue to attach them. I figure the hot glue will hold but also rather manageable if I need to do some servicing. To seal the rest of the gaps, I packed with more foam clay. I'm hoping that the foam will also help with noise dampening.
IMG_2612.jpg
IMG_2614.jpg
IMG_2615.jpg
IMG_2616.jpg


Lastly was the duct work for the top half of the helmet. I used more plastic card to make the duct come to the crown of head, then constructed a delta to help disperse the airflow (in theory, I didn't finish my aerospace degree, chemistry sucks).
IMG_2625.jpg
IMG_2624.jpg


Just need to do a bit of clean up then I can permanently put the two halves of the ODST helmet together.

(I do see some concerns with the design... Let's just hope they are for nothing, otherwise things might get very tricky to fix.)
 
Every Spartan needs to be able to go PewPew.

Weapons
Eoin is going to be sporting a suppressed SMG as his primary and a Magnum. Not a lot of drama for these two. Printed the SMG at 100% but the magnum at 85%. The suppressor can actually screw on and off, which will be handy for storage and travel. I do need to print off the laser attachment, but I want to do a little work and dress it up a bit. They will both be needing some surgery to make them magnet clamp compatible. I'll probably add a sling to the SMG as well.
IMG_2609.jpg
IMG_2627.jpg


The knife was a bit different. I print off the kukri at 100%. I split the print into blade and handle. Using some wall handing nails to add structure, I glued the printed pieces together with construction adhesive. Wanting to increase the hold the open style sheath had on the blade I added a series of magnets to the blade and inside of the sheath. Plastic card was added over the magnets to add some sand able mass. I also used Hot Glue to fill any big gaps.
IMG_2610.jpg
IMG_2611.jpg
IMG_2618.jpg
IMG_2619.jpg


Turns out things were super snug, so lots of awkward hand sanding was required to get the draw smooth. And in the process, we lost a brave soldier in our noble fight against layer lines. My hand sander gave it's the last measure. A moment of remembrance please.
IMG_2620 rip.jpg


Here is the kukri on the chest armor.
IMG_2623.jpg


Probably going to find a different space for it. It's already impossible to couch the stock of the SMG in my shoulder and this bad boy is even more in the way. Honestly my chest piece is just too big, but I'm committed at this point.

Until next time. Remember Spartans (and ODST, Marines, and Covenant) to finish the fight (of your cosplay dreams).
 

Attachments

  • IMG_2620.jpg
    IMG_2620.jpg
    552.5 KB · Views: 17

Your message may be considered spam for the following reasons:

If you wish to reply despite these issues, check the box below before replying.
Be aware that malicious compliance may result in more severe penalties.
Back
Top