I get busy from time to time. Haven't worked on anything super big project-wise in a bit but here's my current one.
Over the past 3 months or so, I've been slowly chipping away at a helmet project that I've wanted to do for a while from dead space. Great game, love it to bits. However, I wanted to take a fresh approach to the design, mash up some concept art (and make some of my own), spend some time 3D modeling and going through design revisions, all that jazz. So here I am, with some progress to show for it.
Here is some of the art I really liked, and used as a reference/inspiration.
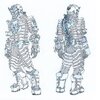
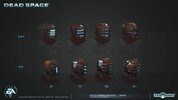
I tried to retain what made these artworks stand out and also make it have a similar vibe/silhouette to the original. Big, clunky, lots of overlapping pieces. You can be the judge of whether I succeeded in doing that.
I did some sketches, mixed those two designs together as best I knew how, and modeled a boi in Blender.
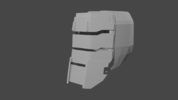
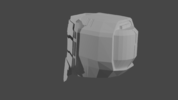
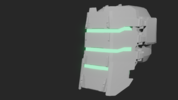
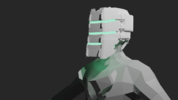
Turned out ok, but i needed something that fit together a little better. So I *remodeled* it in fusion 360, and this was the result:
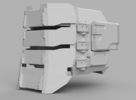
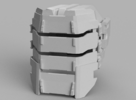
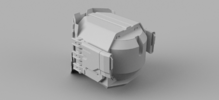
He's a chunky-looking bucket if I do say so myself. I do have some plans to add more greeblies and textures from other materials. I'll share that stuff later.
Anywho, Onto the real world.
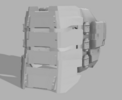
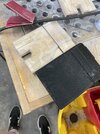
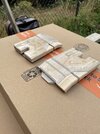
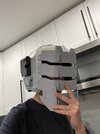
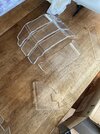
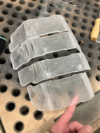
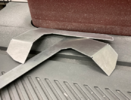
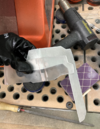
I started by making the facepiece out of acrylic. Yes, there are probably a dozen better materials to make this out of, but it's what I had on hand. And it cuts easy on a laser. I intend to mold/cast the face out of a lighter material later on, to allow for servos to raise and lower the facepiece easier (if that ever even happens, let's be real...BUT it would be super cool and I'd like to make it happen once it's finished). Made some metal fastening pieces from aluminum on a scroll saw, sanded them down, sharpened the corners and edges of the acrylic pieces on the belt sander and we're good to start assembling. Punched some holes with a drill press, screwed in some (too long) machine screws (I'll get some shorter ones later), and we're all set.
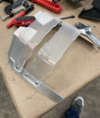
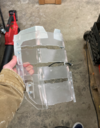
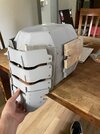
Then, primer. Several coats, with sanding between layers, y'know. Normal stuff, you folks know the drill. Added some details from separate pieces of acrylic later on, too.
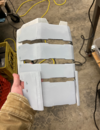
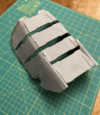
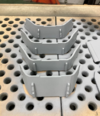
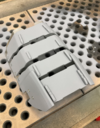
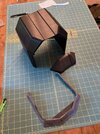
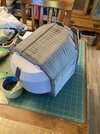
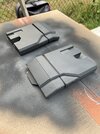
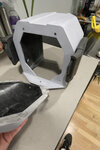
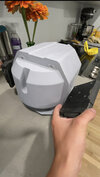
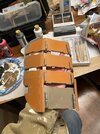
Then, I went to make the rear pieces. I have a buddy nearby who has a big boi 3D printer, so I asked him to print me a few pieces in exchange for some help with his projects, too. Everyone wins, and I get big chunks of 3D-printed parts with no seams! It's really incredible, not having to fill/sand assembly seams. Did about four passes of Bondo, and I'm very happy with the finish of these parts thus far.
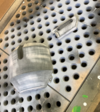
I have a few more parts almost ready to go, and the main body helmet piece is about to be printed, so I'll have a lot of work ahead of me.
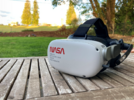
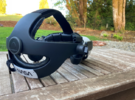
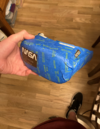
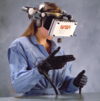
And as a bonus pic, I have a little project of mine I recently finished and its inspiration:
(it's a cool gadget, I do recommend)
Hope y'all enjoyed this chunk of the build log. More later. Hopefully "later" doesn't mean "two months" but ya never know. Feedback/criticism/advice is greatly appreciated. Thanks for looking.
Over the past 3 months or so, I've been slowly chipping away at a helmet project that I've wanted to do for a while from dead space. Great game, love it to bits. However, I wanted to take a fresh approach to the design, mash up some concept art (and make some of my own), spend some time 3D modeling and going through design revisions, all that jazz. So here I am, with some progress to show for it.
Here is some of the art I really liked, and used as a reference/inspiration.


I tried to retain what made these artworks stand out and also make it have a similar vibe/silhouette to the original. Big, clunky, lots of overlapping pieces. You can be the judge of whether I succeeded in doing that.
I did some sketches, mixed those two designs together as best I knew how, and modeled a boi in Blender.


Turned out ok, but i needed something that fit together a little better. So I *remodeled* it in fusion 360, and this was the result:


He's a chunky-looking bucket if I do say so myself. I do have some plans to add more greeblies and textures from other materials. I'll share that stuff later.
Anywho, Onto the real world.
I started by making the facepiece out of acrylic. Yes, there are probably a dozen better materials to make this out of, but it's what I had on hand. And it cuts easy on a laser. I intend to mold/cast the face out of a lighter material later on, to allow for servos to raise and lower the facepiece easier (if that ever even happens, let's be real...BUT it would be super cool and I'd like to make it happen once it's finished). Made some metal fastening pieces from aluminum on a scroll saw, sanded them down, sharpened the corners and edges of the acrylic pieces on the belt sander and we're good to start assembling. Punched some holes with a drill press, screwed in some (too long) machine screws (I'll get some shorter ones later), and we're all set.


Then, primer. Several coats, with sanding between layers, y'know. Normal stuff, you folks know the drill. Added some details from separate pieces of acrylic later on, too.


Then, I went to make the rear pieces. I have a buddy nearby who has a big boi 3D printer, so I asked him to print me a few pieces in exchange for some help with his projects, too. Everyone wins, and I get big chunks of 3D-printed parts with no seams! It's really incredible, not having to fill/sand assembly seams. Did about four passes of Bondo, and I'm very happy with the finish of these parts thus far.


I have a few more parts almost ready to go, and the main body helmet piece is about to be printed, so I'll have a lot of work ahead of me.
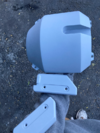
And as a bonus pic, I have a little project of mine I recently finished and its inspiration:


(it's a cool gadget, I do recommend)
Hope y'all enjoyed this chunk of the build log. More later. Hopefully "later" doesn't mean "two months" but ya never know. Feedback/criticism/advice is greatly appreciated. Thanks for looking.

