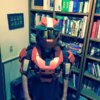
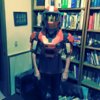
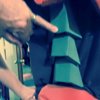
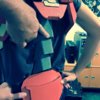
The boots are connected entirely by friction. I wanted the rig to be as naturally fitting and loose as possible, so I constructed the knees down as one piece (that splits into multiple when not worn.
The knees are elevated from the shins using upholstery foam sealed with black plastidip, and are attached to the inside of the shin via hot glue. the foam extends 3-4 inches into the shin, and an angle against my shin to create pressure and hold it in place without blocking blood flow. at the bottom of the shin, there's a 1.5 inch gap between the foot and shin piece. the foot is held in place via velcro and moves independently of the steel toed boots i wear. I plan on adding a second, smaller, piece of velcro to the back because at the moment the foot piece is too loose and rotates too much to my liking.
The belt and thighs are kept on using a double sided velcro belt i made using 3'x1" velcro. it's fuzzy on one side, scratchy on the other. I wrap it around my waist and it adheres to itself. there's two 2"x4" velcro straps running down the front of my leg that i adhere the thighs to. The codpiece and belt have been built all as one piece. I have an extremely small frame, so i only use about half of the belt section. I've left 2 2" gaps of velcro between the belt and the culet (ass plate) so i can velcro weapons, gadgets, and grenades to the back of where the belt would be.
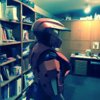
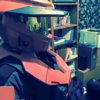
I built the torso in three portions: chest, left upper arm, right upper arm. The chest piece is open on the back: the whole top literally just lifts up like a car hood. underneat, the rear rib cage pieces velcro together laterally across my back, the vents attach over those straps, and the "backpack" velcros down over the vents. It makes getting in and getting out super easy and makes the chest piece much smaller and more proportionate to my frame. The shoulders velcro directly onto the chestpiece to keep them from slipping down and rotating. for parts of the armor where it's supposed to meld into the undersuit via layers, i used the underside of the EVA foam to give it a nice texture, and left it as just exposed black plastidip to increase flexibility. I did this for the collar, the ribcage, the inner thighs, and the upper calves.
The gauntlets are V-tac paintball gloves, and the wrists stay on via pressure (upholstery foam sealed with plastidip again).
The original "collar" from the pep model i was working with was too small to fit my neck or head, so i rescaled a copy of the model and built just those parts to make the collar. It's attached only at the front and is completely free at the sides and back (this is part of the function of how it goes on and off, and also drastically increases flexibility. I have also beveled both the top and bottom of the very back part of the collar to allow wider range of motion. my neck can actually move!)
The reason i was able to run up and down that canyon 5 times in 90 degree weather yesterday was because of my undersuit. i'm using heatout motorcycle gear that wicks away sweat to keep me super cool. When i took off my armor later that day, my entire body was cool to the touch while everyone else felt like they were burning to me. (though that's partially because my HRT blocks testosterone which cools me down a lot too.)
My original color concept:
http://imgur.com/B0cmPhq
Boots:
http://imgur.com/a/rriur
Legs:
http://imgur.com/a/UE6Nb
Torso:
http://imgur.com/a/GkC8V
Undersuit:
http://imgur.com/NU2Azf3
Current version:
http://imgur.com/yOGKcvE
My build has meant so much to me these past two years. It's truly what has kept me going and driving to stay alive. I first started in January 2014 when i attempted using the pepakura/resin/bondo method. My parents had just kicked me out a few months earlier after I had come out as transgender and I was living with my friend's family. I pursued that method for about 9-10 months before realizing how much better foam was. I ditched the old project and started new. i spent a couple months getting used to working with foam before i made any of the pieces you see now, which started either early 2015 or late 2014: I cannot recall. I worked on and off between work and school, and thee were points where i did not build anything for weeks because of my severe depression. At a point in 2015 (starting around april) i was having suicidal thoughts nearly every day for about two months. I finally got some help from a therapist my best friend recommended. I did not know how to use my insurance at the time (it wouldn't have covered him anyways) and so i took the responsibility and paid out of pocket. over the summer i stabilized, learned a little better how to use my insurance, and with assistance from some very close friends finally got approved for HRT by the psychiatrist my insurance covered. I've since been taking Estrogen, and Testosterone blockers for the past two months and have already begun feminizing (compare earlier pictures of me to the picture of my completed armor.) I have a ways to go, but my life is shaping up since i started getting therapy. However, even after two years my dad still hates that I am transgender, and I fear he will never accept me for who i am.
I'm sorry if I ranted on a tangent, but i wanted to convey just how much this armor means to me, and how much it's been through with me. It's my first personal project that my depression hasn't stopped me from achieving and realizing, and it represents a massive step forward to me.


