- Member DIN
- S2424
You should find out when/if they are going to get rid of it, give them your name and number and it's yours when they do.......tip the manager a bit...it helps.
nice job so farSorry, this should have been an edit...
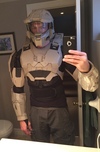
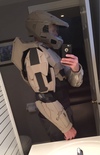
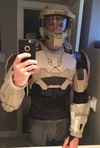
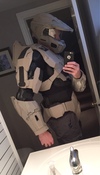
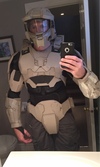
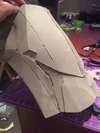
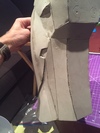
Update time!
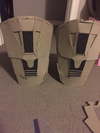
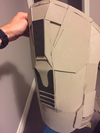
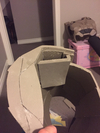
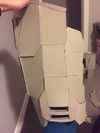
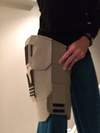
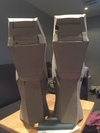
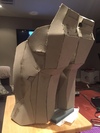
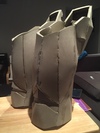
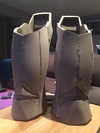
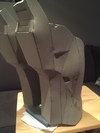
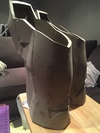
Thighs are done!
http://uploads.tapatalk-cdn.com/20160625/6475392c94e4c64c536866059cd18349.jpg
http://uploads.tapatalk-cdn.com/20160625/fcfa47133b7fcb5e99bba7d6be710c24.jpg
http://uploads.tapatalk-cdn.com/20160625/5f4bc19619daa7b94b7804cf9d72fb47.jpg
http://uploads.tapatalk-cdn.com/20160625/60170ded02589a1ccd7a06c65e4f0a47.jpg
You can see that on the inside of the thigh I built a pocket that my phone will fit into. It is a great fit (the phone won't slide out).
I am going to put a similar one on the other thigh for my wallet.
The fit is good lengthwise. I am going to have to put in a fair bit of padding as my legs don't exactly fill out the thigh...
http://uploads.tapatalk-cdn.com/20160625/53abe79e90450f23bddc538998bead75.jpg
"I don't know what's weirder, that you're fighting a stuffed animal, or that you seem to be losing" - Suzie
nice job so far
bye the way if you have a pistole you can attach it to your thigh by putting a pice of metal in the gun thin putting a strong magnet In the high
it creates the effect that you seen in halo 5 chief tralier
Easy fix..... USe 100 grit on the glue side of the magnets ....superglue works well.
http://www.405th.com/showthread.php?t=44801&page=5&p=745249&viewfull=1#post745249
Or if that doesn't work ( which there is a very low chance of in not working) you could cut a hole out of the foam then put the magnet in then fill it up. But that would be a worst case Sanrio. But preterthethinker idea will probly workPeter
Thanks so much. I will definitely sand off the outer later and give it a whirl.
"I don't know what's weirder, that you're fighting a stuffed animal, or that you seem to be losing" - Suzie
Jme, great job on the thighs.......smooth clean lines and I love the detailing. Once painted it going to look killer!!! Suit is coming out FANTASTIC!!!!


This is really nice! Great work so far. I'm looking forward to see the finished project. May I ask you which files you used?

Great job!!! Piece by piece.....it's coming together nicely!! If I may make a comment/suggestion: change or sharpen your blade more often.....I'm seeing a few spots of "jagged" edges. Not many but you eliminate the need to focus on those areas later w/ cleaner cuts to start w/. Overall....FANTASTIC!!!!
Those shins look nice man. Can't wait to see more!
The funny thing is that I sharpen it all the time. The ragged pieces on the shins are where I had to take pieces off and re-attach them (the back of one of the shins for example, I had to remove a whole piece because the shin was just too wide).
If you find that you need to remove 2 pieces of foam from each other after you've glued them together use your cutting utensil and slice either right down the seam or just to the side of it then add or take away what you need. I've had the same issue before and that's how I take care of that. Great build so far. Looking forward to the completion. Keep it up.