View attachment 309942
View attachment 309943
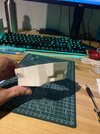
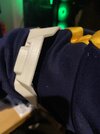
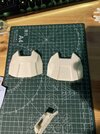
So. After much delay and many days of wrenching I have fixed my problems. I ran into a pretty nasty ABS clog and so I think it will be valuable to share what I have learned along the way and the many struggles. So first thing, for bed adhesion hair spray works wonders (went from barely adhering to being difficult to take off the bed) also check your extruded and make sure the bolts aren’t too tight, you shouldn’t have visible pinching on your filament (this caused many clogs and headaches) I also was preheating and leaving my printer idle to heat the enclosure to make printing easier, do not do this, set your bed, auto home and start immediately, all you will do is leave nasty residue on your nozzle and create points of failure. If you need to clean out your nozzle give acupuncture and cold pulls with nylon a solid go before taking apart your entire horned. Heat guns and small wire brushes are excellent for dealing with clogs as well, I would highly recommend using acetone (for abs) afterwords and doing a deep brush to make sure you get all the gunk out. Finally don’t be cheap! Get and use good filament the first time. This is all stuff that I have been wrenching on and doing trial/error with over the last several days, it has been a very frustrating experience but I have taken it in stride and have learned a lot. Throughout the build process I will also be upgrading my printer and will be documenting the process as I go along. Hopefully the pace will be much faster from here on out. Thank you for your time and have a great day!

") Thanks for the info.
Thanks for the info.