I've just finished my first full costume build (Sadly, not halo related. 'Twas Arrow's s2 Deathstroke) and I fancy doing something a little more ambitious. I'm in the early stages of planning and could do with something I can document my process on, hence this thread. My plan is to build the Halo 2 Anniversary edition of the Arbiter (with an energy sword of course). I have begun by sketching body positions and getting an idea of the scale of the project. I've seen quite a few WIP elite builds in my search on this forum. Hopefully this is a project I can see to the end.
Body Scale
I am 5 ft 5.6. Halo Wiki has the arbiter standing at 7ft 10. To make it easier for me I plan to keep the height under 7ft 5inch. I will add height by using Digigrade stilts and positioning my head at the base of the neck.
Pieces
The main pieces would be the feet, calf pieces, thigh pieces, hip pieces, torso/chest and back pieces, arms, shoulder pauldron, neck pieces, helmet, face and undersuit.
Materials
I plan to build the main armour pieces using eva foam as i prefer it to pepakura. It will be coated in urethane resin using a technique by XRobots. An alternative to this is to 3d print the rough shape, clay sculpt the details then mould and cast, though I believe I can get the detailing done accurately using the foam. I will 3D print the head, then sculpt clay on top for detail and mould and cast in latex. I will then cut the 3D print to create a skeleton for the head. I will create some internal mechanism or servos to make the mandibles move. I will bulk out the shapes of the body with LD200 foam (Using softer, upholstery foam for the joints). The undersuit has a hex pattern with strips across them. I will either find a fabric with the hex pattern or I will mill an mdf board with the pattern then mould and cast in latex. I will then use thin foam or webbing to create the strips. Evakura armour also sell strips of similar stuff for the master chief undersuit that would suit my needs. The joints will be neoprene.
Internal Frame Composition
Due to the size and shape of the suit I believe I will need an internal frame. I will build a frame for the upper torso and connect it with backpack straps and some solid pieces. The head will also be connected to the backpack. A hollow gimbal in the neck will allow for movement of the head, controlled by a strap around my head with wires connected to it. As I've stated before, the legs will have digitileg stilts. I don't believe it is necessary for a frame for the upper legs or lower torso. The hands will likely need wires connected to my first 3 fingers and thumb to control.
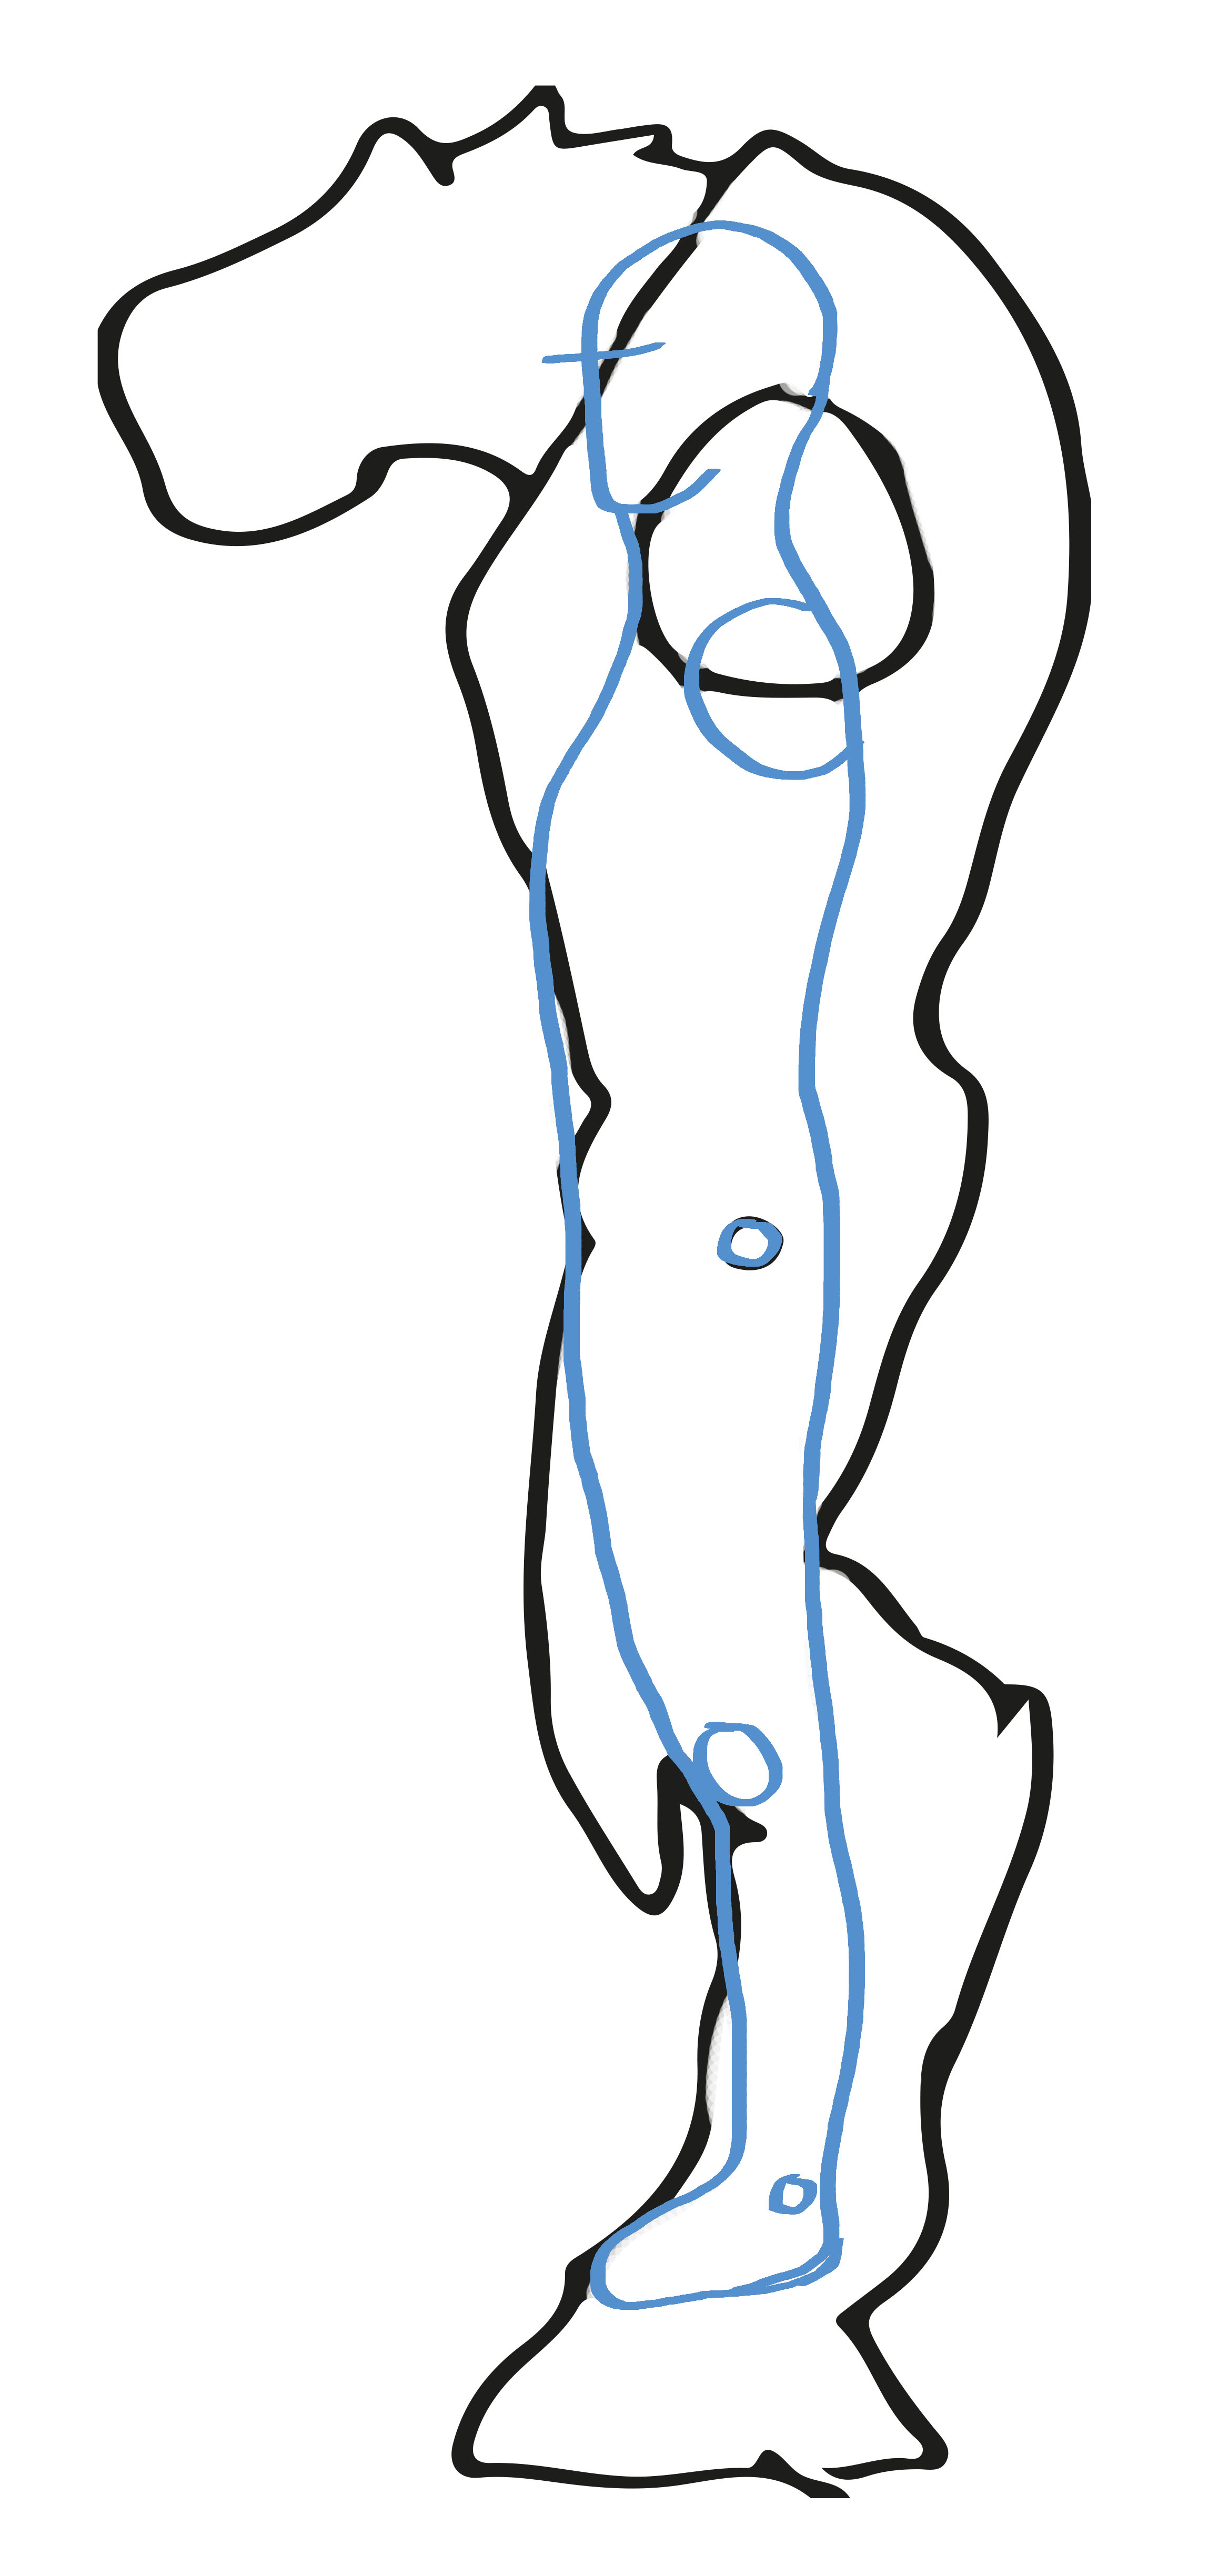
Body Positioning
As I've said before, my head will sit at the base of the neck, just above the chest armour. I plan for my elbows to match the positioning of the arbiter's but this isn't too important to me at this time. My hips and knee positioning need to match.
Strapping and Attaching Pieces
I will connect the overlapping pieces using either webbing or elastic straps. To hold them in place I'll use velco on the undersuit.
Timescale
This will be a long project. I plan to give myself a year or two to complete.
Budgeting
If I buy the Digilegs then that would cost £700. They would likely cost £200 to make. I would allow approx. £300 for the 3D printing, £150 for the foam, Maybe £500 for the latex head and suit?, £50 for clay, £20 for strapping, £50 for paint and allow for £130 additional costs. I have no idea if these are accurate as I'm just guessing. I will fund it piece by piece whenever I get the money monthly. At a guess, this would make the total cost of £1800 with using area 51's Digilegs or £1400 by building my own. Though if i learned anything in my last costume build, I'm awful at budgeting.
Resources/Contacts
Google, this forum, Foamsmith books, contact with experience in electronics, contact with experience in mechanical design, contact with experience with optics (for the sword which I'm yet to plan)
Any help, queries or comments would be most welcome.")
Body Scale
I am 5 ft 5.6. Halo Wiki has the arbiter standing at 7ft 10. To make it easier for me I plan to keep the height under 7ft 5inch. I will add height by using Digigrade stilts and positioning my head at the base of the neck.
Pieces
The main pieces would be the feet, calf pieces, thigh pieces, hip pieces, torso/chest and back pieces, arms, shoulder pauldron, neck pieces, helmet, face and undersuit.
Materials
I plan to build the main armour pieces using eva foam as i prefer it to pepakura. It will be coated in urethane resin using a technique by XRobots. An alternative to this is to 3d print the rough shape, clay sculpt the details then mould and cast, though I believe I can get the detailing done accurately using the foam. I will 3D print the head, then sculpt clay on top for detail and mould and cast in latex. I will then cut the 3D print to create a skeleton for the head. I will create some internal mechanism or servos to make the mandibles move. I will bulk out the shapes of the body with LD200 foam (Using softer, upholstery foam for the joints). The undersuit has a hex pattern with strips across them. I will either find a fabric with the hex pattern or I will mill an mdf board with the pattern then mould and cast in latex. I will then use thin foam or webbing to create the strips. Evakura armour also sell strips of similar stuff for the master chief undersuit that would suit my needs. The joints will be neoprene.
Internal Frame Composition
Due to the size and shape of the suit I believe I will need an internal frame. I will build a frame for the upper torso and connect it with backpack straps and some solid pieces. The head will also be connected to the backpack. A hollow gimbal in the neck will allow for movement of the head, controlled by a strap around my head with wires connected to it. As I've stated before, the legs will have digitileg stilts. I don't believe it is necessary for a frame for the upper legs or lower torso. The hands will likely need wires connected to my first 3 fingers and thumb to control.
Body Positioning
As I've said before, my head will sit at the base of the neck, just above the chest armour. I plan for my elbows to match the positioning of the arbiter's but this isn't too important to me at this time. My hips and knee positioning need to match.
Strapping and Attaching Pieces
I will connect the overlapping pieces using either webbing or elastic straps. To hold them in place I'll use velco on the undersuit.
Timescale
This will be a long project. I plan to give myself a year or two to complete.
Budgeting
If I buy the Digilegs then that would cost £700. They would likely cost £200 to make. I would allow approx. £300 for the 3D printing, £150 for the foam, Maybe £500 for the latex head and suit?, £50 for clay, £20 for strapping, £50 for paint and allow for £130 additional costs. I have no idea if these are accurate as I'm just guessing. I will fund it piece by piece whenever I get the money monthly. At a guess, this would make the total cost of £1800 with using area 51's Digilegs or £1400 by building my own. Though if i learned anything in my last costume build, I'm awful at budgeting.
Resources/Contacts
Google, this forum, Foamsmith books, contact with experience in electronics, contact with experience in mechanical design, contact with experience with optics (for the sword which I'm yet to plan)
Any help, queries or comments would be most welcome.