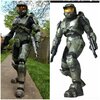
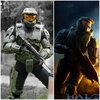
Hello everyone! Here lately, I've had alot of interest in how I add mud to my armor, and it has been requested that I make a little tutorial on this. My approach is very simple and I'm sure there are tons of ways to accomplish the mud look. Really there is no wrong way, ultimately it comes down to preference and how dirty you want to look.


Intro
First things first, aside from black/brown washes, edge highlighting, and other forms of weathering done during a paint job, mud is something I save for the absolutely LAST step on my paint jobs as naturally that's how it attracts to gear in the real world. With that said, I actually apply my mud process OVER TOP of my armor Clear Coat for many reasons. First, clear coat can change colors of paint or ever add a layer of gloss whether matte or shiney. That just takes away from the realism of mud. Also in true muddy realistic form, mud washes or wears off of surfaces over time and is constantly changing. The same goes for my theory of adding mud over my final clear coat, if some wears off... no big deal, add more, or simply leave the mud looking worn where the mud paint naturally wore. It's fun and adds that extra layer of dimension, story, and depth to your armor.
Materials List
-You'll need a few arcylic paints of preference. I prefer Americana acrylics for this part of painting as they are water based, semi transparent and layer very well compared to higher brand paints that just totally cover colors underneath.
Colors: Raw Umber, Desert Sand, Splendid Gold.
-painting mixing palette or cardboard.
- small brush to mix with.
- porous sponge.


Process
(for this tutorial, I will be painting on an old tricep armor piece for example. I'm by no means suggesting this as a normal mud application location.)
1.) I first start by cutting off a small handy piece of the sponge and try to leave a sharp point on one end of the sponge for another step later. You want the blotting surface of the sponge to cover about 1 square inch or so, for best control.
2.) I start by placing a decent size large blob of the Raw Umber, which is the darker brown, onto my palette. I lightly blot my sponge into this dark brown and then carefully blot on my armor surface where I think mud would gather. I start with the dark brown as that simulates mud with higher moisture content and also adds depth to the mud later. Let this layer dry for a few minutes before the next step.


3.) While step #2 is drying some, I then add a small dab of the Desert Sand tan paint to the Raw Umber blob. I also add a dab or 2 dabs of splendid gold. Then mix this all up. Refer to my next pics as sort of an idea of the mixture ratio. Once this mixture dries on your armor, it gives more of a "Dried Mud" appearance". I'm sure you're thinking, "why add gold??" If you've ever looked at dried mud closely, there usually is always some bit of mineral or sand content in the dirt. The gold adds that mineral content to the paint so once it's dried, it really gives it a more gritty realism.


4.) Lightly blot this lighter mixture on your armor over the dried darker brown and slowly build up to desired look. It is very important not to totally cover up the dark brown underneath or even your primary armor color underneath everything. The point of this is for your armor to still somewhat appear the original primary color you chose but to add depth and story to it. Boots obviously would have the most mud, but you still want the minds eye to see your primary color through the mud, as best as possible. It's also important to keep in mind that the paint will change color as it dries. It always dries in a matte tone like real dirt, but when it's still wet, it won't quite look natural. Basically, take your time, don't be scared, and have fun!


5.) Once that lighter layer dries I like to double back to dark brown Raw Umber again. VERY lightly blot this over the lighter layer of mud color to add a "moisture look" back to the mud, and more depth. The sponge should have very little paint and practically almost feel dry when blotting on.
*optional step - you can also complete steps #1-5 numerous times to build up a heavier mud appearance, such as boots and shins, while maintaining great depth to your mud.
6.) Using the sharp point of your sponge, soak up a little bit of the light mud paint mixture and then impact streak it over your dried mud. This will add neat impact strikes like a piece of a dirt clod or mud chuck bashed into or glanced off of the armor surface while your soldier was running high speed through the battle field.


I hope that you all enjoyed this little muddy tutorial, remember to keep it fun and don't be scared to get dirty. As mentioned above, you dont want to take away from the armor's primary color scheme. If your armor is blue you want it to still "look" blue. The mud is just meant to be applied in a way that adds depth and story. You can add this all over your armor, keeping realism in mind.
There are places I have this on my armor most likely no one would notice unless I pointed it out, but doing it just adds that much more character and attention to detail on your final product.


Intro
First things first, aside from black/brown washes, edge highlighting, and other forms of weathering done during a paint job, mud is something I save for the absolutely LAST step on my paint jobs as naturally that's how it attracts to gear in the real world. With that said, I actually apply my mud process OVER TOP of my armor Clear Coat for many reasons. First, clear coat can change colors of paint or ever add a layer of gloss whether matte or shiney. That just takes away from the realism of mud. Also in true muddy realistic form, mud washes or wears off of surfaces over time and is constantly changing. The same goes for my theory of adding mud over my final clear coat, if some wears off... no big deal, add more, or simply leave the mud looking worn where the mud paint naturally wore. It's fun and adds that extra layer of dimension, story, and depth to your armor.
Materials List
-You'll need a few arcylic paints of preference. I prefer Americana acrylics for this part of painting as they are water based, semi transparent and layer very well compared to higher brand paints that just totally cover colors underneath.
Colors: Raw Umber, Desert Sand, Splendid Gold.
-painting mixing palette or cardboard.
- small brush to mix with.
- porous sponge.


Process
(for this tutorial, I will be painting on an old tricep armor piece for example. I'm by no means suggesting this as a normal mud application location.)
1.) I first start by cutting off a small handy piece of the sponge and try to leave a sharp point on one end of the sponge for another step later. You want the blotting surface of the sponge to cover about 1 square inch or so, for best control.
2.) I start by placing a decent size large blob of the Raw Umber, which is the darker brown, onto my palette. I lightly blot my sponge into this dark brown and then carefully blot on my armor surface where I think mud would gather. I start with the dark brown as that simulates mud with higher moisture content and also adds depth to the mud later. Let this layer dry for a few minutes before the next step.


3.) While step #2 is drying some, I then add a small dab of the Desert Sand tan paint to the Raw Umber blob. I also add a dab or 2 dabs of splendid gold. Then mix this all up. Refer to my next pics as sort of an idea of the mixture ratio. Once this mixture dries on your armor, it gives more of a "Dried Mud" appearance". I'm sure you're thinking, "why add gold??" If you've ever looked at dried mud closely, there usually is always some bit of mineral or sand content in the dirt. The gold adds that mineral content to the paint so once it's dried, it really gives it a more gritty realism.


4.) Lightly blot this lighter mixture on your armor over the dried darker brown and slowly build up to desired look. It is very important not to totally cover up the dark brown underneath or even your primary armor color underneath everything. The point of this is for your armor to still somewhat appear the original primary color you chose but to add depth and story to it. Boots obviously would have the most mud, but you still want the minds eye to see your primary color through the mud, as best as possible. It's also important to keep in mind that the paint will change color as it dries. It always dries in a matte tone like real dirt, but when it's still wet, it won't quite look natural. Basically, take your time, don't be scared, and have fun!


5.) Once that lighter layer dries I like to double back to dark brown Raw Umber again. VERY lightly blot this over the lighter layer of mud color to add a "moisture look" back to the mud, and more depth. The sponge should have very little paint and practically almost feel dry when blotting on.
*optional step - you can also complete steps #1-5 numerous times to build up a heavier mud appearance, such as boots and shins, while maintaining great depth to your mud.
6.) Using the sharp point of your sponge, soak up a little bit of the light mud paint mixture and then impact streak it over your dried mud. This will add neat impact strikes like a piece of a dirt clod or mud chuck bashed into or glanced off of the armor surface while your soldier was running high speed through the battle field.


I hope that you all enjoyed this little muddy tutorial, remember to keep it fun and don't be scared to get dirty. As mentioned above, you dont want to take away from the armor's primary color scheme. If your armor is blue you want it to still "look" blue. The mud is just meant to be applied in a way that adds depth and story. You can add this all over your armor, keeping realism in mind.
There are places I have this on my armor most likely no one would notice unless I pointed it out, but doing it just adds that much more character and attention to detail on your final product.


Last edited:


