Thanks PlanetAlexander!
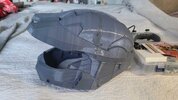
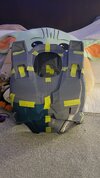
I followed the 3d Print Welding video, was super handy having a bag that I keep all my supports, bases and any failed prints in for recycling purposes HAHA. Finally paid off having that bag saved up!
Used the painters tape on the outside to hold together and welded the inner pieces first, then did some touch ups to fill any gaps on the outer side.
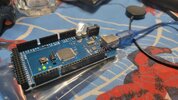
For first time I'm pretty happy with it. Started building my electronic part programming with my Adrino board to see how that's going to look and work.
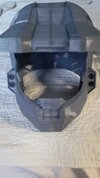
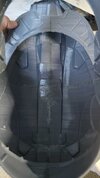
I think filling and sanding is next... or the visor? not sure which should next TBH.
Trying to decide if I i ATTEMPT to 3d print FDM with clear PLA the visor, or ask a friend who has a resin printer to do it, or just repurpose one of those plastic face covid shields for now and replace it later on ... hmmmmmm
SgSaint, those look great, Did you use wood filler? what brand if you mind me asking?
I used 1.5mm walls and 5% infill density with the Cubic layout, hopefully mine will be thick enough