- Member DIN
- S894
Hello all!
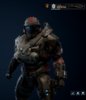
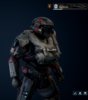
My name is Miles, I'm a new member on here and I am actively working on a ODST / Spartan Build for fun!
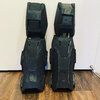
I started out with the halo 3: odst helmet variant, I'll be continuing on by working on shoulders and weapons next.
After I've built these I'll start looking into what chest pieces I'd like to use, I was always a fan of Jorges armor from Reach, but given I'm working with ODST I think I'll be looking more towards the Collar/Breacher chest armor. and of course once the chest is complete I'll continue work on the rest, making all the extra little pieces that make the full uniform.
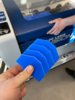
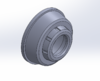
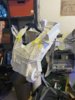
I currently have been 3d Printing the helmet and Visor mold, and I'm sure I'll continue to use the 3d printing techniques to my full advantage. As far as armor goes I will be using more foam than printing since it will need to be lighter and less likely to breaking. I'm already considering making a mould for the helmet so I can cast back-ups just in case (and sell on the side, but I won't plug that here)
I'll be sure to continue posting here as I go along, hopefully I'll be pretty regular but there are no promises. I'm hoping to have this full set of armor complete within 10 months being that I'm going to wear it to the Denver Pop Culture Con in 2020. Hope to see you there!
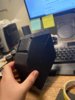
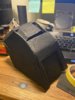
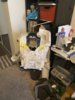
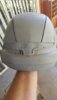
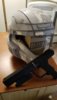
The Helmet process:
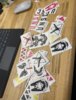
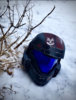
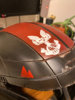
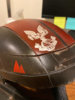
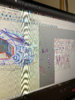
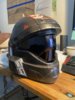
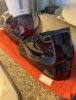
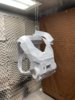
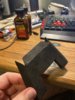
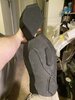
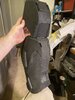
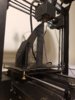
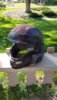
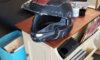
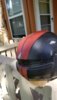
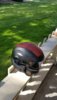
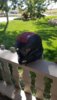
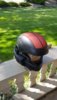
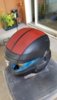
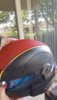
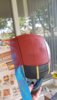
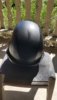
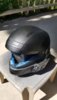
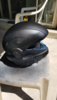
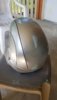
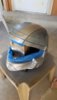
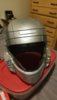
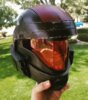
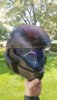
The Helmet itself was 3d printed in Hatchbox ABS on my Anycubic I3 Mega, I sliced the full model in Maya and then printed it in 8 separate parts. After all the pieces were printed, I assembled them using super glue, and then coated the inside using a strong 2 part epoxy from Plasticare. Once I had coated the inside, then came the long task of filling all the print lines using Bondo spot filler and then sanding the whole helmet to give it a nice finish. After about 3 days of sanding and filling I figured I'd be good enough but if you look closely, there are definitely areas I could've worked on more. But for photos and video sake, the helmet will look just fine. Once I'd primed the whole helmet I sprayed 2 layers of a Testors Silver to give the metallic looking under coat. Then placed toothpaste (Trick courtesy of Punished Props from youtube) on certain spots to act as a sealer on the silver that can eventually be washed away with a wet cloth. The next 2 layers were a nice flat black on the whole helmet followed by 2 coats of a gloss black on the spots around the visor to give it a slight bit more shine. Then on to marking out where the stripes were going to be and how I wanted them to look. This is where I want to start differentiating my spartan build from usual ODST's so I went with a flat red that has a single unpainted strip of black running through the middle. After painting the red I let the whole helmet sit to dry for a few hours and then came back to clean up the toothpaste and to start the weathering process! For weathering I used a silver sharpie to highlight all the panels that would get damage on their edges, and then used steel wool and rub'n'buff to make scratches appear. Then I used black brown and yellow acrylic paints and watered them down, giving the whole helmet a wash with this to leave the paint in all the cracks and even to discolor the red stripes I'd painted flat black (which gives the paint a tiny amount of tooth to grab onto washes and really get discolored and gnarly looking) and once that was done I took Cinnamon (yes you read that right) and powdered the entire helmet with a small amount to make the 'dust' really settle into all the nooks and crannies that would typically collect dirt. Once all was dry I did a quick clear coat matte finish over the whole helmet to seal everything in nicely!
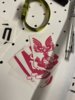
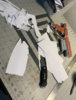
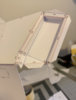
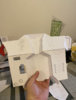
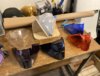
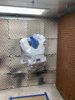
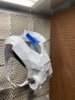
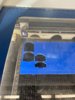
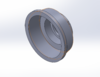
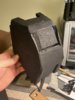
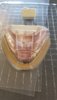
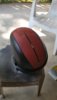
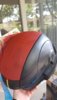
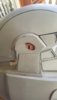
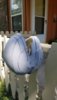
The visor came next and I was able to 3d print a moulde for my visor that I could then vacuum form a piece of PETG to. Since I didn't and and clean my form, i got a lot of print line transferred onto the visor, and it's okay, but I hardly could see through the visor I made that way. So, I took some sand paper and Bondo to it as well and cleaned up my lines some more, just enough I could get a clear-ish visor from it. Once I'd made about 6 visors I came back and cleaned them up some before dying them using iDye: POLY (another tip from Punished Props) to dye my visors Red, Blue, Orange, and Black. Once these were dyed and dry, I hot glued magnets to the helmet interior and to the visors so that I can change out whatever visors I want to use!
For now this is all I have, I will be updating more though as I'm working on a dare helmet as well as my own full set of armor. Lots to make!!!! Please feel free to ask me any questions, share any ideas/criticisms! I'm looking to put this whole uniform into a portfolio and to get into model making on a professional level. So please let me know what you think!!
My name is Miles, I'm a new member on here and I am actively working on a ODST / Spartan Build for fun!
I started out with the halo 3: odst helmet variant, I'll be continuing on by working on shoulders and weapons next.
After I've built these I'll start looking into what chest pieces I'd like to use, I was always a fan of Jorges armor from Reach, but given I'm working with ODST I think I'll be looking more towards the Collar/Breacher chest armor. and of course once the chest is complete I'll continue work on the rest, making all the extra little pieces that make the full uniform.
I currently have been 3d Printing the helmet and Visor mold, and I'm sure I'll continue to use the 3d printing techniques to my full advantage. As far as armor goes I will be using more foam than printing since it will need to be lighter and less likely to breaking. I'm already considering making a mould for the helmet so I can cast back-ups just in case (and sell on the side, but I won't plug that here)
I'll be sure to continue posting here as I go along, hopefully I'll be pretty regular but there are no promises. I'm hoping to have this full set of armor complete within 10 months being that I'm going to wear it to the Denver Pop Culture Con in 2020. Hope to see you there!
The Helmet process:
The Helmet itself was 3d printed in Hatchbox ABS on my Anycubic I3 Mega, I sliced the full model in Maya and then printed it in 8 separate parts. After all the pieces were printed, I assembled them using super glue, and then coated the inside using a strong 2 part epoxy from Plasticare. Once I had coated the inside, then came the long task of filling all the print lines using Bondo spot filler and then sanding the whole helmet to give it a nice finish. After about 3 days of sanding and filling I figured I'd be good enough but if you look closely, there are definitely areas I could've worked on more. But for photos and video sake, the helmet will look just fine. Once I'd primed the whole helmet I sprayed 2 layers of a Testors Silver to give the metallic looking under coat. Then placed toothpaste (Trick courtesy of Punished Props from youtube) on certain spots to act as a sealer on the silver that can eventually be washed away with a wet cloth. The next 2 layers were a nice flat black on the whole helmet followed by 2 coats of a gloss black on the spots around the visor to give it a slight bit more shine. Then on to marking out where the stripes were going to be and how I wanted them to look. This is where I want to start differentiating my spartan build from usual ODST's so I went with a flat red that has a single unpainted strip of black running through the middle. After painting the red I let the whole helmet sit to dry for a few hours and then came back to clean up the toothpaste and to start the weathering process! For weathering I used a silver sharpie to highlight all the panels that would get damage on their edges, and then used steel wool and rub'n'buff to make scratches appear. Then I used black brown and yellow acrylic paints and watered them down, giving the whole helmet a wash with this to leave the paint in all the cracks and even to discolor the red stripes I'd painted flat black (which gives the paint a tiny amount of tooth to grab onto washes and really get discolored and gnarly looking) and once that was done I took Cinnamon (yes you read that right) and powdered the entire helmet with a small amount to make the 'dust' really settle into all the nooks and crannies that would typically collect dirt. Once all was dry I did a quick clear coat matte finish over the whole helmet to seal everything in nicely!
The visor came next and I was able to 3d print a moulde for my visor that I could then vacuum form a piece of PETG to. Since I didn't and and clean my form, i got a lot of print line transferred onto the visor, and it's okay, but I hardly could see through the visor I made that way. So, I took some sand paper and Bondo to it as well and cleaned up my lines some more, just enough I could get a clear-ish visor from it. Once I'd made about 6 visors I came back and cleaned them up some before dying them using iDye: POLY (another tip from Punished Props) to dye my visors Red, Blue, Orange, and Black. Once these were dyed and dry, I hot glued magnets to the helmet interior and to the visors so that I can change out whatever visors I want to use!
For now this is all I have, I will be updating more though as I'm working on a dare helmet as well as my own full set of armor. Lots to make!!!! Please feel free to ask me any questions, share any ideas/criticisms! I'm looking to put this whole uniform into a portfolio and to get into model making on a professional level. So please let me know what you think!!
Attachments
-
 IMG_20190902_194156 (1).jpg1.5 MB · Views: 430
 -
 20190912_103101 (1).jpg982 KB · Views: 444
 -
 20190912_101257.jpg939 KB · Views: 481
 -
 20190910_160701.jpg1.1 MB · Views: 434
 -
 20190910_160657 (2).jpg1.3 MB · Views: 434
 -
 20190910_153701.jpg479.3 KB · Views: 436
 -
 20190910_150459.jpg938.9 KB · Views: 424
 -
 20190910_150456.jpg1.1 MB · Views: 409
 -
 20190910_150452.jpg1.3 MB · Views: 422
 -
 20190910_145930.jpg1.1 MB · Views: 441
 -
 20190910_145926.jpg1.1 MB · Views: 398
 -
 20190910_145556.jpg823.6 KB · Views: 407
 -
 20190910_145552.jpg987.2 KB · Views: 388
 -
 20190910_145453.jpg797.2 KB · Views: 400
 -
 20190910_145436.jpg809.4 KB · Views: 396
 -
 20190910_145434 (1).jpg996.1 KB · Views: 425
 -
 20190910_132913.jpg1.3 MB · Views: 329
 -
 20190910_132903.jpg1.1 MB · Views: 418
 -
 20190910_132857.jpg1.3 MB · Views: 402
 -
 20190910_131747.jpg1 MB · Views: 404
 -
 20190910_131525.jpg1.1 MB · Views: 388
 -
 20190909_233659.jpg938 KB · Views: 428
 -
 20190909_232507.jpg869.8 KB · Views: 415
 -
 20190909_083751.jpg783.6 KB · Views: 409
 -
 20190909_083747.jpg935.7 KB · Views: 416
 -
 20190904_074650.jpg729.6 KB · Views: 417
 -
 20190903_133835.jpg1.2 MB · Views: 424
 -
 20190903_133831.jpg1 MB · Views: 440
 -
 IMG_20190915_114503_647.jpg115.3 KB · Views: 429
 -
 20190915_113527.jpg1.1 MB · Views: 452

")