Props Doc Dailey's H4, 3D printed, Covenant Carbine Build (complete)

Status
Not open for further replies.

DocDailey

Member
Hello All,

This will be a pic heavy explanation of the Covenant Carbine H4 version. I will be as detailed as I can be and will answer all technical questions on this thread. I will break up each section so it's a bit easier to handle.

The Chapters will be:
-3D modeling
-3D printing and prep
-Finishing 3D pieces
-Molding
-Casting
-Final touches

I hope this info helps you in your personal projects. Be sure to give me a shout out when you're all done. I'd luv to see whatever work you complete!
-Doc

ps: It's going to take ma some time to type everything out, so please be patient as I post each section.
 
3D Modeling Chapter:

All images are from my friend Jacob who I commissioned to make this file. He used Blender to create the wire mesh for each piece. He did an amazing job.

*Learning point for the future*- OVER EXAGGERATE ALL SMALL RECESSED DETAIL WHEN 3D PRINTING!!! You'll understand later.

Now for the eye candy:

525385_536113826428516_1392742794_n.jpg

10580507_786067981444707_388730972_o.jpg

10594189_789521581099347_326812714_o.jpg

4.jpg

5.jpg

6.jpg

7.jpg

Next up: 3D printing and Prep
 
3D printing and Prep:
At this point about 205 hours worth of work has gone into this project. This does take time to do correctly. My buddy Walt did all the printing on this project.

10392439_830656123640950_614619033258405361_n.jpg

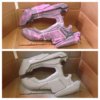
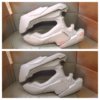
These were all printed out of ABS. Please note that the white pieces were much easier to work with and the fuschia was much more labor intensive to smooth. The dye used for many color spools can interfere with the native properties of the undyed filament.

10690305_833861033320459_5958320147986605486_n.jpg

10424334_833860996653796_26766016658163259_n.jpg

10520679_833861016653794_474982889366842170_n.jpg

At this point I'm now using XTC-3D from Smooth-On. It creates a 'candy coating' on the part and allows for sanding, or immediate molding and painting. It will not interfere with Silicone molds. However if you put any other topical agents on it, that may change your results.

XTC-3D is a bit think and can ruin fine details, so please monitor and carefully gauge how it pools on your pieces. You may also use the Smooth-On tints. That way you can see if you've missed any spots and can also determine where and how many layers you've put onto the piece.

10301365_838925306147365_1271077436935425658_n.jpg

10169393_838925489480680_2164376719045643266_n.jpg

10006357_838925659480663_6756326871639002193_n.jpg

10409283_838925119480717_1723146429522153804_n.jpg

10417567_838925682813994_6141387827479302862_n.jpg

10418385_838925812813981_6008964832904170657_n.jpg

10696310_838925769480652_7409546901608210504_n.jpg

*WARNING* If you place XTC-3D or any other product on surfaces that are perfectly fitted to attach to another piece, it WILL throw off the calibration and ruin the ability of that piece to seamlessly attach again.
 
Finishing the 3D pieces was relatively easy. The ABS is easily sanded and the XTC-3D did a wonderful job of filling most all gaps and cracks perfectly smooth. I used some Free Form Air and some water to fill gaps between pieces because it was the dead of winter and Bondo was not an option. There can be delamination issues while using it, so be warned.

10354751_847456611960901_481636695274900251_n.jpg

10390896_847041075335788_2360637031228185414_n.jpg

10405518_847456665294229_8098472959634645093_n.jpg

10868080_847456631960899_2524839953402927966_n.jpg

I then used Rustoleum Primer Filler rattle can paint to start building a surface that was ready for molding. I used Crystal Clear Matte finish by Krylon for the final coat before I started the mold making process.
*Warning* Make sure you use all spray paint products at the correct temperature. If you don't, you'll be sorry. Seriously.

10881590_859631560743406_5229457644045464933_n.jpg

1653459_861363290570233_1967465455082738936_n.jpg

10371965_847456591960903_4154110062497288540_n.jpg

10881732_849246155115280_1957291687791886454_n.jpg

10858479_846496365390259_8298214364146179195_n.jpg
 
The molding silicone I used was Mold Star 30 (deep blue) Then I switched over to Mold Star 16 Fast (sea foam). MS30 has a 6hr cure time while the MS16F has a 30min cure time. Both are excellent for box molds and do not require degassing due to it's high viscosity.

*Warning* Platinum silicone has some amazing properties, but is very strict with what it can touch, the temperature it needs, and the time it cures. Mess with any of those categories, and you'll be sorry. Very sorry.

10885297_858016037571625_284372301156278928_n.jpg
Be sure to check compatibility before you go nuts making all the molds. You never know.

10847775_849694055070490_6206568673051246050_n.jpg

10492480_859012647471964_3557734720064763007_n.jpg

10888745_865079813531914_6992244880432218685_n.jpg

10906276_863748650331697_1685480276242131368_n.jpg

10897052_861980863841809_3456925652445219536_n.jpg

10931371_864997216873507_5972028015908989255_n.jpg

10888745_865079813531914_6992244880432218685_n.jpg

10931002_863817003658195_6299462619536308260_n.jpg

10933865_863443500362212_1861276045530429688_n.jpg

1969408_866207560085806_5895889793679527066_n.jpg

10868149_864094560297106_3202538781306322562_n.jpg

10885125_865973353442560_4937344207399372693_n.jpg

IMG_3904.JPG
 
Pouring casts

I used Smooth-On's Smooth Cast 300, for it's rigidity, and Smooth Cast 325, for it's amber transparency. That way it would allow for lighting effects later.

Using baby powder in your molds allows for bubbles and a smoky finish to the poured piece. Using Ease Release 200 is a much better material to use before you use the mold. It decreases surface tension on the resin/urethane and reduced air bubbles. It also reduces mold wear and tear by allowing easy demolding.

10246653_871976556175573_4806118564676213668_n.jpg

10806215_867130896660139_6252062660954209002_n.jpg

1907553_867130929993469_7460756761910848891_n.jpg

10906287_868438516529377_4747452715878821824_n.jpg
 
Finally,

I used some Walmart car lighting kits and a dead man switch in the magazine area to both hide the battery and start and stop the lights. That way when I 'reload' the rifle it'll power down. I also used Rustoleum color shift paint for the purple/blue effect. It does actually change colors in the light.

10940504_870053169701245_499631942919567864_n.jpg

10955643_871602626212966_6019648891214541970_n.jpg

10410562_871602649546297_2770037358598876911_n.jpg

If you have any questions, please let me know.
 
Are you just making kits or would you be willing to share the print files. Would live to throw my printer at this.
 
Dang!!!! That is the most amazing Carbine I have seen yet man. Great work.
 
That is, beyond a shadow of a doubt, one of the finest pieces I've ever seen. Anything Covenant is a little odd, what with the glossy iridescent materials they use and the fact that everything glows. Paint that shifts colour with lighting angle isn't something I would have ever have thought about.

Aces work, mate. I'm wondering if you can tell me how long it took you to print each of those pieces out, and how thick they are (I assume they're not solid)? I'm assessing the practicality of 3D printing some armour pieces, but it's not my printer, so it'll only work if I can get a reasonable amount done in the 3 hour time limit.

Fox I can not speak on how long it took for this build. But I have a 3d printer and 3hours is not a lot to work in if you are trying to print out descent size prints. You could slice up parts to fit in your time frame but would not be very effective time management.
 
Fox I can not speak on how long it took for this build. But I have a 3d printer and 3hours is not a lot to work in if you are trying to print out descent size prints. You could slice up parts to fit in your time frame but would not be very effective time management.
Thanks. I worried from the outset that that might be the case, but depending on how things play out, that might not actually be a limitation like I thought it was. We'll have to see what comes of it.
 
I have been following this project and taking notes. I will be using your techniques on my next project. Thanks for all the great detail and instructions
 
That is, beyond a shadow of a doubt, one of the finest pieces I've ever seen. Anything Covenant is a little odd, what with the glossy iridescent materials they use and the fact that everything glows. Paint that shifts colour with lighting angle isn't something I would have ever have thought about.

Aces work, mate. I'm wondering if you can tell me how long it took you to print each of those pieces out, and how thick they are (I assume they're not solid)? I'm assessing the practicality of 3D printing some armour pieces, but it's not my printer, so it'll only work if I can get a reasonable amount done in the 3 hour time limit.

Hi FoxtrotZero,

The total print time was approx 140hrs. The layer thickness I believe was 3x3x3 and the infill was 20%. Or at least something very close to those specs. My buddy Walt did the printing for this piece, though I have gotten my own 3D printer in the meantime. I hope this info helps, and thank you for the kind words.
 
Are you just making kits or would you be willing to share the print files. Would live to throw my printer at this.

Send me a private message. I paid alot of money for get this file created, and posting it on MMF or Thingiverse is messy because I'm not the original artist. I don't want anyone getting the wrong idea about my work versus another person's.
Can't believe I didn't notice before... You use Blender? Awesome.

My buddy Jacob at Stony Props did the modeling work. I forget his name here on the 405th.
 
Status
Not open for further replies.
Back
Top