MrBones
New Member
Hey everyone! ")
This is the start to my journey on a childhood dream to become reality as many before me have done. A full spartan armor build with props for cosplay!
I saw a few spartan cosplayers there and got some photos. I asked questions on how long it took and decided that a year is doable as long as I don't procrastinate so here we are now. So ready to drop feet first into my thread yet?


This is the start to my journey on a childhood dream to become reality as many before me have done. A full spartan armor build with props for cosplay!
Background
A little backstory on myself; I have been in the Midwest US cosplay community for roughly 2 years and have traveled to a few out of state conventions. This year I was able to visit Katsukon on the east coast. It was a big wake up call to how much effort people spend on their cosplays that they have passion for. Now I do spend what I considered a large amount of time per cosplay at about 10-15 hours. Now I know what you're thinking at this point, that's a lot? It was until I saw the reality of what true enjoyment of the craft is like. So I decided I was going to go big for once and invest the next year building this the best I can.I saw a few spartan cosplayers there and got some photos. I asked questions on how long it took and decided that a year is doable as long as I don't procrastinate so here we are now. So ready to drop feet first into my thread yet?
The Goal
- Mark V(B) Armor Core
- Forearms / Wrists (In Progress) (Printed)
- Chest + Back
- Thigh
- Shin Covers
- Knee guards (Printing)
- Armor belt
- Boots
- Recon helmet
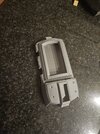
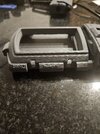
- TacPad (In Progress) (Printed)
- Hardtac case
(Completed!) - DragonBorn Shoulder (Printed)
- Emile Shoulder (In Progress) (Printed)
- Foam Undersuit Chest
- Foam Undersuit Legs
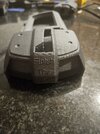
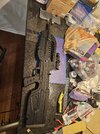
Magnum (Completed!)- Battle Rifle (In Progress) (Printed)
Attachments
Last edited:
