Halo/Starwars Mashup: 501st ODST (Edited)

Status
Not open for further replies.

LegacyAlloy227

Member
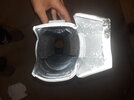
I know I've been silent for a long while, but I emerge with a new project! I am 3d printing ODST armor, and painting it like the character Hardcase from Starwars: the Clone Wars. I received my 3d Printer back in June (I think). It is a Cr10S5. After nearly 2 months of assembling, troubleshooting, and crying, I have been able to successfully print 3d models! I have wanted to 3d print ODST Armor since I first ordered it. The 3d Model I am using was made by MoeSizzlac, and the helmet by SkookumProps. The helmet has already been printed and painted. All it needs now is some padding, a visor, and maybe some enamel.

1603325725126.png
20201014_211150.jpg
20201014_182232.jpg


After scaling the armor in armor smith and slicing the models, I have determined that I will need 7.5Kg of filament for the armor, and it will take 48 days to print.

Capture.PNG


So far, (Besides the helmet) I have two back plates, the biceps, the COD, and the belt is printing as I am typing this thread.

20201021_180426.jpg
20201021_180440.jpg


I'll keep you all updated as I go. I'm hoping to print, bondo and sand during the colder months, and once WIsconsin warms up in spring, I'll be ready to paint and take this all with me to college!

Also, I do plan on making an AIE-486H. That'll be fun :)
 
Update: I have more pieces printed! Both hips and the belt are good to go. The chest was almost done, but the supports decided to bail on me. I am currently printing the lower back piece, and the chest is redesigned.

20201026_213513.jpg
20201026_213536.jpg
20201026_213545.jpg
1603766019072.png


In other news, I'm considering changing my Hardcase ODST into a basic 501st ODST. It would have more blue paint on the armor, and I could easily put my GT LegacyAlloy227 on the armor, rather than inherit Hardcase as a second name.

1603766511668.png
 
I've really slacked on the updates, but I've got a lot done during the past few months. First, I finished my printing phase! It started with combining a bunch of smaller pieces into one print and getting them done at the same time.

1611249472082.png

After the final print, all the pieces were good to go and ready for the bondo phase!
1611249556291.png

Wisconsin hasn't been too cold this winter, but it still isn't warm enough to do a whole lot of bondo, so I got to work on some of the soft parts. I made cardboard holsters for the Magnums, an EVA foam Arc trooper pauldron (Not sure if I'm gonna use it though), and I ordered tactical fatigues and a paintball vest for the torso.
1611249752798.png
1611249807161.png
1611249884187.png
 
Didn't know that I needed this, but glad to see it's happening!

I just recently got around to finishing my ODST helmet, what is your solution for keeping the helmet stable around your head? Most people go with padding/foam, I considered using a harness rig similar to what you would see in a hard hat but I can't really get my brain around how to balance it in the right spot.
 
A harness rig would definitely work. The challenge is securely attaching it to your helmet. If you can print a type of clip like the inside of a hard hat, you can just stick those to the inside of your helmet. Otherwise, foam would be the way to go. I used upholstery foam and glued it to specific spots so it would hug my head.
 
Well, updates are long overdue, but better late than never! We'll start with the torso and branch from there.

I start my torso assembly with the back armor. The back has a lower back plate with the upper back plates attached with a strip of cardboard glued to the inside. Foam shoulder blade plates are mounted to the upper back and have nylon attached. The nylon goes over my shoulders and are Velcroed to the front of a paintball vest. The chest plate has Velcro on the inside and covers the shoulder straps. The back plate has elastic straps with Velcro on the ends. The straps are pulled through nylon inside the rib plates and then stuck onto the abdomen assembly. The shoulder plates have a strap with Velcro that attaches to the shoulders of my paintball vest. The Velcro prevents the shoulders from sagging, and the push clips wrap around my arm and prevent them from flopping. My shoulder plates also bare my UNSC Medical Reference in Aurebesh, and my regiment! The bicep plates are a simple pair of nylon straps with Velcro. The forearms have a foam interior and the wrist webbing from gardening gloves glued to the inside. The friction from the upholstery foam prevents the forearms from wobbling and falling off. Back to my lower body, the butt, hips, and belt/COD all slide onto my pants belt. (Except the hips are attached to vertical flaps on my BDU pants.) The thigh plates have a belt loop to prevent sagging, and elastic to prevent flopping. EVA adds friction and pressure, preventing the thigh plate from moving around. There is also Velcro attached to the bottom front of the thigh armor. The shin has the same upholstery foam application as the forearms, but an elastic band with Velcro prevents the shin from sagging. It is elastic to that I can kneel/bend without breaking the connection. I decided to leave out the boot armor for mobility. The pieces I printed are too big, and the shape of my boots would likely break any armor over time. This week, I also bought a 38 gallon box for storage. That's enough room for all my armor, both helmets, the BDUs, vest, and even a weapon!
20210729_214032.jpg
20210729_214103.jpg
20210729_214414.jpg
20210729_214343.jpg
20210729_214336.jpg
20210729_214209.jpg
20210611_162838.jpg
20210611_145552.jpg
20210729_214518.jpg
20210729_214636.jpg

20210729_214649.jpg
20210729_214537.jpg
20210729_214555.jpg
20210729_214452.jpg
20210729_214808.jpg
20210729_214930.jpg
20210729_214917.jpg
20210729_215008.jpg
20210729_215719.jpg
20210613_021900.jpg
20210613_021812.jpg
 

Attachments

  • 20210729_214636.jpg
    20210729_214636.jpg
    907.6 KB · Views: 99
Status
Not open for further replies.
Back
Top