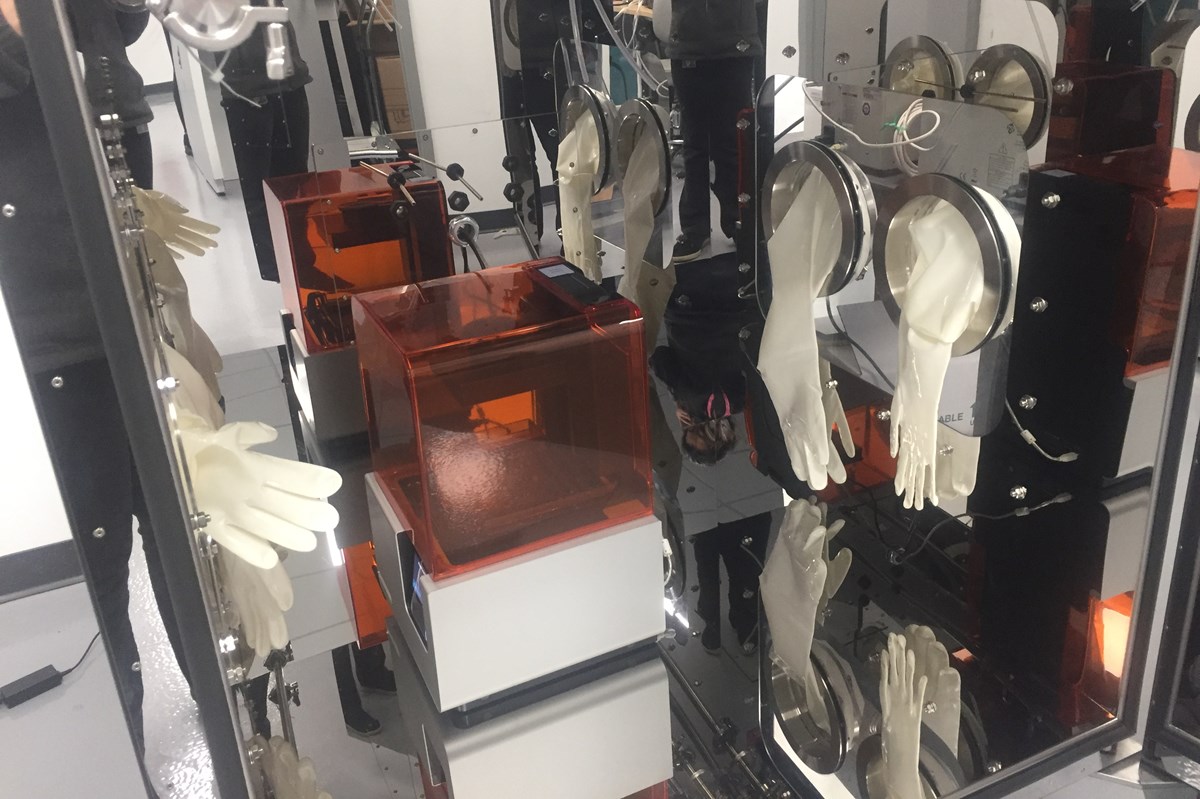
"I wish I knew" Tips When Starting to 3d Print

Rock Lobbster

RCO
405th Regiment Officer
Stream Team
Member DIN
S098
Hello again everyone! The "What's Your Printer" thread has now nearly hit 100 replies (holy cow!) as a result of that we're looking to move to the next stage in creating the ultimate 3d printer for Halo & cosplay reference thread!
In this thread we'd like to know what are some things that you wish you knew when getting into 3d printing?
It could be a helpful video, a method on leveling your printbed, things to look for in buying your first printer, whatever helped you, let us know!
Example:
When I first started getting into 3d printing I used the paper level technique before every print. I realized later on your first layer can just be "good enough"
Also while the benchy is nice, stringing/test towers tend to be more useful in the long run! Even starting on something like a magnum is a good way to jump into making your first prop.
 
Oh man, where do I even start? There's so many little details I've learned over the course of using my printer, but I'll stick to the big ones that I use for all my prints.
  • First things first: take the time to think about where you're going to put the printer and other accommodations it's going to need before you actually buy it. Companies often list the printer's dimensions on their websites; use them to measure out how much space it's going to take up. Also take ventilation and ambient temperature into account when deciding as well!
  • Pay attention to whether the printer takes 1.75mm or 2.85mm filament. One will fit in the printer's extruder and is able to be used; the other is worthless without extreme modification.
    • Addendum: printers often ship with their own brand of filament. I highly recommend getting branded filament (eSun, MatterHackers, Inland, etc.) and printing with that instead since the shipped filament is often of low quality.
  • If you've scaled your armor to your body but they don't fit on your printer, use Meshmixer's "plane cut" tool to slice up the parts into smaller pieces. Leads to more post-processing time, but you'll be able to print them in the first place.
  • Some files you could come across might register as having extra or missing faces in the model (this can also happen while using Meshmixer). As a quick fix, opening the .obj or .stl file in 3D Builder automatically detects these issues and offers a mighty convenient "click me to fix" button. This should take care of the issue, but inspect the Preview tab in your slicer to check for any more issues.
  • Be aware of the two types of supports (normal and tree) and which one best suits the part you're trying to print. A chestplate piece I'm currently printing takes 2 days with normal supports. Using tree supports on the same piece adds an extra 15 hours. If you're slicing using Cura, use the Preview tab to see what the print's going to look like and decide for yourself.
I could really go on and on, but I feel that these will be extremely helpful for those of you who are just starting out. Good luck and happy printing!
 
Print orientation and supports

Both of these things are something I still feel like I am learning more about and getting better with after 400+ days of print time on my main printer.


Print Orientation:
How you position something on the print bed can have such a significant impact on how long something takes to print, the end quality, the amount of supports, how strong the final piece can be, and how long it will take in post processing. There really isn't a correct answer for how to do it. It really comes down to feeling comfortable with changing things up and playing around as you slice your models.

Back.png

Example: With this piece I was able to save a bunch of supports by rotating it for less overhangs.

Related to this - I'd also suggest playing around with different tools to break models into pieces if necessary. If you are printing a larger model and are going to be post processing it anyways, you can save time, filament, etc. by breaking something into a few pieces.


Supports:
When I first started printing, I'd slap a model into the slicer, enable automatic supports, and hit slice. This method works and I printed my entire MKVI suit by doing this. However, I've come to learn that you can save so much print time, filament, and post processing time by changing this up a little.

Don't be afraid to mess around with support blockers/enforcers. I'd also suggest messing with the parameters for the supports in your preferred slicer.

Back 2.png

Example: I was able to save a bunch of supports by blocking out supports from a good portion of the inside of this helmet. It really didn't need them

For Added detail - I use PrusaSlicer and have been playing around with their new organic supports in the Alpha versions. This slicer also has some amazing tools for custom supports. If anyone wants to learn more feel free to message me in Discord and I can gladly coordinate some time to walk through my experience.

1686759188742.png
 
What strength settings are people printing their armor in? I am so curious. I am currently going with wall thickness of 7 at .42mm, so a total of 2.94mm for all walls and an infill of 15% gyroid on a Bambu x1c.
 
Don't be afraid to experiment and mess prints up, try new things, see what that setting does, learn the symptoms of mistakes and issues.
Also, become intimately familiar with how your printer works, comes apart, goes back together.
When all else fails, stripping your printer down, cleaning it, and putting it back together normally does the trick.
Learn how to level and get decent at it.
Settings aren't static, keep an eye out for changes that you may need to make.
 
What strength settings are people printing their armor in? I am so curious. I am currently going with wall thickness of 7 at .42mm, so a total of 2.94mm for all walls and an infill of 15% gyroid on a Bambu x1c.

In my experience that seems like quite a high number of walls. I typically print my props + cosplay stuff with 3 perimeters and between 5-15% infill at .2 MM layer height.

My MKVI suit was fully printed with default settings of 2 perimeters and 20% infill at .2 MM layer height.


The only thing I've ever printed with more than 3 perimeters was the main core of my 3D printed guitar.
 
I'm new to 3d printing in general. I'm currently experimenting with some files and slicer settings so I could troubleshoot printer issues.
I found a custom support setting and support blocker in cura slicer, and it's superhelpful in saving print time and filament.
 
Resin printing
Not scaring you off - just lots of people new to resin printing aren't aware they need to set up a safe working space.

Everyone thinks FDM when they hear "3d printing" but there is a rise in resin-based 3d printing and so many people don't realize its a very toxic (and smelly) workflow. YouTubers make it seem like its just like FDM only with a liquid because they're showing off their sponsor's machines on a bench in a studio, not in the real world.

So often I see threads on Facebook and Reddit with resin printers for sale because people sunk hundreds of dollars into a setup then realized they just can't have it in their apartment or home. That's a really painful lesson especially in these economic times.
1686774822327.png


The entire workflow is toxic. Period. That includes the resin marked "eco", "Plant based" or "water washable". Remember that ethanol car fuel is plant-based too, but you wouldn't leave open top vats of it on the bench in your house. If you want to believe the people selling the stuff when they say its "less so" you do that. I'm old enough to remember when asbestos was safe and sold as Christmas snow to sprinkle around the house, when talcum powder was used by millions for decades and later learned to give you cancer, about 50 medications that PASSED FDA certifications, over the counter heartburn pills that were also carcinogenic. All I'm saying is, I don't trust the people making bonuses on sales to have my health as their first concern. You do you.
Asbestos_snow.jpg
RealWorldPrintingTent.png

ME... I won't have it in my house and won't go in the resin shed without a VOC respirator.
or
=========
The printer is the least of your concerns when it comes to fumes. It's mostly contained but as soon as you take the lid off all that comes spilling out. Venting the printer only does a small part. The rest of the resin workflow involves open bottles, open vats, big buckets of open alcohol, parts off-gassing while curing, resin waste and paper towels in the trash all off-gassing. Fume residue settling on everything.
There isn't a step in resin workflow that is 'safe'. This is all industrial grade chemicals, fumes and handling. You need to accept this up front or don't bother.

Don't confuse "odorless" or "water washable" or "plant based" with "safe". Plenty of odorless chemicals that will kill you or severely screw you up. Oleanders are plants too, and they'll kill ya dead. Resin, alcohol, MEK, acetone, cleaning fluids... that's all industrial grade chemicals. It has no place living in your bedroom/spare room, or on the same air conditioner as the rest of your house.

"Water washable" does not mean you wash it down your drain!
It is still an industrial chemical solution that you have to take to a proper hazardous waste material collection center. Usually that means taking buckets of resin wash water outside and letting the water evaporate out until you only have solids left to dispose of. Most people I know still wash their water washable in alcohol because its a far easier process and gets them a better clean.

3m half mask

VOC filters (put them on monthly subscribe and save)

Off brand full face but it takes the 3m filters

> What others did about fumes?
Well... Ask 100 people you'll get 100 different answers because everyone has a different situation.
For me... I wasn't silly enough to think industrial manufacturing belonged in my house. So I put it in a small cargo trailer that had no purpose at the time. (see pic) Others subdivide a garage. or basement. Or... that spare room over the garage... Or buy a Shed as a dedicated maker space. Someplace to put the work shop on its own air handling not shared with the family and pets.
Then comes the retort: But I'm only a hobbyist making little gaming wizards and my apartment doesn't the room for a shed. Well… The chemicals don't know or care about what you're making. If you don't have room then don't do it. I'd love to have a full-blown cabinet workshop, but I can't so I don't try.
In my resin trailer I added air con as well as a dedicated vent fan.
4" vent fan
Duct
I tried setting it up in my main FDM shop but 3 days of that showed me it needed its own space and own air handling. Simply put - this is all industrial-grade materials and your health deserves industrial-grade precautions.

Lots of people will say "Oh, that's overblown. A box fan in a window is all you need." Ok. *YOU* do that. I would never work for someone that takes that attitude about worker safety and that's only 8 hours, 5 days a week. Why would I do that in my own home around my family and pets 24/7/365?
I'm not telling anyone what to do. Just sharing what I do and my perspective. But my two cents worth: If you wait until you're having lung problems to accept you need a better situation: You're already having lung problems.

Still insisting on having it in your house? If you google "VOC rated room air filters" (not just the HEPA stuff) but actual VOC rated... Look at ratings... then look at the spec for the size of the space they can handle... Looks like something in this range-ish, is what you're probably looking at.

> I don't have room for ventilation and safety gear

Well... Make room and take toxicity seriously. You shouldn't buy a horse first THEN ask "how do I deal with a horse living a 3rd floor walk up apartment?" Considering your safety and situation should be the first step in resin printing, not the last step as an after-thought.


My personal advice is to not worry about buying resin printing tech if you don't plan to treat it like an industrial machine using chemicals that require special handling. If you plan to use it with no more safety than a inkjet printer and drop it in your spare room you're not being realistic.

1686775892413.png

1686775917481.png
 
Experiment with a few slicers, but once you pick the one you like best dive into the features and settings. There are a lot of great slicers out there, and they keep getting better.

Prusaslicer and Superslicer for example can plane cut your model. At least as of Prusaslicer 2.6.0-alpha6, possibly earlier, you can slice and have it add registration "connectors" as they call it.

1686777818469.png
1686777886912.png

Left: SuperSlicer 2.4 splitting a model Right: PrusaSlicer 2.6.0-alpha6 splitting a model
Don't take the orientation of these images as a suggestion for how to orient prints.


SuperSlicer also has calibration tests integrated into the slicer itself and includes descriptions of what it will do, and how to read the print.
1686778201718.png
1686778240350.png


Edit (6/24/23):

Maybe not something I wish I knew, but more something I wish I'd forced myself to do earlier. Printer maintenance. Check parts on occasion for wear and do some basic maintenance every so often. Depending on how often you print this could be every X print hours or every X weeks/months if you'd rather do so at set intervals. If you can it's not a bad idea to have a spare set of replacement parts to reduce printer down time.
 
Last edited:
I highly recommend anyone getting into 3D printing learns about what "manifold" 3D models are. Here is a really helpful link!

In short: the world of 3D modelling, of course, doesn't have to behave like reality - and rarely does. But when you make or take a model for 3D printing, that model does need to respect the real world's rules.

laurence fishburne GIF


Models that do are considered "manifold" - watertight, patched up nicely, everything is facing the right way, etc. . Non-manifold 3D models may cause problems when slicing or printing objects. This can happen because the maker intentionally minimised the model's complexity for optimisation, or it can happen just by accident when 3D modelling.

Blender can do some repairs by hand, but it's handy to chuck it into the free 3D builder program first, as it can do it quite well automatically.
 
Resin printing
Not scaring you off - just lots of people new to resin printing aren't aware they need to set up a safe working space.

Everyone thinks FDM when they hear "3d printing" but there is a rise in resin-based 3d printing and so many people don't realize its a very toxic (and smelly) workflow. YouTubers make it seem like its just like FDM only with a liquid because they're showing off their sponsor's machines on a bench in a studio, not in the real world.

So often I see threads on Facebook and Reddit with resin printers for sale because people sunk hundreds of dollars into a setup then realized they just can't have it in their apartment or home. That's a really painful lesson especially in these economic times.View attachment 332488

The entire workflow is toxic. Period. That includes the resin marked "eco", "Plant based" or "water washable". Remember that ethanol car fuel is plant-based too, but you wouldn't leave open top vats of it on the bench in your house. If you want to believe the people selling the stuff when they say its "less so" you do that. I'm old enough to remember when asbestos was safe and sold as Christmas snow to sprinkle around the house, when talcum powder was used by millions for decades and later learned to give you cancer, about 50 medications that PASSED FDA certifications, over the counter heartburn pills that were also carcinogenic. All I'm saying is, I don't trust the people making bonuses on sales to have my health as their first concern. You do you.
View attachment 332489View attachment 332492
ME... I won't have it in my house and won't go in the resin shed without a VOC respirator.
or
=========
The printer is the least of your concerns when it comes to fumes. It's mostly contained but as soon as you take the lid off all that comes spilling out. Venting the printer only does a small part. The rest of the resin workflow involves open bottles, open vats, big buckets of open alcohol, parts off-gassing while curing, resin waste and paper towels in the trash all off-gassing. Fume residue settling on everything.
There isn't a step in resin workflow that is 'safe'. This is all industrial grade chemicals, fumes and handling. You need to accept this up front or don't bother.

Don't confuse "odorless" or "water washable" or "plant based" with "safe". Plenty of odorless chemicals that will kill you or severely screw you up. Oleanders are plants too, and they'll kill ya dead. Resin, alcohol, MEK, acetone, cleaning fluids... that's all industrial grade chemicals. It has no place living in your bedroom/spare room, or on the same air conditioner as the rest of your house.

"Water washable" does not mean you wash it down your drain!
It is still an industrial chemical solution that you have to take to a proper hazardous waste material collection center. Usually that means taking buckets of resin wash water outside and letting the water evaporate out until you only have solids left to dispose of. Most people I know still wash their water washable in alcohol because its a far easier process and gets them a better clean.

3m half mask

VOC filters (put them on monthly subscribe and save)

Off brand full face but it takes the 3m filters

> What others did about fumes?
Well... Ask 100 people you'll get 100 different answers because everyone has a different situation.
For me... I wasn't silly enough to think industrial manufacturing belonged in my house. So I put it in a small cargo trailer that had no purpose at the time. (see pic) Others subdivide a garage. or basement. Or... that spare room over the garage... Or buy a Shed as a dedicated maker space. Someplace to put the work shop on its own air handling not shared with the family and pets.
Then comes the retort: But I'm only a hobbyist making little gaming wizards and my apartment doesn't the room for a shed. Well… The chemicals don't know or care about what you're making. If you don't have room then don't do it. I'd love to have a full-blown cabinet workshop, but I can't so I don't try.
In my resin trailer I added air con as well as a dedicated vent fan.
4" vent fan
Duct
I tried setting it up in my main FDM shop but 3 days of that showed me it needed its own space and own air handling. Simply put - this is all industrial-grade materials and your health deserves industrial-grade precautions.

Lots of people will say "Oh, that's overblown. A box fan in a window is all you need." Ok. *YOU* do that. I would never work for someone that takes that attitude about worker safety and that's only 8 hours, 5 days a week. Why would I do that in my own home around my family and pets 24/7/365?
I'm not telling anyone what to do. Just sharing what I do and my perspective. But my two cents worth: If you wait until you're having lung problems to accept you need a better situation: You're already having lung problems.

Still insisting on having it in your house? If you google "VOC rated room air filters" (not just the HEPA stuff) but actual VOC rated... Look at ratings... then look at the spec for the size of the space they can handle... Looks like something in this range-ish, is what you're probably looking at.

> I don't have room for ventilation and safety gear

Well... Make room and take toxicity seriously. You shouldn't buy a horse first THEN ask "how do I deal with a horse living a 3rd floor walk up apartment?" Considering your safety and situation should be the first step in resin printing, not the last step as an after-thought.


My personal advice is to not worry about buying resin printing tech if you don't plan to treat it like an industrial machine using chemicals that require special handling. If you plan to use it with no more safety than a inkjet printer and drop it in your spare room you're not being realistic.

View attachment 332490
View attachment 332491
Something tells me I'm going to see a lot of links to this post in #3D-Printing on the discord. EXCELLENT explanation, and very useful resource.
 
I wish I knew....

1. FDM prints need so much sanding it's worth using as much SLA/SLS in your builds as possible as it cuts down you work time HEAPS
2. Consumer resin printers are sh1t. If you can afford a Formlabs Form 3+ or 3L, do it.
3. Reinforce everything with dowel pins / rods wherever you can, because 3D prints really aren't that strong.
4. Prusa Slicer if the best FDM slicer ever and I'll fight anyone who disagrees (kidding)
 
When choosing types of filament, do not use ABS if you do not have a ventilated enclosure for your printer. ABS creates toxic fumes while printing.

If you're doing a print on a FDM printer, keep in mind that any detail smaller than the size of you're nozzle or layer height can not be produced. This applies to either trying to make a print with small details, or if you decide to use a larger nozzle to make faster prints.
 
Hopefully not a bad necro post. Just wanted to throw out some learning experiences that I have encountered or read during my time with an FDM printer.

Dry your filament before using it. You'd be surprised with how much moisture a loose spool can suck up if it's sits out for a while. It can have an adverse affect on your print's quality, causing warping, clogs, and stringing. You can dry it by using a food dehydrator (yes, really), or buying a dedicated product that is designed for the task of filament drying. I use a EIBOS Cyclops dryer for my spools.

Wash your build plate. You probably handle your print bed a lot when removing a completed print off of your plate. Well, fingers are greasy, and the grease can transfer onto the plate, ruining the adhesion. I just use little Dawn dish soap and a sponge and go to town when I clean my plate, as it removes the grease.

If you're thinking about use ABS, consider ASA instead. ASA, unlike ABS, is UV resistant right off the bat. It also has better weather and chemical resistance. It still gives out toxic fumes while printing, but the smell is less noticeable. You should strongly consider getting a filter system that uses activated carbon or a way to vent the fumes out even if you have an enclosed printer.
 
From working for an industrial FDM printer manufacturer for over 5y; I can solidly say there are a few things that ALMOST EVERYONE struggles with when getting started.

1. First layer height / leveling. I’ve seen so many people here and with customers we had where they have parts that fall off the bed, nozzle jam, trashy print quality, etc and all the issue was that their first layer wasn’t being laid down properly. I’ve attached a diagram I made years ago showing what “too far” “just right” and “too close” first layers generally look like.

2. If your printer suddenly starts acting weird a while down the line after working great; if nothing is loose or you have any obvious hardware things going on; it’s always nice to have a “known good” file on hand. When you first get your machine there usually are some “demo” files they ship with to confirm functionality and to use as your first print out of the box. Those are generally sliced with 100% default slicer settings. If you encounter print issues; try printing that file. If it works without issues; revert your slicer settings to totally stock and see if your parts come out okay with those stock settings. If it comes out badly, you likely are dealing with a hardware-related issue and you should start troubleshooting there.
 

Attachments

  • IMG_4495.jpeg
    IMG_4495.jpeg
    128 KB · Views: 31
The air quality around your printer can affect the print quality (specifically, FDM printing).

I put my printer in my basement workshop, which gets quite cold in the winter-time. The cold air would cool the print at the base so much that it would shrink and curl off the print bed. This lead to many (so many) prints failing due to base adhesion failure or just warped and unusable parts.

Once I found out that the cold air was the culprit, I built an insulated box to put the printer in to keep the air around the printer warm and haven't had a print failure like that since. I later found that many companies offer printer enclosures that do this; worth looking into if the temperature in your space fluctuates.
 
If your 3d printer is customized at ALL make sure to find out what the custom pieces are and write that down somewhere safe.

I bought a custom built 3D printer from a local shop based on a Creality CR10 frame. But so much of it is mix matched different brands and aftermarket upgrades that trying to find parts has been a nightmare. If you don't have a list of parts from the person who built the printer, definitely take the time early on to completely dismantle and figure out what your printer is made of and how it works.

It'll make maintenance and troubleshooting later on a LOT easier.
 

Your message may be considered spam for the following reasons:

If you wish to reply despite these issues, check the box below before replying.
Be aware that malicious compliance may result in more severe penalties.
Back
Top