Mandalorian Bounty Hunter (Sintra, Foam, & 3D Printed)

Alright had to modify the internals of my helmet of course I got way too carried away and did not take before and after pics so I'll reuse some pics of last year and maybe edit them and show what I did. And here are my edits.
Screenshot_20230317-050951_Chrome.jpg
 
Last edited:
Also finished assembling my jetpack, I don't have the weather to do my usual filler primer and spot putty, I either have a load of pollen, or its too cold, or its raining, but the jetpack looks awesome.
20230316_111401.jpg

20230316_111406.jpg

And I didn't take a pic but their is a back mount to attach the jetpack to and take to take it off for when I get lazy and wanna sit and chill!
 
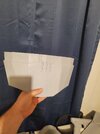
I have been pretty bad about updating you guys on progress, I almost have all my current pieces spot putty'd up, and started with magnetic attachments, so far just the chest and lower abdomens have been mounted up and works flawlessly, well except the magnets on my vest keel trying to attached to each other, I should have done "alternating" magnets so that they don't attract to each other, but instead I attached them in the same direction, really annoying man
 
I remembered to take some pics before I left for work this morning, I'll start with the messy spot putty ones I suppose.
20230430_113726.jpg

This one I already wet sanded the lower plate and the chest plate is 3 hour old spot putty, you might can tell the difference. And the chest wet sanded.
20230430_184259.jpg
 
Last edited:
This is the jetpack all spot putty'd up, which took forever. I haven't sanded this yet as of this post, kinda dreading it.
20230430_113729.jpg
 
This is the bracers/gauntlets all putty'd up and wet sanded, minus the greeblies that go on it, which are just spot putty'd.
20230430_113732.jpg

20230430_184320.jpg

Oh yeah, also have a "mando-puter" for my gauntlets, pretty cool, it flashes random mando numbers and letters, I tried to post a video of it on here, but wouldn't let me, so I took photos, really quickly, to show the result, here look.
20230503_033101.jpg

20230503_033105.jpg

20230503_033107.jpg

20230503_033109.jpg

I even managed to take a pic of what it would look like in my gauntlets, which is surprising for me.
20230503_033138.jpg
 
And here is the back plate that the jetpack attaches to, which is a very solid attachment, which also has been spot putty and wet sanded.
20230430_184310.jpg
 
Alright and here is a better pic of the greeblies that go on the gauntlets and my hand plates, all of which have only been spot putty'd.
20230430_113743.jpg
 
I have doing alot of spot puttying and filler primering and wet sanding, and I pretty much have the pieces for the upper armor ready for it's first coat of some gloss grey, then I'll see if it needs a second coat then graphite powder time.

Here are some pics of all of the pieces ready to go, and got my shoulder pauldrons in last week, I'll post those after my progress pics.

Also very pic HEAVY....


20230516_032112.jpg

20230516_032135.jpg

20230516_032140.jpg

20230516_032147.jpg

20230516_032152.jpg

20230516_032235.jpg

20230516_032304.jpg

20230516_032254.jpg

20230516_032314.jpg


Alright next post will be some shoulders!
 

Attachments

  • 20230516_032319.jpg
    20230516_032319.jpg
    1.5 MB · Views: 84
Alright, so these shoulders are a work of art printed by MakerBak3d on etsy, it did take a while, almost 2 months, but they are perfect, and If I wanted to, the sigils can be interchangeable!

20230508_134709.jpg

20230508_134710.jpg

20230508_134716.jpg

20230508_134718.jpg

And the sigils are resin printed.
20230508_135035.jpg


Pretty awesome right, also got some grav charges in last week.
1683832666576267.jpg

Anyway, so my post- empire mando suit, I'm thinking of doing a wolf pack color scheme but instead of greys, might go with browns and tans, with some greys, in my head it looks cool, basically this color scheme, even repaint my helmet to match.
phase_ii_commander_commander_wolffe_by_spartan_055_dc0seae-fullview.jpg

download.jpeg

Thats my ideas for now, thanks for viewing and liking!
 
Aight, got the sigils primed up and then gloss dark grey to prep for the graphite coating then I will probably just leave it graphite, should look cool.
20230517_160637.jpg

20230517_160638.jpg

20230517_164804.jpg

20230517_164806.jpg

Hopefully get this all beskar'd up today if the paint isn't tacky of course, gloss paints always take a while to dry
 
Good morning, I got the helmet sanded back down to Boba's colors and reprimed it, gloss dark grey base coat and then graphited it for the beskar finish, the usual stuff.

20230518_170526.jpg


Here is the dark gloss grey
20230519_224915.jpg


Then some graphite powder after letting the gloss dark grey dry for 24 hours.
20230520_042312.jpg

20230520_042320.jpg

20230520_042333.jpg


Then I assembly'd just the shell of the bucket to put some paint on it accurately
20230520_054151.jpg

20230520_054155.jpg

20230520_054158.jpg


Then after that, I got a clean micro fiber towel and really buffed out the graphite to a decent shine, I didn't want too shiny ao this is good enough for me, to where light touches it, it has a nice metallic sheen.
20230520_062711.jpg

Here is an exemple of that sheen
20230520_094733.jpg

20230520_094737.jpg

20230520_094747.jpg


Anyway currently filling in some seams on my range finder, missed those during my first time customizing my helmet, anyway later!
 
Last edited:
Went ahead and beskar'd the shoulder strap armor and main chest piece.

These will stay bare beskar
20230525_140640.jpg

20230525_140924.jpg


And the chest will probably be half bare beskar and half painted.
20230525_191239.jpg

20230525_191243.jpg


And wating for my magnets to come in so I can finish the attachment points on my flight suit
 
I noticed the chest and ab plate had alot of ripples and deformities, probably from me leaving those prints outside to dry soooo wet sanded it back to the primer and currently spot puttyin' those puppies again
 
Aight, the ab plate have been sanded back to to primer then re-putty'd it and wet sanded, then rinse, lather and repeat until it got the edges back again.

20230527_043910.jpg

20230527_043913.jpg

20230527_043918.jpg

20230527_055810.jpg

Of course this is beskar'd up now, but forgot to take pics. So I'll do that later today.

And just to add more posts on my thread I'll post something pretty on the next post.
 
Also spent pretty much a week sanding and puttying up my "flying phoenix" of course forgot to take progress pics, but I did managed to get a snapshot of it beskar'd up.
20230529_123635.jpg

Also got the back plate beskar'd up but only use filler primer and wet sanded it and primed again and wet sanded until it was decently smooth, you won't really see it anyway.
20230529_123637.jpg

Anyway next week I'll order alot of N52 magnets and other stuff, maybe foam as well to get a new belt started or might make it out of leather, dunno yet, leaning towards foam for the varying thicknesses.
 

Your message may be considered spam for the following reasons:

If you wish to reply despite these issues, check the box below before replying.
Be aware that malicious compliance may result in more severe penalties.
Back
Top