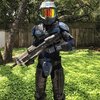
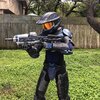
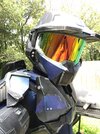
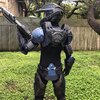
Hi! My name is Leonidas. I started making armor back in February last year and finished my first full suit back in September. It was 3d printed using the awesome files created by MoeSizzlac and I felt like it turned out well considering it was my first build. But due to certain limitations of the model, numerous issues, and learning curve I was ultimately unsatisfied with it in the end.
I want to take it a step further and make something that's more my own. Using the the Halo 5 game mesh on the Armory uploaded by Art Andrews, I have done a full high-res conversion of the Halo 5: Guardians Mjolnir Mark IV armor for 3d printing and cosplay. I'm specifically using the female variant as the base because I feel like its better proportioned for the average body types and will allow for a more comfortable fit. After all, not everyone is built like Terry Crews.

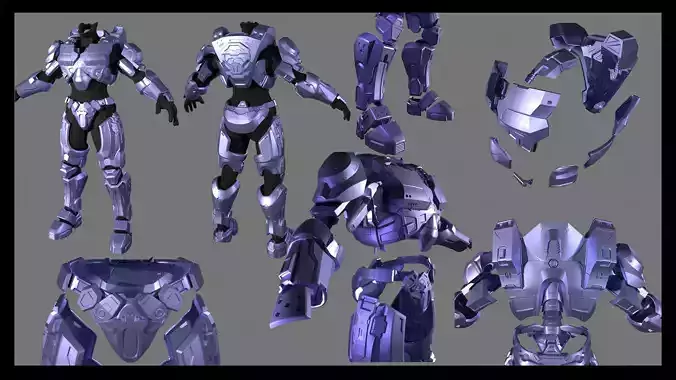
I have redesigned the torso to be modular and practical scaling and wearing. The back and front plating has been separated from the sides and shoulders so that they can be scaled independently, allowing users to scale the specific parts to better fit their own proportions instead of a global scale warping the whole model and save a lot of time and filament not having to reprinting the entire thing only to find out it doesn't fit. The independent pieces will allow for a better range of movement in the shoulders and sides. This will also let users mix and match chest and back plates while maintaining some cohesion. I have separated a panel on the back of the Calf plating as well so users can slip their foot through.
As an optional piece I have designed my own custom back plate based off of Chief's armor in the live action "Forward Unto dawn" series. this also includes spinal plating.

The model is finished for the most part but until I'm less poor I wont be able to do any test prints. I tried to to account for the thickness based on each part so some may be thicker than others but until I can do a test I can't be 100% sure of the thickness.
This is scaled for 5'10"
A couple of tips if anyone decides to print this:
Studying the original model I noticed that it was designed with a lot of thick padding in mind so each piece will be slightly large around the diameter of legs and arms so don't be afraid to really pad it if a piece feels a little big.

When scaling for the thigh keep in mind that you should be able to bend your leg at least 90 degrees at the hip, and 100 at the knee.
All "Detail" pieces are separated so that to make it easer overall to print.
A good way to test scale is to create primitive shapes such as rings and rectangles scaled to the length and diameter of the piece.
The 4 pieces that make the Side, work like an arm that wraps around and clamps to the front of the chest plate so each piece should be able to move as if they have a hinge between them. the "Clip" and adjacent side piece has a hole through it so you can put a long screw through.

This is what I have so far, any advice or feedback will be most welcome. I won't actually be able to print anything until I become unpoor, so nothing is finalized and these files and project may be updated and revised as I go along.
I want to take it a step further and make something that's more my own. Using the the Halo 5 game mesh on the Armory uploaded by Art Andrews, I have done a full high-res conversion of the Halo 5: Guardians Mjolnir Mark IV armor for 3d printing and cosplay. I'm specifically using the female variant as the base because I feel like its better proportioned for the average body types and will allow for a more comfortable fit. After all, not everyone is built like Terry Crews.
Halo 5 - Mjolnir Mark IV Armor | 3D Print Model
Model available for download in OBJ format. Visit CGTrader and browse more than 1 million 3D models, including 3D print and real-time assets
www.cgtrader.com
I have redesigned the torso to be modular and practical scaling and wearing. The back and front plating has been separated from the sides and shoulders so that they can be scaled independently, allowing users to scale the specific parts to better fit their own proportions instead of a global scale warping the whole model and save a lot of time and filament not having to reprinting the entire thing only to find out it doesn't fit. The independent pieces will allow for a better range of movement in the shoulders and sides. This will also let users mix and match chest and back plates while maintaining some cohesion. I have separated a panel on the back of the Calf plating as well so users can slip their foot through.
As an optional piece I have designed my own custom back plate based off of Chief's armor in the live action "Forward Unto dawn" series. this also includes spinal plating.
The model is finished for the most part but until I'm less poor I wont be able to do any test prints. I tried to to account for the thickness based on each part so some may be thicker than others but until I can do a test I can't be 100% sure of the thickness.
This is scaled for 5'10"
A couple of tips if anyone decides to print this:
Studying the original model I noticed that it was designed with a lot of thick padding in mind so each piece will be slightly large around the diameter of legs and arms so don't be afraid to really pad it if a piece feels a little big.
When scaling for the thigh keep in mind that you should be able to bend your leg at least 90 degrees at the hip, and 100 at the knee.
All "Detail" pieces are separated so that to make it easer overall to print.
A good way to test scale is to create primitive shapes such as rings and rectangles scaled to the length and diameter of the piece.
The 4 pieces that make the Side, work like an arm that wraps around and clamps to the front of the chest plate so each piece should be able to move as if they have a hinge between them. the "Clip" and adjacent side piece has a hole through it so you can put a long screw through.
This is what I have so far, any advice or feedback will be most welcome. I won't actually be able to print anything until I become unpoor, so nothing is finalized and these files and project may be updated and revised as I go along.
Last edited:
")