- Member DIN
- S224
Hello 405th!!
I've just modified my Nerf MA40 and tought it was a good idea to make a thread out of it, since I took a lot of pictures and videos
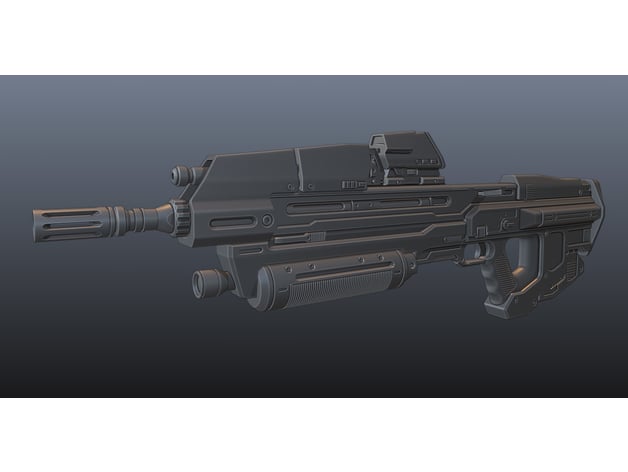
Well, here's how it came out:

And a few detail shots:


The entire process was basically:
• Change the muzzle brake
• Cut the magazine
• Fill and sand toy screw holes/logos
• Repaint
Muzzle brake
My first thought when I bought the rifle, was "that muzzle brake looks wierd", it is too short and wide to be an accurate one.
So, found some files on Thingiverse, that rifle files were split into pieces, so I just grabbed the muzzle brake file, printed it at 100% scale, and lucky for me, it fit perfectly in the hole left after cutting the original muzzle brake. Then, just glued it to the rifle using 2 part epoxy glue, and filled the union with some detail-filler (here in México is called "Plaster" by a brand named "Comex"; it's basically Spot Putty)


As you noticed, the rifle changed color; that's because I had to emergency paint it to be used at a Con but lastly I decided to go with the default coating, instead of the red one.
Magazine
Another upgrade that it had to be done, was the magazine, which was too long, luckilky, nothin that a saw could fix:


I cut a big piece of the magazine and leave the top part intact, for the magazine to still be removable. Then, attached the two pieces by adding some wood pieces inside and glue them with 2 part epoxy. Finally, also used "Comex Plaster" to fill that gap between the 2 pieces.
Filling and Sanding
As you can see in some pictures up here, I filled the real screw holes with, you guessed right!: Comex Plaster (I'm sorry, I love that thing)
Also, filled and sanded all of the "toy marks", like the Nerf/Halo logos; also filled the battery "door"? (my english didn't help me here)
Anyway, sanded a LOT and the only screw holes left were the fake ones (the ones that needed to be there to be "accurate")

Painting
Lastly, and my favorite part: painting.
First of all, I glued the ammo counter to the rifle with 2-part epoxy glue, and then, primer and start the painting.


Started with the lighter gray, then moving to the darkest tones. I used vinyl paint (I believe it's called "house paint" too). This was a long process, because I had to wait for the first color to dry before adding the next, and for every color to be fully complete, had to apply 3 layers each color. After that, clear coat and weathering.


For the weathering, used some silver paint to make the scratches; diluted black oil paint to make the stains in the lighter colors, and diluted brown oil paint to make the stains in the darker colors.
To fully finish, of course I had to make the decals. The ammo counter was printed in vinyl and the rest of the decals were stencils made with vinyl cricut and painted with a sponge and acrilycs.


I vectorized all of the decals using the following image as reference, and adjusted them to the Nerf scale:

If you want to see more of the references images I used, you can enter this Artstation link.
If you're repainting your Nerf MA40 and want to make the decals, here's the .eps file of the decals I've made.
Finally, if you understand some spanish (or don't understand any of it but still want to see the process), I've made two TikTok videos explaining some of my process during this build:
Part 1
Part 2
And that's for the MA40!! I wanted to do this like a year ago (when I bought the rifle), but couldn't do it untill now; and I couldn't be more proud with the result :')
Thanks for reading me! See ya
Jerverant Cosplay · Instagram
I've just modified my Nerf MA40 and tought it was a good idea to make a thread out of it, since I took a lot of pictures and videos
Well, here's how it came out:
And a few detail shots:
The entire process was basically:
• Change the muzzle brake
• Cut the magazine
• Fill and sand toy screw holes/logos
• Repaint
Muzzle brake
My first thought when I bought the rifle, was "that muzzle brake looks wierd", it is too short and wide to be an accurate one.
So, found some files on Thingiverse, that rifle files were split into pieces, so I just grabbed the muzzle brake file, printed it at 100% scale, and lucky for me, it fit perfectly in the hole left after cutting the original muzzle brake. Then, just glued it to the rifle using 2 part epoxy glue, and filled the union with some detail-filler (here in México is called "Plaster" by a brand named "Comex"; it's basically Spot Putty)
As you noticed, the rifle changed color; that's because I had to emergency paint it to be used at a Con
but lastly I decided to go with the default coating, instead of the red one.Magazine
Another upgrade that it had to be done, was the magazine, which was too long, luckilky, nothin that a saw could fix:
I cut a big piece of the magazine and leave the top part intact, for the magazine to still be removable. Then, attached the two pieces by adding some wood pieces inside and glue them with 2 part epoxy. Finally, also used "Comex Plaster" to fill that gap between the 2 pieces.
Filling and Sanding
As you can see in some pictures up here, I filled the real screw holes with, you guessed right!: Comex Plaster (I'm sorry, I love that thing)
Also, filled and sanded all of the "toy marks", like the Nerf/Halo logos; also filled the battery "door"? (my english didn't help me here)
Anyway, sanded a LOT and the only screw holes left were the fake ones (the ones that needed to be there to be "accurate")
Painting
Lastly, and my favorite part: painting.
First of all, I glued the ammo counter to the rifle with 2-part epoxy glue, and then, primer and start the painting.
Started with the lighter gray, then moving to the darkest tones. I used vinyl paint (I believe it's called "house paint" too). This was a long process, because I had to wait for the first color to dry before adding the next, and for every color to be fully complete, had to apply 3 layers each color. After that, clear coat and weathering.
For the weathering, used some silver paint to make the scratches; diluted black oil paint to make the stains in the lighter colors, and diluted brown oil paint to make the stains in the darker colors.
To fully finish, of course I had to make the decals. The ammo counter was printed in vinyl and the rest of the decals were stencils made with vinyl cricut and painted with a sponge and acrilycs.
I vectorized all of the decals using the following image as reference, and adjusted them to the Nerf scale:
If you want to see more of the references images I used, you can enter this Artstation link.
If you're repainting your Nerf MA40 and want to make the decals, here's the .eps file of the decals I've made.
Finally, if you understand some spanish (or don't understand any of it but still want to see the process), I've made two TikTok videos explaining some of my process during this build:
Part 1
Part 2
And that's for the MA40!! I wanted to do this like a year ago (when I bought the rifle), but couldn't do it untill now; and I couldn't be more proud with the result :')
Thanks for reading me! See ya
Jerverant Cosplay · Instagram