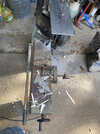
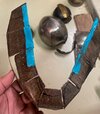
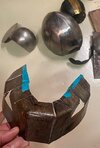
1st Build Noble 6 from sheet aluminum

Status
Not open for further replies.

KragAxe

Member
Well, not exactly my first armor build. I've been building steel armor for medieval reenactment groups since 1990....but it's my first HALO armor build, and my first large aluminum project....and my first project to share here on the forums! Aluminum works significantly different than steel!

I want to do a full Noble 6 rig this Fall. I'm starting with the Mark V(B) helmet. Similar to modeling for a printer, I break the project down into individual components. Also, this will be done with a base helmet, to which a second "skin" gets attached to create the thick parts. I don't have aluminum welding capability, so I'll be using blind rivets that will be blended in to be "invisible". I'll have some aluminum thin bar sections used periodically to create something to rivet sheet metal sections to. This will make more sense once I get into that part of it and you seethe pics.

The top of the helm is being done in 1/8" 6061 aluminum. This is a bitch to shape into complex curves...but I want it thick so I can gouge/cut different shapes and contours into it as needed. That, and I know I'll be doing stupid stuff with friends and it needs to be impact resilient! The rest of the helm will be 0.080" 6061 and the remainder of the armor will be 0.063" aluminum. The .063 shapes much easier and doesn't work harden as fast.

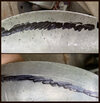
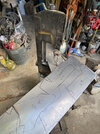
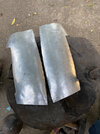
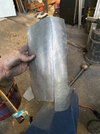
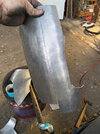
First pic is the raw stock for the helm along with a couple medieval helms I used as a sizing guide for my head. I made a paper model, then cut it apart and used this to estimate the pattern on the aluminum. This is a bit of black magic, as I'm not experienced in stretch rates of Al. I oversized it a hair since it's easier to trim some off, than to add it back in!

helm master.jpg
helm 1.jpg


helm 3.jpg

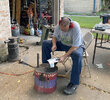
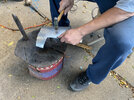
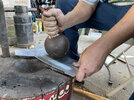
I used my 30 yr old "Ye Ole dishing stump" with a 12 lb ball to start the curves. I pretty much work the metal between various curvature depressions in the stump and with various size hammers/forms to get an even compound curve.

Helm 4.jpg


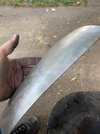
Here's some progression shots of what I got done. This was only about 45 minutes of work.....but It's been several years since I've done this and I might need a week to recover now! :)

helm 5.jpg


I over curved this a hair, but the next step will be smoothing it out on a pneumatic planishing hammer which will take a little bit of the curve back out of it. I'll put it in one of my heat treating ovens to anneal and stress relieve it first, otherwise it may start cracking out, then again after planishing, then put the final curves in it, Next will be the side plates, which have very slight curves and should go pretty quick. The lower portion of the helmet will definitely be the challenging part. I did a mock up of the front lower half in paper, and although complex, its pretty straight forward. I'm still figuring out the curved portions over the ear sections. Worst case, I could always cast them, I have tons of aluminum shavings from my MA-40 build I could melt down!

Started raining again here in Houston......hopefully it'll be clear this weekend and I can get more done!
 
So aluminum can be curved smashing it against a stump? Guess the old ways work best.
There's three different curvature depressions in the wood depending how tight i need the curve to be. There's a line as well for hammering in grooves. Over wood, you can hammer the sheet over flat area and still get a a very shallow dish, which is what I'll do for the sides of the helmet. Most of what I do is 0.032" thick 4130 chrome moly steel for heat treatable medieval items. It's much, much easier to manipulate than this thick aluminum!

A lot of guys use the bottoms of old CO2 cylinders welded to a steel plate. It stretches the metal faster since there's no give, but I prefer the wooden forms as they leave a smoother dent if that makes sense. Plus, they aren't near as loud. Beating on a steel form with a 12 lb steel ball will irritate neighbors pretty quick. This is just for the deep stretching. I use the air planisher to blend it all together and smooth it out.

I'm building a 30 ton hydraulic press for use with my knifemaking. It will be able to squish sheet metal pretty easy. I won't have that built until the spring, though. We plan on buying a house then and I don't want to have to move another giant piece of equipment, so it's still just parts in boxes now.
 
I'm looking forward to how you'll deal with a lot of problems that foam smithers don't have to worry about, like sharp edges and weight. This will be an intreguing challenge.
PS Love how you've painted the tree stump!
 
This is really neat! I have never heard of anyone making halo armour out of metal before. It's going to be very interesting to see how it turns out. I'm excited for the final product!
 
I'm building a 30 ton hydraulic press for use with my knifemaking. It will be able to squish sheet metal pretty easy. I won't have that built until the spring, though. We plan on buying a house then and I don't want to have to move another giant piece of equipment, so it's still just parts in boxes now.
You're starting to sound like my brother. He just put up a barn bigger then his house to put his CNC machine in. It's been sitting in his garage for a year.
 
You're starting to sound like my brother. He just put up a barn bigger then his house to put his CNC machine in. It's been sitting in his garage for a year.
Unfortunately, I went the other way. We were living on a couple acres with a 35 x 50 shop. Now I have a 2-car garage in a subdivision with the same amount of equipment shoved in it. We hope to find a place with a little more room this spring.

Sharp edges aren't a problem. Aluminum is very easy to deburr. For weight, I expect to come in somewhere between 25 and 30 lbs. My steel fighting armor sets were in this range and made from 18-14 ga steel. Aluminum is lighter, but there's a lot more "stuff" on HALO armor than medieval armor. I've lost 75 lbs the last couple years, so I ought to be able to carry a bit more weight! :)
 
I forgot how much I hate aluminum sheet metal! Hah! Got the basic shape matched pretty well to the images. I hit a few people up on facebook for a few measurements off their helms to verify some of my interpretations of the images I'm using. I still need to round the front rim a hair and curve it down. Other than, that, it just needs smoothing out.

I had to heat the helm up to 800*F to anneal it from the work hardening, then I went back and dished the center line a little more to get just a touch more curvature there. I was a little too flat-topped before. Looks great now.

I cut the right side out and will try and shape it from a single piece. If it were steel, no problem....but it's 1/8" aluminum. I'm having problems transferring creases through the thick metal. If I get it close, I should be able to grind/file away metal to make sharp creases. I'll work with this side and dig out some of my small armouring hammers and creasing stakes and try that as well. (these hammer from the outside over the stake as opposed to driving it in from the rear.)

Anyways, here's where I'm at now:

Helm 6.jpg template 5.jpg

If there's interest, I can do some short youtube videos on the various sheetmetal techniques and tools.
 
I forgot how much I hate aluminum sheet metal! Hah! Got the basic shape matched pretty well to the images. I hit a few people up on facebook for a few measurements off their helms to verify some of my interpretations of the images I'm using. I still need to round the front rim a hair and curve it down. Other than, that, it just needs smoothing out.

I had to heat the helm up to 800*F to anneal it from the work hardening, then I went back and dished the center line a little more to get just a touch more curvature there. I was a little too flat-topped before. Looks great now.

I cut the right side out and will try and shape it from a single piece. If it were steel, no problem....but it's 1/8" aluminum. I'm having problems transferring creases through the thick metal. If I get it close, I should be able to grind/file away metal to make sharp creases. I'll work with this side and dig out some of my small armouring hammers and creasing stakes and try that as well. (these hammer from the outside over the stake as opposed to driving it in from the rear.)

Anyways, here's where I'm at now:

View attachment 296900 View attachment 296901

If there's interest, I can do some short youtube videos on the various sheetmetal techniques and tools.
i would love to learn how to do that stuff i had an older guy how started to teach me how to do this but he passed away before we could really get into any projects.. but i love the way this is coming together it is going to be a work of art
 
Been slammed at work lately and haven't had much time, but I did spend a few hours putting the basic ridges into the aluminum....or at least trying to!

I wanted to use the thick aluminum because it had "the look" of the spartan armor. Unfortunately, the 1/8" Al is just not moving like it needs to. The punch/chisel marks aren't transferring through the metal like I need them to, and having to bake it at 775* after every few working sessions is really getting old. So, for the helm, I'm switching to primarily 16 and 14 ga steel sheet. With the exception of the ear cover sections, these are fairly straight forward shapes to do in steel. Several of the attachments will still be done in aluminum, and the remainder of the armor suit will be aluminum, but the helmet will be steel. I didn't want to have to deal with rust....but I don't want to have to spend three hours for every crease I need to put in either!

The pics below are about three hours of work, just to get a single even crest ridge. Even then, I had to go back and hand file the surface to get a sharp ridgeline. The next line down will be a valley ridge and will be a real nightmare the way this is moving. the other benefit of steel is that I have all sorts of steel welding equipment, so I don't need much hidden rivet work.

At least the weather has cooled off here in Houston so it's nice to work outside!

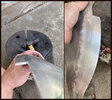
Here's a couple pics of where I left off. The point of the sharpie pen marks is so you can see the scribed line. I kind of missed! Once a line is marked, I go back and forth between chiseling in the groove from the rear, then working it over a stake from the front. 6061 aluminum work hardens extremely fast. Once work hardened, it's very prone to cracking along stress points, so you bake it at 775*F for two hours to anneal it (soften/stress relieve).

helm 7.jpg helm8.jpg
 
I pulled out all my steel and dusted it off. I put together a quick video of most of the tools I’ll be using for this. I’ll be using 16 ga mild steel for the helm, 0.080, 0.063, and .125” aluminum sheet for the bulk of the armor with small pieces getting milled from bar, and some 0.032” 4139 chrome moly steel for some connecting sections.

I hope to have the lower front of the helm and the lower leg done this weekend.


1030D5E3-2167-4ECE-B149-A9798F72D96F.jpeg

7F7AAF5B-C3A4-40FB-B894-57AD128EF5C7.jpeg

877C2E40-9697-42E5-9D74-B6FB47A78E43.jpeg

23FA305F-C1D7-498B-B1B3-24C3799523B4.jpeg


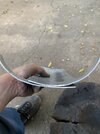
digging around in the garage today I noticed my sheets of thin 1095 high carbon steel I typically use for making Damascus steel billets for knives was rusted pretty bad. I decided to repurpose it and did a new lower section of the helm. This is now ready to be welded on the inside along the last 1/2”. Then it’ll be spot-heated and hammered over a form to close all the gaps, then finish welded on the inside and outside. Once it’s a solid single piece, I can heat up sections and hammer all the creases and such to get crisp lines and smooth curves. This is 0.032” and I’ll be able to heat treat everything make an extremely tough helmet.

This whole piece weighs just under a half pound. musing this Steel, the whole helm will come in around 4 lbs. pretty light!
 
Last edited:
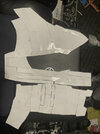
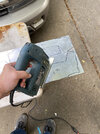
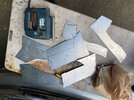
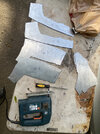
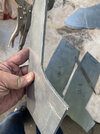
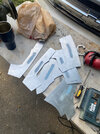
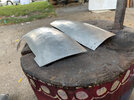
Got patterns done for the thighs. I started with the pepakura files here on the forum. Taking a best guess at stretch rates of the aluminum, I taped them together to make flat patterns for the 0.080" 6061 aluminum sheet. I then cut them out using a jigsaw for roughing them, then the bandsaw to trim them close. I then clamped them together and used my 2x72" belt grinder for making each set of parts identical.

From there, they get rough dished using the 12 lb ball and a smooth shallow-curved hammer. Then I take some of the curve back out, which flattens the center and curls the edge...which is the shape I want. Then I do some planishing hammering to smooth things out. I have an air-powered planishing hammer I'll use to really smooth things out.

These came out great so far, as you can see in the pic. The parts mate up great along the edge. Guess I judged properly on the aluminum stretch! Once I get all the main parts done, I'll temporarily rivet them together and finish the lateral curve to get them to wrap around the thigh properly.


IMG_4748.JPGIMG_4750.JPGIMG_4752.JPGIMG_4753.JPGIMG_4754.JPGIMG_4755.JPGIMG_4756.JPGIMG_4757.JPGIMG_4758.JPGIMG_4759.JPGIMG_4760.JPGIMG_4763.JPGIMG_4767.JPGIMG_4770.JPGIMG_4771.JPGIMG_4772.JPGIMG_4773.JPGIMG_4776.JPGIMG_4779.JPGIMG_4780.JPG


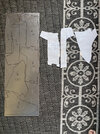
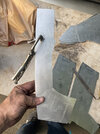
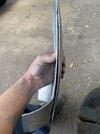
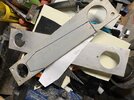
Got the side central plates cut. These are cut from 1/4” aluminum. They’ll get lots of the design features milled out, then a simple longitudinal curve to match the thigh.

These 1/4” strips were originally low density shielding filters for a neutron/gamma dual-source nuclear gauge. Now I can say my HALO suit really does have nuclear components. :)

Evidently, I missed something when turning the multiple pepakura pieces into single large sheet metal patterns. I’m missing a “triangle” of metal off the upper portion of the rear panel. Easy to splice in....just an annoying oversight on my part.

071FFE81-DB88-426C-94C6-6EED7F2E1CFB.jpeg
6396DB24-0159-44D4-90F9-34CC740D092C.jpeg
0D82A7DC-486A-42BF-9253-A4FB07ED81FA.jpeg
 

Attachments

  • B5752E36-5528-43B1-B272-0EC9A83F2062.jpeg
    B5752E36-5528-43B1-B272-0EC9A83F2062.jpeg
    123.1 KB · Views: 116
Last edited:
I've been working on bladesmithing projects trying to get ready for the last big knifeshow of the year, so I haven't done much on this. After the 14th, I'll shift into overdrive on the armor and my MA-40 in 6.5 Grendel cal.

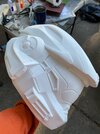
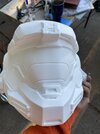
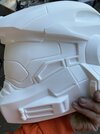
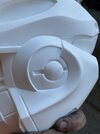
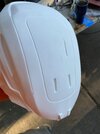
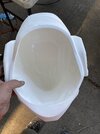
I *did* get some stuff to help out with the helmet, though. I bought a resin cast Mark Vb helmet from IconProps. It's sized pretty much perfect for my head, other than I have a really skinny head and will have to pad the sides a lot, and is a big help for visualizing how my steel sections need to be. Looks like I had all the heights and lengths spot on, but my angles were off...significantly... on the side/cheek sections and that was throwing off all my other patterns. Having a finished helmet in hand makes it easy to compare size/contours of the sections I'm making. I'll cut out the visor section and use that for forming some visors with a vacuum setup.

Of course, I'll finish out the resin helmet so I have something to use with the rest of the armor while I work on the steel version. I cleaned out part of my garage looking for some firearm building tooling and found stacks of heat treatable chrome moly sheet steel, sheet aluminum, a couple thousand rivets in various metals......never did find what I was looking for though! I'm good to go on sheetmetal for the rest of the armor.

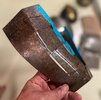
Here's some pics of the resin helmet. It's really nice! I threw in a pic of my MA-40 barrel I did, too. It came out awesome! I heat treated the muzzle brake so it's match the gold color I'll be using as the secondary color on the armor. :)

IMG_4843.JPGIMG_4844.JPGIMG_4845.JPGIMG_4846.JPGIMG_4847.JPGIMG_4848.JPGIMG_4849.JPG

IMG_4817.JPG
 
Wow...It's coming up on a year since I was really working on this! I just found my boxes with all my parts so I can pick this back up where I left off....once I actually remember where I left off! Last Fall and this Spring were pretty rough, so things like this got set aside. Back on track now, though!

I'm going with all aluminum on the body armor, rather than steel. I got in three sheets of 0.040" 6061 aluminum for the remainder of the body armor. This will be easier to form than the 0.062 and 0.070" I had on hand. I'll still use some of the thicker stuff for elbow/knee sections that will see a little more wear/impact. I'll be using hidden rivets for a lot of this. You drill the hole, bevel the edges, set rivet and mash, then sand flush. I'll take lots of video along the way.

The helmet will be getting done in 4130 chrome-moly steel. Sides and face in 0.032", and the top in 0.062". I'll be both hot and cold forming this, so that 0.062" will be getting stretched out and thinned out in some areas. I plan on forming the entire top from one piece. We'll see how much of my armoring skills I still remember....been a while since I've done a helmet! I want to keep the helmet under 4 lbs for comfort. (for comparison, my fighting medieval helms are usually 8-10 lbs). This is pretty thin metal on the lower portions and it will be heat treated to harden and temper it. I'll also use some aluminum edging along some points to keep it rigid and held to shape. I'll be using the resin cast prop as a guide for comparison of the parts I'm making. I need mine to be about 10-15% smaller than the prop. I have a skinny little head and the prop makes me look like a bobble head!

First pics at place. New place is larger....and might even be cleaner, but don't hold your breath for that! You get to see the virgin epoxy coated floor in these pics!

The pics are after cutting and rough forming getting ready to weld. This is take-2 on this part. Measure twice, cut once...... The pointy/blockiness will be smoothed out via hot forming once it's all welded up. It'll be smooth and seamless like the 14 ga stainless medieval bascinet top in the background.


head 1.jpghead 2.jpghead 3.jpg
 
Last edited:
Status
Not open for further replies.
Back
Top