Planning ODST Build - Progress and Final Costume Photos on Pg. 2

Status
Not open for further replies.

einherjarvalk

New Member
Hi all,

Long time lurker, first time poster. I've had my eye on doing Halo cosplay for years but the cost and scale of the work necessary has put me off for a long time. My new year's project this year is to overcome that and eat this particular elephant one bite at a time, with the intent of eventually having a wearable ODST cosplay by this fall. While I'm not a stranger to making armor (I've done some small armor pieces and props with foam and Worbla for a few other cosplays that were much more fabric-intensive), this will be my first time using Pepakura templates of any sort. I've decided to start by making a weapon of some sort to get my bearings using pep templates before moving on to armor pieces and then, finally, the helmet.

Right now I've pulled the pep files from the Armory for Halo 3: ODST's armor and weaponry, but I'm having a bit of trouble making sense of it all. There's some files labeled "FOAM" as well as "A" or "B", but they often don't seem to have all the parts matching to the file; some of the parts are outside of the "print" format. Am I supposed to use both A and B templates for things like the M7S or just one or the other?

I've been poking around at Reach files as well in case I decide to go for the more detailed Reach ODST look, but there appears to be multiple cases of A/B files with missing parts for the major weapons (MA37, M392) as well, and I haven't found any ODST .zips for Reach either (I'm guessing the Reach set is a mish-mash of UNSC Marine/Army trooper and Spartan-III parts).

Any guidance that might be helpful? I realize it may be cheaper and more effective to just buy things like weapon props, but I want to start small and have the satisfaction of saying "yes I made these" when I go out in public with them if possible. Additionally, does anyone have experience using thermoplastics like Worbla to "coat" foam Halo armor? I've done it before for Fire Emblem pauldrons but I'm not sure if the finer details of Halo pieces may make it suboptimal.
 
It is definatly cheaper to make the armor and props than to buy it, and it feels really good to have it done and show it off. I dont quite understand by the mention of a and b parts, but when you have peices off of the printing zone of the pepakura, that is because the file your are using is foam and has been converted to foam from a paper peice. That peice may be not on the shape because you needed to connect two one dimensional peices of paper, when it's not needed because the two dimensional foam peice already makes the shape, if you understand what I'm trying to say. I have always wanted to try using worbla, and I have seen people cost things in it, but it just gets so expensive I have never ordered it. If you want to make something hard like that, I would just fibreglass a pepakura file.
 
Apologies, I should have included some screenshots for reference. Here's what I'm looking at in a couple of different places.

wlUNthf.png

Note how there are 4 different files for the M7S - an "A", a "B," and then a "B" for both foam and the optic. I'm not sure if I'm supposed to use all 4 together, just the "A" or "B" set, or just the "B" foam and sight files together assuming the majority of that part will be made of EVA foam. Looking at the "B" foam file, it's evident that some parts are not effectively rendered in the pep file, namely the suppressor and muzzle device for mounting it, despite both being present in the 3D model the pep file is derived from.

It's a bit different elsewhere:

Xn86Y2D.png


This set of Reach files has an MA37 followed by a 3-part foam MA37 file. While the foam MA37 files have notes that make it a bit clearer that they're supposed to go together as a set, the M392 having 1 normal pep file and then A/B foam pep files is confusing me.

As for Worbla, I'm lucky enough to have a local shop that sells it directly, so I've never had to deal with shipping costs for it, which were what made it really expensive upon initial discovery. While I've never worked with fiberglass/bondo/rondo to make a prop, I can't imagine it gets easier than pointing my heat gun at a Worbla sheet and just melting it onto the foam parts. That said, I'm assuming fiberglass over pep probably maintains hard angle sharpness better than Worbla (and is probably exponentially less likely to deform in the Texas heat), so I may look into that more when I get there.
 
Absolutely correct. I would assume the peices would go together, but I dont know as to I cant see the file/template itself... maybe someone else will see this thread soon, or if those files were used in a different thread you can find them there.
 
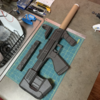
I've been away for a bit dealing with some other things but have recently (when time allows) been trying to build the M7S SMG using the AndrewDFT files. Is there some kind of secret to getting clean EVA foam bevels that I'm missing? His look super clean and despite using the sharpest blades I can find, my bevels look super chunky and patchy to the point where I may just scrap this entire attempt. Is it perhaps the foam I'm using? I'm just using generic EVA foam matting from Harbor Freight but I know their materials aren't always the best and may be causing more tearing/"chunkiness" than a better foam might.
 
IMAG0881.jpg
When you are cutting your bevels are you using a sawing motion or trying to do it with a smooth stroke. Sawing motions will definitely give you jagged and chunky cuts. If you haven't noticed DFT has actually some nasty looking cuts, he saws his bevels.
To clean up the mess you have to sand it smooth with either a dremel or sandpaper, or both.

Edit: I have built the same prop as well. It was second prop I ever made.
IMAG0881.jpg

You can see here that I was guilty of the sawing motion as well. At this point had done some sanding but not enough. Some of the nasties are still quite visible.
 
Last edited:
A metal ruler goes a long way for straight edges and smooth bevels. When cutting, draw your arm back rather that bending the wrist. It will prevent the blade from moving side to side. That is what gives it that jagged look. Changing of position of the blade. One smooth motion.....clean cut. Its the inside corners and rounded edges that are the hardest to do w/ cuts. That is when a good sander, hand or power, comes in to play.
 
First and foremost. Sharp blades and sharpening stones. I personally have done the DFT method and it is a lot of going back and smoothing things out with my dremel. A clean cut will always make look best and sand less too. With the ODST files it is best to open them and look at it all. sometimes it is just a very refined detailed version of the prior. Back cuts and thinking of reinforcing all porps. Think of each cut before you do it. and just take is easy. rushing through the work can lead to lots of mistakes. With ODST armor having many curves you need to be slow and clean for the best results. Then over time the speed just comes.
 
Thanks for the tips, all. Figured I'd give an update - I've been working off of DFT's M7S template and I've realized just how much better I've gotten at planning, cutting, and building with EVA foam just over the course of this prop. In addition to the suggestions you have all made I've also found that finding something to apply pressure to the "excess" of the foam as I cut to hold it together while cutting tends to help with the cleanliness of the cuts, as the blade is more likely to stay level as I go.

I put the last major components together today and am now getting ready to detail it for the texture circles, then seal, paint, and do final assembly before moving on to the armor. While I didn't reinforce the sliding stock, I did reinforce the trigger guard, trigger, and the modified hood of the optic with wire and toothpicks, which is how I'm currently getting away with a rounded hood instead of a square one. I also went and added an extra detail that wasn't present in DFT's template; namely, the addition of a charging handle and what I assume are dust cover locks/detents on the upper angled surface of the receiver. These were in the in-game render, so I'm not sure why he omitted them, but my inner gun nerd demanded I add them back in.

Feeling pretty good about the project now; can't imagine the armor itself having too much more difficulty than some of the little fine details I've forced myself to add in here already.

One minor thing I'm curious about - for those of you who've made props like these already, how did you cover up the "seams" on the top where the layered foam can be seen? Did you seal the seams with hot glue or similar and paint over it or do something more drastic like cutting styrene sheets to cover them?
 

Attachments

  • D2y6M2iX4AAgT7L.png
    D2y6M2iX4AAgT7L.png
    2.3 MB · Views: 278
  • image0.jpg
    image0.jpg
    1.8 MB · Views: 283
One minor thing I'm curious about - for those of you who've made props like these already, how did you cover up the "seams" on the top where the layered foam can be seen? Did you seal the seams with hot glue or similar and paint over it or do something more drastic like cutting styrene sheets to cover them?
In the past I did use hot glue to cover gaps, I'm not proud of it but I used to and it does "work". That being said it's difficult to hide those crimes when it comes time to paint and the surface finish will be different at the points where there is hot glue.

If you can get your hands on some Lumin's Workshop Foam Clay and Woodland Scenics Foam Putty these both work as fillers that cure and dry to have the same properties as EVA foam which is great for making a seamless piece. Just lightly wet the surface and press some of the clay into the gap, wait for two days for full cure or put your prop in the deep freeze to speed up the process and then sand everything smooth with a high grit sanding tool of your choice.

Other people like DAP Kwik Seal smoothed out with water to blend into the foam but I find it also gives a paint finish difference so it's up to you on which method works best for you.
 
Thanks for the advice on the Woodland Scenics putty. I wasn't able to get it fully smoothed out, but it definitely looks better than it did before in the stock.

269022


269023


Unfortunately, the magnets camouflaged in the grip don't appear to be strong enough to hold the gun up on their own, but I'll play around with a larger magnet embedded in the armor to see if that improves things. The laser also works, courtesy of a $10 airsoft laser pointer and an MLOK picatinny rail I managed to install into the shipping tube siding that forms the suppressor. The suppressor itself also came out really well; I used foil tape to cover the "helical" look of the shipping tube and create circumferential seams akin to modern welded suppressors. Hopefully, the metallic undersurface will also wear well and create a realistic look as it gets dinged up.

I'm currently trying to juggle my finances and waiting on a busted printer before moving on to the DFT armor template - for those of you who have made armor from his template, how long did it take you to get it done? My current plan is to try my absolute best to get the DFT set made by late August (the con this is for is on Memorial Day weekend), but I'm going to assess my progress in a month or two - if I'm not getting anywhere with it, I'm considering ordering a set from Sean Bradley Studio in late June/early July so I have time to clean it up and paint it, but that's going to incur significant costs and also yanks my smug sense of satisfaction out from underneath me by admitting I had someone else do the lion's share of the work. The helmet will probably end up being a purchase at least, but I'm marking that as largely optional for the con I hope to have this done by.
 
Progress update - chest is done! Some minor issues with cutting/outlining but nothing that I don't think can be "buffed out" and covered with putty/paint. I probably could've had this done sooner but I had some trouble getting the templates printed off (I don't have a printer, my apartment office center printer was dead for a month, and cardstock doesn't play nice with print-by-page services).

270479


270480


I'm a little worried about the negative space under the main trauma plate; I may hook up an admin pouch of some sort to use as a wallet carrier and cover that zone. As an aside, where are people having their name/unit/med info decals made? I'm probably getting a bit ahead of myself there, but since I'm assuming they're made-to-order, the more lead time I have, the better.
 
DFT I can say is the place that many of us ODST started our first suit at. Mine was. wore it one con enjoyed it and determined I could do better. Built another suit for my next con. And a version 3 for my third. The shins and knee's from my second suit are still in service nearly 4 years later.

It is a learning progress. I have learned new things each build found new techniques and and have gone I can make it better lets have another shot at it. Tools to help with cleaner cuts. The cheapest is a Hot Knife. Comes in the wood burning/engraving kit that Harbor freight sells for like 9 dollars. It is basically an exacto knife chuck that fits in a soldering iron. drastically reduces the number of knife blades you go through. But you still need to clean up the blade and occasionally sharpen it to keep it cutting clean. And if you are lucky enough to have access to a wood working shop or a maker space with tools. A band saw with a fine tooth metal cutting blade is the true go to machine. You can cut forward and backwards on it and set any bevel cuts you want to make with precision. It gets a bit fiddly in corners but you can do the body of the cut and then come in with a sharp blade and finish corners out. If you have access to a maker space that also has a laser cutter. <insane manically glee occurs>

Then in my case I finally have hit the stage that my suit is 3d printed. Material price not bad. Time invested is a lot.
 
Progress update - chest is done! Some minor issues with cutting/outlining but nothing that I don't think can be "buffed out" and covered with putty/paint. I probably could've had this done sooner but I had some trouble getting the templates printed off (I don't have a printer, my apartment office center printer was dead for a month, and cardstock doesn't play nice with print-by-page services).

View attachment 270479

View attachment 270480

I'm a little worried about the negative space under the main trauma plate; I may hook up an admin pouch of some sort to use as a wallet carrier and cover that zone. As an aside, where are people having their name/unit/med info decals made? I'm probably getting a bit ahead of myself there, but since I'm assuming they're made-to-order, the more lead time I have, the better.
Not bad looking at all. Actually very nice. And I am sure you have learned a few things in the process.
 
Still working at this - should have the entire upper torso (arms, gauntlets, ab/butt plates) done by this weekend.

I'm still looking to get some Med ID stickers made as well as the various insignias printed off soon. Does anyone have a recommendation for where I can find them?
 
I’ve got to say I looked at DFT for a long time before settling in using the files whereisdanielle has up, super impressed with how clean your seams and glue work are, I’m ashamed to admit while I love how mine looks finished if you look up close it’s a mess ahah, keep up the awesome work!
 
Status
Not open for further replies.
Back
Top