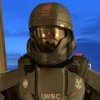
Planning ODST Build - Progress and Final Costume Photos on Pg. 2

Status
Not open for further replies.
Still working at this - should have the entire upper torso (arms, gauntlets, ab/butt plates) done by this weekend.

I'm still looking to get some Med ID stickers made as well as the various insignias printed off soon. Does anyone have a recommendation for where I can find them?
I hope this is what you are looking for. Simple but good. You can print these on a vinyl, get a printer shop to print them into stickers, or use TurboCharizard s methods to apply it to your armor

 
I hope this is what you are looking for. Simple but good. You can print these on a vinyl, get a printer shop to print them into stickers, or use TurboCharizard s methods to apply it to your armor

For things like hazard labels and medical tally plates I like using the method that PerniciousDuke outlines here just for the sake of small text.

For larger things (larger than 2") go to town with a Cricut or a hobby knife and good painters tape!
 
We have an armor set!

IMG_0933.jpg


My con is coming up in a few weeks, so I'm now shifting to final prep before attaching rigging. This week I'm planning to spray Plasti-Dip the entire thing to seal it and then start coating it with paint - if other Helljumper costumers have suggestions for a good base color match, I'm all ears.

Small details are also being worked on. I'm going to try and get some UNSC/ODST logos made on a Cricut, and I'm experimenting with a self-seal lamination pouch for my med chit that will go on the shoulder. I've also picked up some replacement backpack straps that I think will be great for mocking up the rigging that the Bullfrogs have on their armor, with or without a jetpack. The front straps dangle down but can be slotted behind the front trauma plate, so I'm thinking I'll likely paint the armor, then hot glue the straps directly to the torso armor, trim the excess, and just let them hang behind the plate.

IMG_0941.jpg
 
I was summoned by the sheer prospect another ODST was joining the fold, and I have to say- Fantastic work! I used DFT long yonder back and while it may have not been my best build, it got my feet through the door and on the ground!

And your Silenced SMG looks stunning! I saw you mentioned some issues with your magnetics for it, I always am suggested going through Ebay and picking up some high strength Rare Earth Magnets (Neodymium). But another great alternative is setting up a sling for your SMG as well on your suit that you could conceal within your armor when not in use, by the use of buckles, nylon, and some ingenuity.

I can not wait to see this project wrap up otherwise!

Thank you! The magnets I tried using were neodymium magnets, but unfortunately it looks like they just don't have enough pull to actually get good adhesion, especially when the "host" magnet on the armor is under half an inch of EVA.

The sling idea is worth considering, though. I actually have a few high end rifle slings that are set up for use with QD swivels, and now you've got me wondering how well I could get a couple of cheap QD sockets or HK hook mount points installed on my SMG, or if I could potentially just pull the QD swivels off one of the slings and just cinch it down around the foregrip and receiver extension in the same way Frank Proctor's Proctor Sling is used.
Glad to be of any help! A few of our con-goers at Outpost made quick to use slings for their weapons to help them keep their items on them without them having to be held!
 
Paint wise, usually anything looks good. I have seen all black armors with accents, spiderman and deadpool paintjobs, many different types and colors of camo, and any color you can think of. I beleive whatever you choose to do will work great considering how good your build is coming along.

As for neodymium, the best and strongest you can get is the 1/8th thick circles with the hole in the middle. These are very strong, and quite large too. They work great but the problem is that sometimes it is too strong. Be careful of where your fingers are, and if there other metalic objects near by. We also dont want to potentially scramble a phone with the magnets...
 
Time's running short, but I'm rounding the final corners.

Paint went on last week (Rustoleum Charcoal Gray), but I hated how light the gray was - it was barely darker than just raw foam. I whipped up a batch of black wash and I've been slowly darkening it down to a dark color closer to the "Steel" option from Halo 3. It's a bit lighter than black, which is good for contrast. In the picture below is a black Plasti-Dipped shoulder, a raw foam ab plate, and a Plasti-Dipped-then-painted-then-washed buttplate.

IMG_0953.jpg


I also picked up a helmet I found for relatively cheap made by a Chinese company called XCOSER. However, I again hated the color - while it was painted, it a.) had the wrong bloodtype molded in (I'm matching both my medical chit and helmet to my actual bloodtype of O+), b.) had the brand name molded into the back of the helmet, and c.) the paint made it look like a toy. Some time with a Dremel sanding wheel followed by the same prime-paint-wash process got it to approximately match the armor pieces I've been working on.

16B53345-5667-4927-BB71-F40EB728F120.jpg


I then added a few details to help really make it pop, and will add weathering this weekend. I accent striped it with a single red stripe on top instead of the white/silver the Bullfrogs used. I'm a fan of the Black Powder Red Earth graphic novels, where the "uniform" of the protagonist PMC company's elite unit is Multicam Black armor/pants with a red shirt. Since I'm using Multicam Black fatigues as a base layer and really like the visual aesthetic of Multicam Black and dark red, I figured I'd replicate it here. I also stenciled my bloodtype where I dremeled off the molded in one.

Pre-wash:

IMG_0960.jpg


Post-wash:

IMG_0969.jpg


I'm thinking I'll skip the usual metallic drybrushing in favor of a medium gray drybrushing outside of things like really minor scrapes that won't appear without a little metallic sheen to help them show up. Real-world ballistic armors and helmets are made of ceramic materials or similar, and IIRC there was some canon materials in one of the novels talking about Marine armor being ceramic, so I think it makes a lot more sense for it to wear away to a flat color instead of to a metal.

I've also got to try and get some decals cut on a Cricut machine this weekend - I'm really hoping it goes well, since it's a library machine I'll be using and I only really get one shot at getting it all right. Fingers crossed.
 
Wow this looks really good, great work!
 
Another update - I finally got the rest of the costume painted, decaled, weathered, and worn! I've held off on photos because I'm waiting for my "pro" photos from the con to come back, but I did take a few hall shots and such for the meantime.

For starters, my helmet got a little extra TLC and a name badge, plus a weathering pass. I opted to go light on the weathering, focusing more on raised edges that would get worn away from things like rolling around in a kit bag and light scrapes rather than serious trauma.

IMG_0978.jpg


IMG_0980.jpg


I've made a mental note to either replace or darken the visor somehow down the line; it's far too transparent for my liking right now, but I didn't have time to fix that before the con. That was time that I spent with my girlfriend, who helped me frantically weather the hell out of my armor, washing it, weathering it again, washing it again, and so on until I got an effect I liked. We ended up using two shades of gray as mentioned - one "base" pass with the darker gray, and one "highlight" pass with the brighter gray. The brighter gray was also later used to create sharper scratches where debris may have hit. We also spent a little time putting more wear and abrasion on the left side of the armor set - since I'm right-handed, one can conclude there would be more wear on the side I'm pressing into cover with, rather than having equal wear on the shooting side that would be exposed more frequently.

Here's my torso both before and after the first weathering pass. Note the red "emergency release" tab; I thought it was a super cool detail on the in-game model that a lot of people leave off. It's just the end of the strap woven back and wrapped in colored electrical tape, but it adds some decent character. I then added decals as well; while I think I scaled them too large, they have a much more dramatic impact that I liked in the end anyway.

IMG_0972.jpg


IMG_0982.jpg


Complete armor set, laid out and ready to rumble after final weathering:

IMG_0985.jpg


And finally, the complete costume the night I took it out for my photoshoot. Hopefully I'll have those photos back in a week or two so I can share them as well.

IMG_0999(Edited).jpg


Bonus:

IMG_1006.jpg
 

Attachments

  • IMG_1004(Edited).jpg
    IMG_1004(Edited).jpg
    429.5 KB · Views: 195
Status
Not open for further replies.
Back
Top