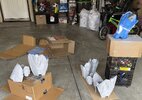
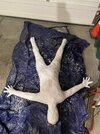
Super excited got a 3d printer for Christmas and I have only been working on this armor since February. Hope to keep this steady work pace and have it completed by August.
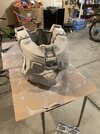
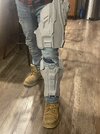
I’m actually using culking sparkle. I have three kids that like to watch or “help” so I wanted the least harmful thing I could use. It’s actually working really well too! Still a couple more sands but this leg is almost done.
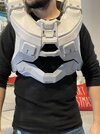
I did not make them I got them from Thingivers. Here is the profile of the creator Thingiverse - Digital Designs for Physical Objects he has them all on his page. They are initially made for some one who is 6'2". I am 5'11" so I scaled them down to 96% and so far it has worked out. with that sizing they wont fit me perfect with out a padded under suit but i plan on making a tech suit from scratch. Hope this info helps.
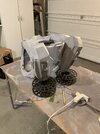
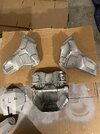
Another leg ready for sanding and I also got my second printer running today. So hopefully I will be significantly reducing my time to print and glue everything. And start working on lights for the helmet and a tech suit. Any tips would be greatly appreciated.
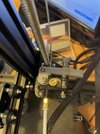
Had some hick ups Extruder tension arm broke on one of my printers, and my mother in law visited. so could focus on my print. I printed a new arm and I am back on track will hopefully have a big update at the end of the week.
It might be worth it to get the metal extruder replacement kit. Also a Capricorn Bowden tube. I've heard some pretty bad horror stories about both of these breaking on enders so I've pre-emptively replaced my own. Wasn't too hard or expensive tbh.
I'm excited to see some more progress when it happens
Will you use some kind of sealing for the pieces? fiberglass or something similar for hardness and deformation in the sun? The armor is looking beautiful, I'm also doing it
Will you use some kind of sealing for the pieces? fiberglass or something similar for hardness and deformation in the sun? The armor is looking beautiful, I'm also doing it
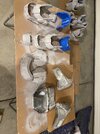
So I have actually been printing in pla+ it is more heat resistant than normal pla and I use uv resistant clear matte spray paint as my final coat. I dont need a hardening agent because I print thick walls and a decent amount of infill so it is already very hard. I have done a couple of drop tests and no brakes so far. My goal with this build was to use as little toxic material as possible (I have 3 kids that dont understand toxic fuems). The most toxic thing in my build is the glue and spray paint.


")