Reach ODST (Foam) (Pic Heavy)

Status
Not open for further replies.

blackout11c

Jr Member
I was working on this for Armageddon Expo last year, but university got in the way and progress slowed for several months. But I hope to finish it for Armageddon this year.

It's made of standard 10mm EVA foam mats, hot glued, then plasti-dipped. A note about the plasti-dipping: in NZ, it's a bit pricey, being about $30 a can.

At the moment, I've assembled the:

  • Left and right forearms, with loops to attach them to the elbow pads.
  • Right shin
  • Right thigh plate
  • Chest/vest base
  • ODST Chest

I'm using these for the gloves and stuff:
  • Blackhawk Hellstorm SOLAG tactical gloves (without Kevlar lining) (black)
  • Wolf Force X-type kneepand and elbow pads (black)
  • 5.11 Tactical series belt (tan)

I've also mostly done both shoulders (still need to assemble the core), the chest front plates, and the ODST stomach plate.

But now, pics! (apologies for the quality, but the camera on a Lumia 635 isn't the best)

WP_20150824_19_10_33_Pro.jpg
Left forearm, elbow, and glove.

WP_20150824_19_04_36_Pro.jpg
Right forearm.

WP_20150824_23_07_02_Pro.jpg
Right shin. The knee plate has been plasti-dipped, and is temporarily attached. I also need to attach the securing belts to the lower shin.

WP_20150819_22_29_09_Pro.jpg
Both forearms, with the elbow pads attached.
 
Re: Reach ODST (Foam)

New pic dump incoming.

WP_20150902_23_41_57_Pro.jpg

Hand carved ODST stomach attachment, because templates were evading me.

------

WP_20150902_23_40_44_Pro.jpg

WP_20150902_23_40_53_Pro.jpg

ODST chest plate. Some edges still need to be fixed up.

------

WP_20150902_23_40_01_Pro.jpg

Reach Trooper thigh armour. This one is for the left side.

------

Last but not least, a new chest core. The one I had made previously didn't fit (at all).

WP_20150902_23_39_09_Pro.jpg

WP_20150902_23_39_17_Pro.jpg

You might notice how the shoulder straps aren't straight. That's because the templates are from the actual game assets, custom modified for use with foam. They actually contour around your shoulders.
 
Well, well.

It's been almost a year since I updated this, but I guess late is better than never!

Courtesy of being a full-time uni student, things haven't progressed as much as I would have liked, but at least I've been able to get some work done here, there, and in the mid-year break between semesters. So, time for a brief recap of what is and isn't done.


  • Undersuit - Still needs to be purchased. From my research with (read: dissection of) the 3D model, it's basically just BDUs.
  • Undersuit (Vest & Attachment points) - See Undersuit. Going by the model, there are a few key parts here:
    • Shoulder attachment points. These are present on the base model, and are used for all of the shoulder permutations. These attach to the vest.
    • Ballistic vest. This is used as the mount for the chest armour and the stomach plate.
    • Tactical belt. Used as a mounting point for the codpiece, as well as for the rear plate ODSTs get.
  • Shoulders - Ready to Plasti-dip. All that needs to happen after that is final paint and fitting on the yet-to-purchase mounts.
  • Forearms - Again, need to be Plasti-dipped.
  • Gloves - Purchased and tested!
  • Chest Base - Save for the fitting of a few hidden buckles, it's ready to Plasti-dip.
  • Stomach, cod, and ODST plate - ready for Plasti-dip.
  • Thighs - One needs to be coated with Plasti-dip
  • Knees - Bases have been bought, with the extra elbow pads being used to hold the forearms in place. Both attachment plates have been Plasti-dipped.
  • Calf/lower leg - Save for the twin elastic bands wrapping around the back of each calf, these are also ready to Plasti-dip.
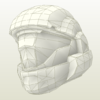
  • Helmet - WIP.

As you might have gathered, the single biggest thing left to do - other than assembly/final detailing - is the Plasti-dipping of most of the components. But luckily, the con I'm aiming for is in October, which gives me more than enough time to get most, if not all, of it done.

But enough about that. Have some shots of it as it is!

IMG_7987.JPG
Barely visible alongside the left forearm is a 30cm engineering ruler for scale.

IMG_7988.JPG
Basically the same shot as above, from a different angle.

IMG_7989.JPG
Forearms, shoulders, and gloves. You can also see the elbow pads.

IMG_7990.JPG
Detail on the back of the chest base.
 
I agree!!! (eskimobob stole my word!!! but I capitalize my "F"s.......so mine is better.......) It is Fantastic!!!!.....Smooth cut lines and nice "Foam-Fu" w/ the bends and angles. Very symmetrical.
 
Last edited by a moderator:
That is some fantastic foam work!
I agree!!! (eskimobob stole my word!!! but I capitalize my "F"s.......so mine is better.......) It is Fantastic!!!!.....Smooth cut lines and nice "Foam-Fu" w/ the bends and angles. Very symmetrical.
Little late, but thanks!

So, little update this time.

Courtesy of still being spring here, it means that it's wet and and sometimes windy outside. Which basically prevents me from completing the next part of this: sealing and painting! Which, as quite a few of you know, is an absolute pain.

But yeah, that's basically all of the bad news about it. No pictures yet, but I've got the strapping and detailing sorted. Now it's just a case of sticking it to the (eventually) painted parts. As well as that, I have a rough outline of what the colours are going to hopefully wind up like.

ODSTPrev.png
To the left is the tweaked version, which I'm going to use as a guide. The final colours I'm going for are darker/browner than these, but they are quite close. Centered is the ODST from Halo 3, and at right is the baseline ODST model from Reach.

ODSTPrev.png
 
Last edited by a moderator:
Status
Not open for further replies.
Back
Top