shainagrace
New Member
Hello!
So, I've been a big fan of this kind of armor work for a while, primarily inspired by captaincaliflour's freaking amazing Gipsy Danger and Cherno Alpha builds, as well as the gundam, transformers, and space marine work I've seen online, and decided I wanted to learn how to do this kind of thing for myself. So after countless hours researching the EVA foam method of building on here and on the RPF, I embarked on my journey to create Gipsy Danger.
I got a lot of my pep files on this forum, some from the RPF, but used a mix of both. I photoshopped them onto myself to get correct dimensions and such, and then used a 3d modelling software to change the dimensions of the actual 3d models before unfolding them in pepakura. I then printed all of this out on a big engineering plotter at staples, and more or less have all of the stencils I'll be using for the foam work.
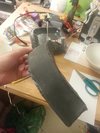
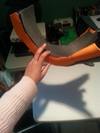
I decided to start on Gipsy's Cod piece first. I've never worked with EVA foam and my work is absolutely pitiful right now. I'm at a loss because I want this project to turn out well of course, and I really can't pinpoint where I'm going wrong with everything. My seams are really messy looking and not good. Brace yourselves for the mess:


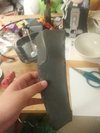
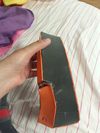
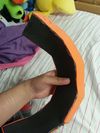
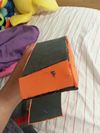
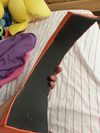
another section of the cod peice:


I have to snip off a few things because I accidentally kept the tabs in the stencils. I also see that giant mess of hot glue that I need to fix, so I'll be melting and smoothing that out soon.
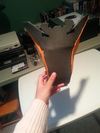
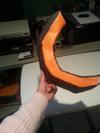
I know of the method where you cut each piece at a 45 degree angle to make seams nicer but I cannot grasp it. I tried just kind of hot gluing things and using a hot knife to sort of melt seams together, but that caused some gross crispy, and sometimes deformed foam so I won't be doing that anymore.
I really really really don't want my project to be a mess, but I really am at a loss. I'll update as I go, maybe things will get a little better, but any tips anyone has would really help me out heh
Thanks everybody
So, I've been a big fan of this kind of armor work for a while, primarily inspired by captaincaliflour's freaking amazing Gipsy Danger and Cherno Alpha builds, as well as the gundam, transformers, and space marine work I've seen online, and decided I wanted to learn how to do this kind of thing for myself. So after countless hours researching the EVA foam method of building on here and on the RPF, I embarked on my journey to create Gipsy Danger.
I got a lot of my pep files on this forum, some from the RPF, but used a mix of both. I photoshopped them onto myself to get correct dimensions and such, and then used a 3d modelling software to change the dimensions of the actual 3d models before unfolding them in pepakura. I then printed all of this out on a big engineering plotter at staples, and more or less have all of the stencils I'll be using for the foam work.
I decided to start on Gipsy's Cod piece first. I've never worked with EVA foam and my work is absolutely pitiful right now. I'm at a loss because I want this project to turn out well of course, and I really can't pinpoint where I'm going wrong with everything. My seams are really messy looking and not good. Brace yourselves for the mess:
another section of the cod peice:
I have to snip off a few things because I accidentally kept the tabs in the stencils. I also see that giant mess of hot glue that I need to fix, so I'll be melting and smoothing that out soon.
I know of the method where you cut each piece at a 45 degree angle to make seams nicer but I cannot grasp it. I tried just kind of hot gluing things and using a hot knife to sort of melt seams together, but that caused some gross crispy, and sometimes deformed foam so I won't be doing that anymore.
I really really really don't want my project to be a mess, but I really am at a loss. I'll update as I go, maybe things will get a little better, but any tips anyone has would really help me out heh
Thanks everybody


") . It is really easy to continue gluing after you have joined the seam and let the glue cool on a project. That is one of the forgiving wonders of EVA, it is very "bendy".
. It is really easy to continue gluing after you have joined the seam and let the glue cool on a project. That is one of the forgiving wonders of EVA, it is very "bendy".