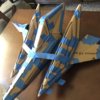
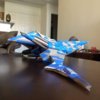
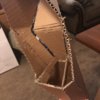
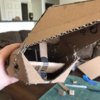
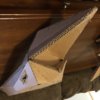
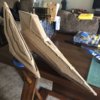
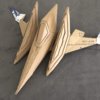
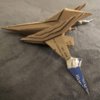
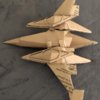
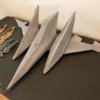
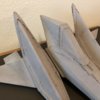
Star fox arwing build (Satchmo III)

Status
Not open for further replies.

Satchmo III

Well-Known Member
Hail four-oh-five!

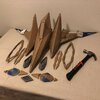
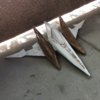
This thread will document the making of a physical model arwing from the 3ds remake of Star Fox 64.

Arwings from other Star Fox games may be added to the build as work progresses (likely the SNES and Star Fox 64 versions at minimum). I know this isn't Halo-related but I'm sure there are some Star Fox fans on the forums that may appreciate the build. I've been doing quite a bit of 3D modeling as of late but I haven't built anything for some time...so I'm changing that.

Thanks for your interest and please post any questions or comments. Wish me a (garbled) good luck!

mock-06.png


I've reserved the next post for finish photos.
 
Last edited:
ENTRY #01: BRIEFING

The primary building material for this project is cardboard. I intend to wall mount the model once complete and may pursue molding/casting it. The wingspan of the model will be 38 inches.

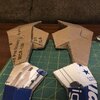
There's a lovely website called The Models Resource from which I was able to find a game asset for the 64-3ds arwing that was used in one of the smash bros games. I simplified the model in blender and modified it into a few distinct pieces to help me build it. The three main pieces include the fuselage with cockpit, the g-diffuser (the blue foil section), and the wing. There's an opening between the upper and lower g-diffuser sections for the wing to slide through and a peg at the inner end of the wing will insert into a sleeve that will be integrated into the fuselage. The individual parts will help the detailing process (by providing ease of access around the parts) and make it so the model can be broken down for any needed transportation in the future.

3DS blender window 00.png 3DS blender window 01.png

After the blender work I exported an OBJ file and used pepakura designer to scale the model and print paper parts templates. I used a plotter to print out on a 36in by 48in plan sheet.

3DS pep window.png IMG_0547.JPG
 
Last edited:
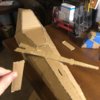
ENTRY #02: TEMPLATE WORK

Cardboard has sufficient thickness for gluing parts together so I had turned off the tabs (AKA flaps) in pepakura designer since they aren't needed. The unfold mostly consists of only one side of the model since the template pieces can be flipped over and traced around for the other side of the model. The paper template pieces were cut out using an exacto knife. I pinned these templates to cardboard (yay for stock-piled boxes) and traced them with a pencil before cutting them out of the cardboard with a box-cutter.

IMG_0548.JPG IMG_0549.JPG IMG_0551.JPG IMG_0552.JPG IMG_0555.JPG
 
Last edited:
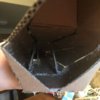
ENTRY #03: TEST ASSEMBLY

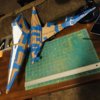
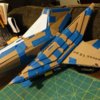
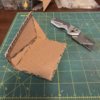
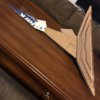
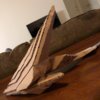
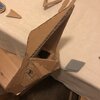
I haven't cut out everything just yet but have started assembly by test-fitting the cardboard parts together for the fuselage and one of the g-diffusers. I'm using painter's tape for the test-fitting since it won't peel up the cardboard when removed. I'll use the test-fitting to determine if there are any pieces for which I want to shave down cardboard thickness to help pieces join more closely.

I began with the fuselage...

IMG_0553.JPG IMG_0554.JPG

...and moved onto one of the g-diffusers. The first image below is of the cardboard pieces pre-assembly. In the second (assembled) photo you can see the area that the wing will slid through before being inserted into the fuselage.

IMG_0560.JPG IMG_0556.JPG

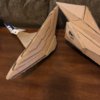
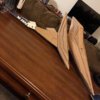
After these parts were assembled I placed them side by side to see what I had done and I also admired my growing refuse pile (there's negative space for a second g-diffuser in the pile).

IMG_0557.JPG IMG_0558.JPG IMG_0559.JPG

NEXT STEPS: Will cut out cardboard for wings and test-assemble one. Take care four-oh-five!
 
Last edited:
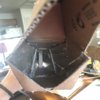
Dear Satchmo III,

Thank you for adding even more nostalgia for me into this site. I played a lot of Star Fox as a kid and spent many hours behind the controls of an Arwing. I wish you all the best in this build and I can't wait to see the finished piece.

Also, DO A BARREL ROLL
 
ENTRY #04: TEST ASSEMBLY CONTINUED
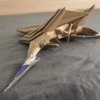
A couple days back I cut out the cardboard wings and taped one together. I was able to slip it through the first g-diffuser.

IMG_0566.JPG IMG_0567.JPG

Yesterday I taped together the second g-diffuser and wing and cut the cardboard for and assembled the simple cockpit screen and trim. I haven't yet cut the fuselage and g-diffuser thrusters or the wing flaps, since these are a bit intricate I intend to finish them prior to incorporating them into the main body.

IMG_0574.JPG IMG_0575.JPG IMG_0578.JPG IMG_0571.JPG

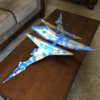
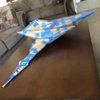
It looks like an arwing...and so I'm eager to continue. Each wing fits through the space in the g-diffusers right now but there's a fair amount of give due to the temporary tape. That space might not be as forgiving as I start to glue things together so I may have to reassess how the main pieces get assembled.

NEXT STEPS: Remove temporary tape and replace with hot-glue.

Dear Satchmo III,

Thank you for adding even more nostalgia for me into this site. I played a lot of Star Fox as a kid and spent many hours behind the controls of an Arwing. I wish you all the best in this build and I can't wait to see the finished piece.

Also, DO A BARREL ROLL

Thank you for the well wishing. The Star Fox 64 cartridge probably spent the most time in my N64 (I wish it was still in my possession). I hope the finished piece will be worth seeing.

Why was it so satisfying when Slippy bought the farm? I would even take a few shots at him myself.......

I can't recall ever intentionally shooting at Slippy, but it's possible I've just completely blocked such actions from my memory.

If you guys haven't yet seen A Fox In Space I highly recommend it.
 
ENTRY #05: HOT-GLUING

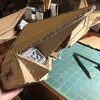
A pretty good day's worth of work today replacing temporary tape with permanent hot-glue starting with the fuselage (I got through the first g-diffuser/wing set). As I assemble, some of the cardboard pieces get beveled so they fit together tighter.

IMG_0593.JPG IMG_0594.JPG

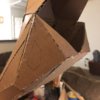
I've also glued in some internal structure to minimize flex and in some cases help to eliminate skew. I didn't think about doing this until most of the fuselage was built but I wanted to add in some support to the middle which was already enclosed. To still accomplish this I cut a slit in the top and slipped in a shim of cardboard.

IMG_0592.JPG IMG_0595.JPG IMG_0597.JPG

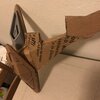
The single plane shim wasn't very strong so I removed it, modified the slit into a triangle opening, and glued up a triangular post to slip in there. Applying glue to both ends of the post did the trick and ultimately the opening at the top got covered by the long cardboard strip on the "hood". I used more triangular posts near the back of the fuselage to beef up that section before closing it up with the thruster section.

IMG_0598.JPG IMG_0599.JPG IMG_0603.JPG

The first g-diffuser took some time to put together but the first wing went fairly quickly since it's simpler. Once the wing cardboard was beveled and tightened up, its base fit snugly through the g-diffuser opening. If I pursue molding/casting individual g-diffuser and wing parts I'll have to shave the cardboard down a little more so it's not quite so snug but it's perfect if I just leave everything as cardboard.

IMG_0600.JPG IMG_0605.JPG IMG_0602.JPG

One of my initial ideas was to integrate a peg into the base of the wing and slide it into the fuselage, so the horizontal structural post through the fuselage may double as a receiving shaft for the wing pegs. I'm leaning towards abandoning this idea but the internal fuselage structure is nice anyway.

IMG_0601.JPG

I enjoy using cardboard (making something out a what used to be a box) though the cardboard I'm using might not be the best building material at this scale (it's not terribly dense while still being slightly too thick). It's taking me longer than anticipated to assemble but I do like how it looks sans blue tape and gluing edges plus adding the internal structure has made it pretty sturdy.

IMG_0604.JPG

NEXT STEPS: Finish hot-gluing the second g-diffuser/wing set and decide how to address the thurster pieces and wing-flaps. Keep doing the work four-oh-five!
 
ENTRY #07: CARDBOARD TWEAKING AND PLASTIC PRINTING

It's a good thing I'm not in a very big rush because this build seems to be stuck in all-range mode (aka...slow). I've been working at it one day a week (usually Sunday) but I'm hoping to start putting in some more time during the week.

The left and right g-diffusers were pretty well symmetric after they were assembled but the wings were a bit too far off (inconsistent angles) from one another. The two contributing factors to this were that I didn't cut each side's pieces to have a consistent direction of cardboard corrugation and I didn't crease very well on the second wing I put together. To fix this I cut where I should have creased and added in cardboard shims to push the cardboard how it needed to be angled, then I glued it back together. This fixed the skew and gave the cardboard a slightly sharper angle. I did this in several places (you can see one on the wing to the left below).

IMG_0651.JPG

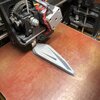
For the thrusters I've pursued 3D prints. The fuselage thruster took about two hours to print and each g-diffuser thruster took six hours. For the fuselage I cut out the cardboard so the thruster could be recessed in and the g-diffuser thrusters will be glued to the backside of the g-diffusers. I plan to 3D print the wing-flaps also.

IMG_0651-01.JPG IMG_0653.JPG IMG_0654.JPG IMG_0658.JPG

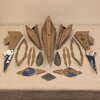
I spent some time infilling the ends of the cardboard (between the corrugations) with hot-glue so the edges are solid. There are still some gaps which I'll be fixing before moving on to sealing and smoothing. I'll be finishing individual parts before assembling everything so I've broken the parts down and practiced some knolling. Hammer for scale reference.

IMG_0660.JPG IMG_0673.JPG

NEXT STEPS: Finalize hot-glued edges, seal, and start smoothing. And wing-flaps.

Such cardboard. What skill! Droooooooooling

Thanks Sean Anwalt! Fortunately the 64-3ds isn't the most complicated model in the Lylat system.
 
ENTRY #08: INITIAL SMOOTHING

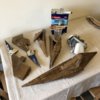
Some family stuff and the Viper Bravado squad kept me from the arwing for a few months. Back in March I applied resin to the exterior of the cardboard and this weekend I spread on and sanded off bondo on the wings and fuselage. I primed everything including the g-diffusers to get a better sense of smoothness levels. I'll be doing some more filling/sanding but don't plan on doing a bunch as I think I'm going to add plastic sheeting on top of many areas anyway to detail out paneling.

IMG_0678.JPG IMG_1084.JPG IMG_1085.JPG IMG_1086.JPG

NEXT STEPS: Finish smoothing and plan panel work.
 
Status
Not open for further replies.
Back
Top