1st Build 1st armor build

halo three rat

New Member
I’ve been putting off printing and assembling my armor for way too long, and now school is starting, so I’m starting this thread to help keep me focused.


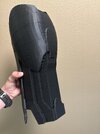
Started out by downloading the mark 7 armor and scaling it using armorsmith. I then tried to make the forearm out of Eva foam, but quit when I realized it was taking way too long and that I had a 3d printer to do the work for me.

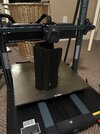
The printer I had at the time was too small, so I ordered an elegoo Neptune 4 max to print the parts on. When the printer arrived, I spent a week calibrating it and doing test prints before printing the shin piece for the armor.

All that took about 3 months because I procrastinated way too much, and I only have about a month and a half to finish it before the championships in Seattle.
 

Attachments

  • image.jpg
    image.jpg
    1.8 MB · Views: 48
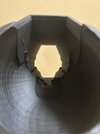
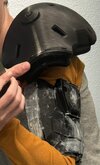
Heel couldn’t fit through a part in the shin piece, so I used a dremel and heat gun to make it work. It works for now, but I need to make it better
 

Attachments

  • IMG_9644.jpeg
    IMG_9644.jpeg
    2.3 MB · Views: 46
Been a while, but I’m about halfway through printing the other shin piece. Currently working on slicing the boots.
I got 2 5kg rolls of filament so that I wouldn’t have to constantly buy more filament, and it was cheaper by about $160.
I went to Lowe’s and got some filler primer finally, so now I can start sanding the first shin piece I printed
I contacted a vacuum forming company to see if they could make some visors, as I do not have a vacuum former, but it’s been around 3 weeks and they haven’t responded
I don’t think I’m going to finish this by October 2nd, which is when I want it to be done for the halo championships in Seattle, so I’m torn between grinding out a helmet, or just bringing the flood carrier form costume I made last year.
 

Attachments

  • IMG_9701.jpeg
    IMG_9701.jpeg
    2.6 MB · Views: 15
Last edited:
Been a while, but I’m about halfway through printing the other shin piece. Currently working on slicing the boots.
I got 2 5kg rolls of filament so that I wouldn’t have to constantly buy more filament, and it was cheaper by about $130.
I went to Lowe’s and got some filler primer finally, so now I can start sanding the first shin piece I printed
I contacted a vacuum forming company to see if they could make some visors, as I do not have a vacuum former, but it’s been around 3 weeks and they haven’t responded
I don’t think I’m going to finish this by October 2nd, which is when I want it to be done for the halo championships in Seattle, so I’m torn between grinding out a helmet, or just bringing the flood carrier form costume I made last year.
Where did you buy the rolls from?
 
I just finished taking the second shin piece off the printbed, and its kind of fixable. he first layer shift happened at an easy to reprint spot, so I'll probably just reprint the part that failed. still annoying having the last hour of a 48 hour print fail because of some layer shifts. next I plan on printing the thigh piece, which is probably the second largest piece.
 
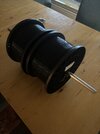
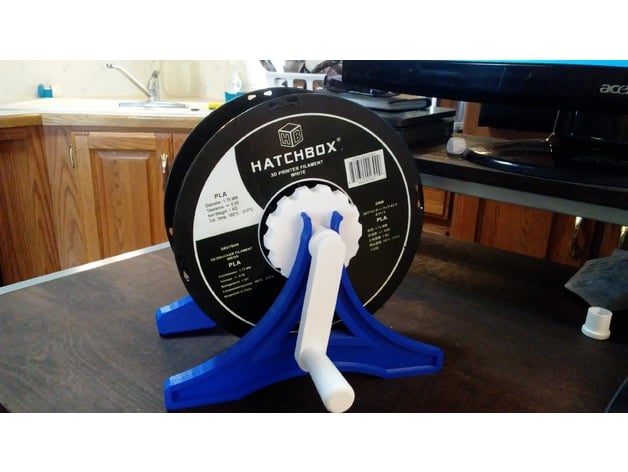
Not sure if I said this yet, but my printer’s head lifted up whenever it’s pulling directly from the 5kg roll, so I have to manually despoil it by hand every print. I got fed up with respooling it by hand for 2 hours every night, so I decided to slice a filament spoiler to help with the speed. I’ll post a link to the files on thingiverse in case anybody is struggling with this problem as well.

 
I finished the despoiler and sliced a bunch of armor pieces. I printed the bicep piece, haven’t fixed the shin piece, and started printing the eagle strike shoulders. I decided that I didn’t want to deal with making a visor for the eagle strike helmet, so I sliced the rakshaka helmet instead
IMG_0204.jpeg
IMG_0203.jpeg
 
The shoulder piece finished printing, and I looked through halo infinite at all the armor pieces I’ve been talking about, and found out I’ve been calling them the wrong thing. The helmet I was planning on printing was the Brodie helmet, and the shoulders I’m using are the crab shell shoulders.
 

Attachments

  • IMG_0228.jpeg
    IMG_0228.jpeg
    308.4 KB · Views: 14
Ummm.... Doesn't that printer vent though the bottom? And you've got it on carpet it will sink in to. I'd worry about dramatically shortening its life from fuzz and over heating.


An excerpt from my "New Armorer FAQ" but if I had to summarize:
It sounds like you might have jumped the gun by going straight to armor, and a tighter fitting armor at that.
Next build your skills. Don't use your helmet or real armor as test parts to learn on if you've never done this before, don't know sanding plastic printed parts etc. Maybe print 20 test XYZ cubes at like 60mm. Use those to learn good sanding, smoothing and painting techniques. If you can't make a flat cube look like metal then you know you aren't ready to tackle armor. Plus you have 6 sides per cube to test painting on and use as a visual record of "This is silver over gloss black" etc.

After the simple cubes move on to a "speed shape". These are commonly used to test paints on over various contours. This gives you a good model to practice sanding more complex shapes with curves and grooves on. Again, you're working up towards the complex shapes of helmets and armor. https://www.thingiverse.com/thing:4826498

Helmet probably should be last, not first. Yeah yeah, everyone wants a helmet to drool over. But it's the thing everyone stares at so you want to do it AFTER you've developed a process, techniques and skills.
Personally I always recommend starting at the feet & hands then working up & in to the body.
• You're going to weather and distress the boots more than anything else... and they get looked at with the least critical eye.
• Then shins which have to ride on the boots.
• Then thighs since you have to avoid joint conflict so you can sit etc.
• See how this goes? Up from the boots, and inward from the hands to forearms to biceps to shoulders.
• By the time you get to the chest and helmet; the parts at eye level that everyone stares at, looks at first, is right there in your face in every photo - you can make them look stellar.
And if you start at the boots you're looking at parts that are only a day or two per part not 6 days per part. So you can hone your scaling skills.

If you've never done an armor build before you might want your first armor to be one without the really tight tolerances of a Spartan or Ironman. I confess I made about 3 Spartan armors to get my first one right. It was very Goldilocks of "This is too big, this is too small, this is just right" with every part. If I had known then what I learned through the process I would have made a Mandalorian (least actual armor) then an ODST then Spartan and actually gotten 2-3 good wearable costumes instead of a lot of waste. I mean, if you're going to print 3 costumes either way, might well have 3 costumes- instead of 1 + a pile of wrong-sized prints, right?

If you are new to 3d printing or considering buying your first 3d printer just so you can make an armor:
3d printers have come a long way since I started with them in 2009. But they still aren't fully plug-n-play like a department store inkjet: But some of the newest & smallest ones are getting there. There's a lot more to 3d printing than just hitting print: Like knowing your different materials and when to use them. Or knowing when more walls and less infil, or more infil and less walls is the right choice. You should expect there to be a learning curve and at $20/spool that curve comes with a cost. I'm just saying walk into 3d printing with your eyes open.
"What's your printer?" thread on the 405th forum:
What's Your Printer?
I wish I knew this about printers before buying discussion:
"I wish I knew" Tips When Starting to 3d Print
°
Jumping right to armor is really not the best way to go when beginning 3d printing. You really want to work up to something this big and specialized. Work up to things so big that a 3% goof can mean added costs, joints that lock up and you can't bend your elbow etc. Little easy things first… Things with no supports to start. Move up to props like pistols. And keep moving upward over time.
• A few settings differences can be the difference between a part too weak to be used and printing your armor so heavy it's exhausting to wear. The difference between a $10 part and a $40 part adds up to a significant difference over an entire armor.
 
Ummm.... Doesn't that printer vent though the bottom? And you've got it on carpet it will sink in to. I'd worry about dramatically shortening its life from fuzz and over heating.


An excerpt from my "New Armorer FAQ" but if I had to summarize:
It sounds like you might have jumped the gun by going straight to armor, and a tighter fitting armor at that.
I plan on moving the printer into a better area later this week after I finish printing the forearm piece of my armor, and with the gun jumping, yeah I probably did, but I’m learning a whole bunch of stuff about cosplay. I’ve been printing for about 2 years, but this set of armor was the first large print that I wanted to do, other than a couple helmets and other big prints. And with regards to the sanding, yeah I kinda have no idea what I’m doing. I’ve only sanded one print so far and that was a visor buck that I did without any filler primer or bondo, because I hadn’t had those yet
 
I’m printing the helmet and forearm piece. Both should* be done by tomorrow, but the prusa might fail, and the elegoo just has bad estimates. I also realized that when I sliced a bunch of armor pieces, I forgot to change the layer height to 0.2 or something like that, and now they’re all at 0.1 which makes them print slower, but makes me have to sand less
IMG_0236.jpeg
 

Attachments

  • IMG_0235.jpeg
    IMG_0235.jpeg
    3.1 MB · Views: 8
I’ve been printing for about 2 years,
Ohhh... Okay. I got the impression that the 4max was your first printer and the armor was basically your first printing project.

> And with regards to the sanding, yeah I kinda have no idea what I’m doing. I’ve only sanded one print so far and that was a visor buck that I did without any filler primer or bondo, because I hadn’t had those yet

I'm a believer in not doing that technique where people slather the entire print in bondo/acetone slurry like a coat of Magic Shell on ice cream. A touch of spot putty on an imperfection is one thing, but I don't like seeing the entire part coated. To me, that's saying your entire part is one big imperfection. That's me. One guy's opinion. The next person will have their own approach that's equally right, just different.
JustSandIt.png
 
I'm a believer in not doing that technique where people slather the entire print in bondo/acetone ... To me, that's saying your entire part is one big imperfection.
Depending on how bad your layer lines are and how thin your walls are, the entire part being an imperfection is very much possible. Also, if you are doing 5 coats of paint, it's easier to get the whole thing pretty smooth if you did a good job sanding without coating the whole thing in putty. A lot of builds I see doing the bondo slurry are doing sanding, bondo, primer, then paint and that's it.

I agree though, most people can get away with just sanding and using the bondo for fixing small areas and hiding welds. The standard build would do well to do a sanding pass (80>120>220) first before the first layer of paint/primer goes on. I see a lot of layer lines through the paint because there was not enough sanding done.
 

Your message may be considered spam for the following reasons:

If you wish to reply despite these issues, check the box below before replying.
Be aware that malicious compliance may result in more severe penalties.
Back
Top