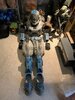
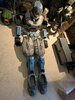
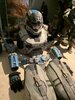
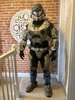
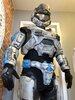
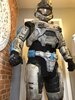
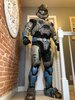
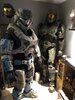
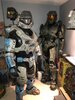
The first full suit up has taken place y’all. Over all I’m extremely happy with this build. Like most, looking at everything all together there are a few things I’ll have to adjust and some things I wish I did differently all together. The biggest issue with this suit is upper mobility and it comes from the chest piece being too large. It’s nothing that needs to be redone immediately but down the road I would like to remake the chest piece smaller and possibly cast out of foam. Enjoy the pics and comments welcome!