3D printed H3 Mk6 armor

Status
Not open for further replies.

marscreature

New Member
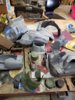
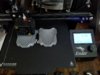
New build, a friend is slowly printing and mailing me parts and sent me a spare spool of filament.. Hope to finish before November 1.
Print models created by MoeSizzlac.
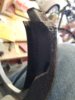
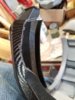
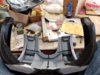
I have found that using a soldering iron on 3D prints works very well for welding the pieces together, I got the idea from this video.
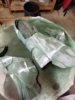
After putting on the shoulder pieces I realized my head is too wide to fit... going to wait for the rest of my prints before deciding to cut the weld I just did or not...

20180927_191731_resized.jpg


20180927_191826_resized.jpg


20180927_191836_resized.jpg


20180927_191848_resized.jpg
 
are you printing in pla or abs?

just be very careful i used a similar method of 'welding', i used the friction method it lasted about an hour of normal movement and crack. i found that the welds that werent in dead centre of the part of my body lasted due to lower stresses
 
are you printing in pla or abs?

just be very careful i used a similar method of 'welding', i used the friction method it lasted about an hour of normal movement and crack. i found that the welds that werent in dead centre of the part of my body lasted due to lower stresses
Using PLA+.
Using a soldering iron gets it hot enough to melt into the print where I feel friction welding only is hot enough to melt the filament and just holds pieces more than bond them.
I also am planning on 1 or 2 layers of fiberglass on the inside to ensure the durability is there.
 
Im keen to see how you have progressed on your print. PLA was gonna be my first option for my torso
 
Im keen to see how you have progressed on your print. PLA was gonna be my first option for my torso
Unfortunately haven't progressed at all, still waiting on the prints to be shipped to me... should be here within a week though.
 
Back in June bought a 3D printer, had some parts I was obligated to print before Halo parts. All parts needed for my H3 Mk6 armor are printed. Theighs and shins are done, working on the rest now (pictures are from a week ago).
May print a helmet since i'm not entirely happy with the cast one I bought years ago, so I cut Rainyfire's helmet on thingverse into 5 pieces instead of 8 to fill more space on my Ender 3 Halo 3 Mark 6 Helmet by marscreature
 

Attachments

  • 20190806_194129.jpg
    20190806_194129.jpg
    1.8 MB · Views: 425
  • 20190806_194141.jpg
    20190806_194141.jpg
    1.3 MB · Views: 414
Last edited:
Finished printing the last chest piece on my Ender 3 Pro and started putting it together. Back piece is a good color contrast example of "welding" pieces together with extra filament and a soldering iron, opposite side taped to hold it in place.
All the extremity pieces are 99% done with sanding.

20190824_205231.jpg20190824_205205.jpg20190824_205200.jpg20190824_140255.jpg20190824_140231.jpg20190824_092055.jpg
 
Last edited:
Chest tape test fits well. I had to cut the bottom middle area a little so I could breathe better, was tight on the sides of my rib cage when inhaling. Going to use sticky back velcro to hold the chest and back pieces together.
Also, forgot to print the hand pieces, so those are printed now.
Very excited about how everything is finally coming together.
 

Attachments

  • 20190825_152347.jpg
    20190825_152347.jpg
    2.1 MB · Views: 427
  • 20190825_152336.jpg
    20190825_152336.jpg
    1.4 MB · Views: 414
  • 20190825_164307.jpg
    20190825_164307.jpg
    3.6 MB · Views: 414
  • 20190825_143032.jpg
    20190825_143032.jpg
    723.6 KB · Views: 426
  • 20190825_142919.jpg
    20190825_142919.jpg
    692.7 KB · Views: 426
  • 20190825_152329.jpg
    20190825_152329.jpg
    3.4 MB · Views: 402
Last edited:
Just a word of experience: sticky back velcro doesn't stick super great. You'll want to reinforce it somehow by either super gluing the velcro down or supplementing it with an additional attachment method, such as snaps or clips.
Thanks, I'll think of something to reinforce it with.
 
Been busy and it's hard to get time to work on this, also I forget to take more pictures when I do.
Wood filler, Sandable Filler Primer, and sanding the Torso, which is the last part before I start putting it together for wearing.
Helmet needs work too, want to add a 2nd layer visor for the 3d H2/H3 visor look, and add lights.
Printer was empty so I printed the H2 BR, sadly won't likely find time to finish it before Grand Rapids Comic Con in November since all my focus is on the actual costume/armor.
Link for BR: Halo 2 Anniversary Battle Rifle by TheApropalypse
20190902_165057_resized.jpg20190902_165116_resized.jpg20190904_172304_resized.jpg
 
Finally got around to making the top layer of the visor, I have a nice gold visor and was going to just put this clear on top, not sure if I want to paint over it or not so I don't ruin the viability.
Top is Acrylic/plexiglass, kinda fragile when bending, the top part snapped off as I was separating it from the top blue protective sheet.
Middle is Styrene and would have been perfect, except I had to snap part off the edge of the sheet to fit it on my cutting machine and slightly cracked the edge doing so.
So far, I would definitely recommend Styrene sheets over Acrylic.
Bottom is my paper trace from my helmet that I scanned as a reference.
Also attached are the Halo 2 visor images I referenced. (Yes I know this is an H3 build but eventually I want to convert it to H2.)
20191008_075213.jpg
akin-bilgic-halo-masterchief-02.jpg
download.jpg
 
Also attached are the Halo 2 visor images I referenced. (Yes I know this is an H3 build but eventually I want to convert it to H2.)

Just so you know, the visor isn't the only difference between halo 2 and halo 3. There's some differences around the neck area, the nose area, the buttom jaw plates, the amount of vents etc.

Oh no. I think this has become an addiction for me :O
 
Just so you know, the visor isn't the only difference between halo 2 and halo 3. There's some differences around the neck area, the nose area, the buttom jaw plates, the amount of vents etc.

Oh no. I think this has become an addiction for me :O
Would you be willing to make a list of the differences? I am only aware of the few obvious ones like the hand and ankle pieces and the visor was just something I happened upon.
 
Would you be willing to make a list of the differences? I am only aware of the few obvious ones like the hand and ankle pieces and the visor was just something I happened upon.


Oooh! Now that's a challenge.

Well *Insert shameful plug* I made a halo 2 3d printable helmet that you can print yourself *End shameful plug*

You could prob compare those two in the area of the helmet.

If I could probably describe it, the halo 3 is a fatter, sharper model, whilst the halo 2 is a skinnier but smooth model (rendering/textures make it appears as thus)

If you look at my interpretation of the halo 2 helmet (Which I basically expanded upon the existing halo 2 asset) and compare it to Moesizzlac's Halo 3 model (Which from my eye, seems extremely close, if not, derived from the original low poly halo 3 model) you can see some staggering differences

1570763791508.png


As you can see, they're completely different shapes. That's because, for halo 3, the master chief model was made from scratch rather than using the halo 2 model.


I'll cover the armor differences in the next post.
 
Last edited:
Prob the best I can compare right now. You need a sharp eye to see the differences upon first glance.

This is written in context of halo 2 vs the latter, halo 3.

I'll start from bottom to top.

Feet- have 5 shield projectors, 4 in halo 3. Model switches from round to flatter. has vents. Toe cap changes colour from gunmetal to iron.

Leg armor- near same, but different dimensions because of a different model. Texture also different. Notice massive scratchs below kneeplate?

Thighs- Shield projector is not on a raised plate like on the halo 3 one. Shield projector is also a shorter length and fatter but longer and narrower in halo 3. Thigh plate is slimmer in halo 2 but ends flares out to the top in the Halo 3 one.

Codpiece- It's more curved in halo 2. Halo 3 has a flatter style.

Hand plates- you already know

Forearms- halo 3 is more detailed, textures show more raised and weird smaller shapes such as the opening of the cuffs.

Torso- More form-fitting in halo 2- halo 3 more bulkier, more raised plates. Notice the breast plate? the shield projector/nipple area? Its a cut out notch in halo 3 but it's just an indent in halo 2. Look at the plate outlines, they all start and end at different angles.

Biceps- halo 2 smooth- halo 3, raised plates.
 

Attachments

  • masterchief-comparison.png
    masterchief-comparison.png
    202.7 KB · Views: 369
Status
Not open for further replies.
Back
Top