3D printed mkVI build (Citruspers)

Citruspers

Member
Update: if anyone doesn't want to scroll all the way to the end, here's a little update how things are going:

chest detailing.jpg
BR breacher paint.png
cortana chip painted.png

bubble shield silver.png
LEDs lit front.png


-----

Hi everyone,

I'm Citruspers from The Netherlands, 31 years old and been a Halo fan for a long time (I'm no stranger to hauling CRT TV's for a system link LAN party, lol). I've obviously played the games and have read most of the books. Favourite game is a toss-up between Halo 3 (finale) and Reach (storytelling/presentation), favourite books are probably the Karen Traviss series.

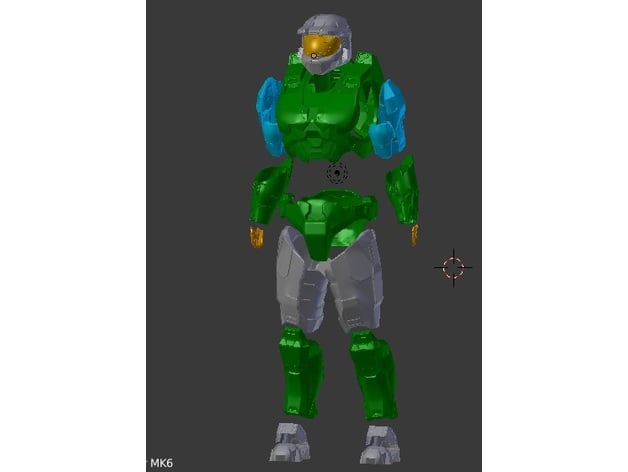
I've been dabbling with making a Mjolnir costume for years now, starting out years ago with a paper/pepakura model and a massive amount of filler putty. After that, the project had been on ice for a few years until the Halo TV show came around. Disregarding the flaws, their depiction of spartan armor got the itch going again and I found myself low-key 3D printing some parts of Moe Sizzlac's mkVI armor set.

Then Castlefest came around again (finally!) where I walked around in my first (and last-minute) Skyrim cosplay and the reactions I got really motivated me to pursue my Mjolnir armor further.

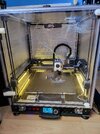
So that's where I'm at now, my printer (a Voron 2.4 300mm) is busy cranking out more parts as I type this. I'll update this post to become a proper build log, but for now I'm excited to join the community, have a chat and share experiences. :)

Links to files used:


Plasma grenade, Cortana chip, BR75: Get more from OddWorks on Patreon
 

Attachments

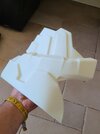
  • 20220810_152553.jpg
    20220810_152553.jpg
    269.7 KB · Views: 150
  • 20220810_152631.jpg
    20220810_152631.jpg
    444.4 KB · Views: 160
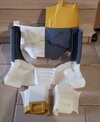
  • 20220810_152729.jpg
    20220810_152729.jpg
    252.6 KB · Views: 144
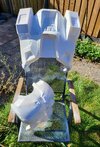
  • 20220810_152744.jpg
    20220810_152744.jpg
    174.9 KB · Views: 152
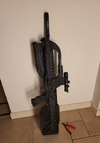
  • Battle rifle assembled.png
    Battle rifle assembled.png
    1.4 MB · Views: 30
Last edited:
Hello Dutch neighbor! Great to see our European 405th getting bigger. Looking forward to progress on your Mjolnir.
Glad you got to start making it. Sometimes gotta wait for that perfect time :D
Thanks Reclaimara! You're from The Netherlands as well then? If yes, I'll probably ask you some questions about suppliers if that's alright :)
 
Oh no I live in Germany currently but I'm like 30min away from Netherlands so we kinda are neighbors.

Ah I see! That's indeed pretty close though :)

I'm getting somewhere with the armor now!
Mjolnir WIP.jpg

Right now I'm thinking about adding buckles to the areas marked in red, seems like the easiest solution for getting the armor on and off? Possibly with some magnets to keep things aligned properly.
armor cuts.jpg


Open to suggestions though!

EDIT: maybe some criss-cross shock cord in the center at the back to allow for some flex when putting the armor on...
 
Last edited:
Well, we're getting somewhere!
I applied a coat of polyester varnish on the armor which definitely helped get rid of some (most?) layer lines, though I probably should have filled the gaps first...oh well. Time to let the first coat of primer dry and then it's filling and sanding time....hopefully the polyester coat won't give me too many problems :D
 

Attachments

  • chest first coat.jpg
    chest first coat.jpg
    959.1 KB · Views: 119
Last edited:
Well, the answer is definitely: gap fill first, varnish later. It kind of gums up when sanding, so not ideal. Lesson learned I suppose, but I'll try to work around it for now :)
 
My FDM printer is being a bit difficult at the moment, so I figured I'd experiment a bit with helmet detailing.

I have some transparent UV resin for my MSLA printer and a pretty good technique for getting transparent prints out of it, so I designed a couple of lenses for the mkVI helmet :)

Smooth on the left, ridged "wideangle diffuser" on the right:
Lenses.jpg


Mounted:
lenses mounted.jpg


Lit:
Lenses mounted lit.jpg


I know the wideangle lens detailing isn't really canon (I think they're clear or perhaps very lightly frosted in-game), but imho it looks pretty neat. I'm still perfecting my technique and trying to think of different designs, but once I get everything in order I'll see if I can upload them somewhere.
 
Your build is looking great so far I can't wait to see the rest of your journey to the final product. 3D printing is a great way to get a good backbone to build on although all the elbow grease is in the finishing work. It's also where you will really see all your hard work pay off though so keep at it! Also what issues are you having with you FDM prints?
 
Your build is looking great so far I can't wait to see the rest of your journey to the final product. 3D printing is a great way to get a good backbone to build on although all the elbow grease is in the finishing work. It's also where you will really see all your hard work pay off though so keep at it! Also what issues are you having with you FDM prints?

Thanks! And true about the finishing, when I did my dragon priest mask I figure 90% of the time went into sanding, priming, sanding, priming and so on. But the finish when coating it with paint was very much worth it!

As far as print issues my Voron was just being a bit difficult, it had some layer shifts and eventually I had a cable that broke inside the drag chain. It's fixed now, I just haven't printed any more parts recently.

I'm also debating switching to PLA+ given that temperatures here in The Netherlands don't really hit that high, and I'm coating the armor parts with some epoxy anyhow. ABS seems like an unnecessary hurdle at this point.
 
I've been using eSun's PLA+ for a while now and have been quite happy with it. Definitely much better than the stock Creality PLA that I was using
 
Thanks! And true about the finishing, when I did my dragon priest mask I figure 90% of the time went into sanding, priming, sanding, priming and so on. But the finish when coating it with paint was very much worth it!

As far as print issues my Voron was just being a bit difficult, it had some layer shifts and eventually I had a cable that broke inside the drag chain. It's fixed now, I just haven't printed any more parts recently.

I'm also debating switching to PLA+ given that temperatures here in The Netherlands don't really hit that high, and I'm coating the armor parts with some epoxy anyhow. ABS seems like an unnecessary hurdle at this point.
That's good to hear, during my builds almost all of my print issues were coming from supports failing or printer components beginning to wear out and I was pretty new to 3D printing so I didn't know what to watch out for so it led to extra unnecessary finishing work.

Glad to see that you got it fixed and are just getting ready for your next step! I personally just use PLA myself and I haven't had it be an issue yet. Although I have ordered in some PETG for testing because I've been told it is a good material to work with in the finishing process so I wanted to try it out.

I've thought about using ABS, but I don't really need weather resistance or components that are that tough. I also use an Ender 3 and a CR10 S5 so I don't want to take the time to build a box to vent the fumes out for safety if I don't really need the positive aspects of the material. Like you said an unnecessary hurdle.

Oh yeah, 3D printing is its own challenge. I've been doing it since 2016-2017 and it still can be a headscratcher sometimes.

I'm not a huge fan of PETG, I initially chose ABS because it's easier to sand and won't deform/warp even when left in a hot car. And yeah, if you don't have an enclosure, don't even bother trying to print ABS, you'll just have a bad time :)


EDIT: I spent some time filling and sanding the back armor panel and.....it fell off my chair while drying, causing it to split back into segments.....urgh.
 
I just got into 3D printing earlier this year due to the prices of small printers becoming economical and knocked out my ODST in about 2 months of working on it. It was quite daunting for the first few parts but I have finally gotten a feel for my small Ender 3. Due to my comfort with a small scale FDM printer I stepped up the the massive S5 so I would be able to not have to print and join 8 parts to make a wearable helmet. It just estimated to take a month to print half a chest piece in one go.

That's terrible your panel fell and split. Are the pieces at least salvageable? Also are you using any thing to back your seams to reinforce them so they aren't as fragile while you work on the visible face?

Half a month for a print, lol. I don't think I'd dare leave it on for that long, or risk a layer shift halfway through. But yeah, trying to match up joints is a pain. In my own designs, I usually try to include locators (holes and pegs) that makes lining things up easier, but I don't think there's an easy way to do so with pre-split files...

Luckily the pieces are salvageable, it split across the lines where I superglued, so not that surprising really. I reinforced the front panel with epoxy and fiberglass but the latter is so nasty to work with I'm now contemplating ripping up an old T-shirt to use as reinforcement instead (with the same epoxy of course).

BTW, I just saw your ODST build, it looks fantastic. What's your finishing technique like, to get rid of the layer lines? The usual bondo -> sand -> prime routine?
Thank you! I tried to do the keying method for lining up the joints and it didn't work to well for me, so I ended up just sanding them off and using super glue and doing it by hand. As for finishing, I sanded my parts down some first a bit, not enough to break through the skin and details, but enough to lower the lines down a bit. Next I'll superglue the components together and back the seams with a plastic epoxy. It typically dries to touch in 30 minutes. After that dries I will use bondo spot and glazing putty, it's a one part putty that air dries within about 10 minutes and sands like powder. Sand it using a medium grit sandpaper (240ish grit) down until it where you like it leaving a few pits here and there for weathering detail. Then, I'll rinse it off and let it dry. Next I paint it with a sandable fillable primer. Spray like 2 or 3 coats on it and let it dry. Next I'll wet sand it with 800 then 2000 grit sand paper and its ready for final paint. I use a respirator when applying and sanding the spot putty because its just as nasty as regular bondo.

I'm glad to hear you don't have to reprint your parts. I 100% recommend backing your seams with some epoxy. None of my parts failed or broke on my seamlines. They only stress fractured on the prints structure.
 
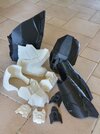
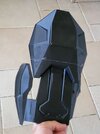
Well, I'm making some progress. I coated both insides with epoxy to reinforce the seams and spent some time sanding, filling, priming the front.

Armor sanding.jpg


Right now I'm waiting for (hopefully the last application of) filler to dry and after that it should be sanding, sanding and more sanding, and eventually coating.

I'm considering using epoxy for the absolute top layer as it should both offer protection, add some gloss AND if it's thick enough give a slight offset shimmer like energy shielding. Thoughts?
 
Well, I'm making some progress. I coated both armor parts with epoxy and spent some time sanding, filling, priming the front

View attachment 324062

Right now I'm waiting for (hopefully the last application of) filler to dry and after that it should be sanding, sanding and more sanding, and eventually coating.

I'm considering using epoxy for the absolute top layer as it should both offer protection, add some gloss AND if it's thick enough give a slight offset shimmer like energy shielding. Thoughts?
That's some great finishing work, I can't wait to see what it looks like once you've finished!
 

Your message may be considered spam for the following reasons:

If you wish to reply despite these issues, check the box below before replying.
Be aware that malicious compliance may result in more severe penalties.
Back
Top