A055 Recluse Ambition Build (Micro Update, 24 Feb 21)

Status
Not open for further replies.
On that same page I linked, there is instructions on how to make your own vibrating table......I used it and made my own about 8-9 years ago....and it still works. I put mine on top of 2 large sponges which allows the table to vibrate w/o shaking itself off my work space but still allows the material to release the bubbles.
 
Okay, not a big update, but I just realized for Option #1 for my body cooling idea (one my previous mass post within this thread), is that the hydration pack that I listed I totally didnt notice it had a slit in the middle to help with keeping it flat even after melting. In addition to allowing me to have a drinking tube, you can buy an attachment that would allow you to refill the pack with chilled water while wearing it. [LINKED HERE]

Examples from the listing.
1601772325934.png
1601772384303.png


I believe that this would be a viable idea for more actively cooling myself down periodically by making a detour to get water from a vender (or someone handing them out for free) or even a tap that has cold water. Any thoughts or ideas to further expand on this?
 
Update, I'm now starting to understand how to use substance painter and in the next couple of days I am going to try and have a painted reference of the armor's color scheme.

Additionally, on a personal note, not really relating to the design or aesthetics to the armor, I now plan on making this armor in memory of my grandfather who had recently passed due to covid-19. He was a large influence on my life and rescued me when I need help. He was one of the few people that really inspired me to be creative and to keep learning from the things I enjoy. I'm not sure exactly where, but I'm looking at placing a small "In memory of Robert Becker" as a tribute to him. This is no longer just an Ambition build to me, now it's something more, and I will get this done to the best quality that I can do.
Sorry for your loss brother, if you need any help or anything let me know ok... i want to see you finish this... so your grandfather looks down and says thats what im talking about..
 
Update, I'm now starting to understand how to use substance painter and in the next couple of days I am going to try and have a painted reference of the armor's color scheme.

Additionally, on a personal note, not really relating to the design or aesthetics to the armor, I now plan on making this armor in memory of my grandfather who had recently passed due to covid-19. He was a large influence on my life and rescued me when I need help. He was one of the few people that really inspired me to be creative and to keep learning from the things I enjoy. I'm not sure exactly where, but I'm looking at placing a small "In memory of Robert Becker" as a tribute to him. This is no longer just an Ambition build to me, now it's something more, and I will get this done to the best quality that I can do.
So yeah, painting the suit of armor in substance painter has been proving to be significantly more difficult that I've been expecting, with the amount of fine details, I might instead talk to a friend to just work the colors in another program for some high quality visuals.
 
MICRO UPDATE


------------------------------------------------------------------------------------------------------------------------------------------------


Design
Alright, so I'm looking at the helmet system a bit more in terms of how my head will fit into it realistically and make it so the hinge system is not a thing, as it wouldn't work due to how some parts would collide and prevent it from opening properly. So I'm looking at either two designs of making it open and close up. The blue/teal line is for the simplest and easiest to achieve way of opening up the helmet and slipping my head in, but my worry is that I wont be able to fit in while wearing FPV goggles when slipping the helmet on, so the orange line would be for greater area to slip into (wider) and I would just use magnets for both ideas to keep it closed while being worn. With the orange line I would need to first slip it to the side first before pulling back, as I guess there are some higher friction parts that would act as "locks" and prevent it from sliding straight back.
1614186504267.png


Vision
I've been looking around further for how to see outside of the helmet, primarily the camera system. I've been having issues on finding places that would give instructions on how to hard wire an FPV drone camera while also being able to give it power and keeping it running safely for a long period of time. I was looking at the Revenant1988 's gungnir helmet build when I saw that Vichtz made a comment on how he found a solution for the camera system on the gungnir helmet, and that due to the short range within the helmet only being a few inches away at the most, no antenna would be needed and that it would just be easier to use it wirelessly. Meaning, that I would be fitting the kit that would power and transmit it all within the helmet (a life saver for complexity), on the downsides of costs.

I think I've settled on a camera system like this one right here, Similar to the one Vichtz suggested. [THIS IS A LINK TO IT HERE]

1614187390381.png

With something this small and sensitive, I'll likely be adding in a conformal coating to help protect the electronics from sweat.

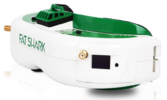
Additionally, for the vision system, I'm going to splurge and get some Fat Shark FPV goggles, likely the HDO goggles that they have available and just get the adapter that allows me to use 18560 batteries to power them so that it's easy to swap out the batteries quickly for the duration of the con. But what's an extra 200 USD when you're already going to have to spend a few grand, am I right? ;-;
1614188162348.png
1614188229182.png


Keep in due mind that I'll be having a battery for both the goggles and the camera inside the helmet, so it might be a tad bit cramped, hopefully I wont have to have wires running down my back again an into the under suit somewhere.

Under/tech suit
Okay, so I've been looking around for how to most reasonably work on the tech suit, I'm currently at getting a custom-printed zentai suit of the H5 tech suit and then use that as a template to go over my DTD and slap on/adhere the 3d molded parts directly onto the zentai suit, which would work as a great outline/guide to know precisely what goes where. [Here's a link to the referred image below]

As an example, but just not in these god-forsaken colors.
1614188893103.png
1614188932547.png


Modeling
Yeah, I'm still looking around for some modelers to get this to be near perfect as humanly possible.

Thanks for checking out the small update on planning and the design, stay safe!

Take care y'all,
TheTAB01
 

Attachments

  • 1614188113258.png
    1614188113258.png
    431.5 KB · Views: 118
does the caddx nebula nano work with fatshark fpv goggles? whenever i see specs about it they always seem to say "works with dji" or "kit for dji" I'm attempting a gungnir build and i've decided to get a pair of fatshark goggles, and the caddx nebula seems pretty good, but i'm not entirely sure if it'll work with a fatshark. ( I know very little about drone fpv kits and such, all my knowledge stems from researching)
 
Status
Not open for further replies.
Back
Top