Anyone have a young child (5-6yo), whom they created a kit for?

Status
Not open for further replies.
Ok perfect! I was hoping that was the case, but your response confuzzled me!

One last thing…as I have yet to mess with it but once things are saved, and patterns created..how do you save the files to print like elsewhere so to speak?

I noticed they save as a DSX file but not sure what the normal method of “Saving patterns and printing patterns” at say an Office Depot” is handled.
Unfortunately I don't know much about that. The DSX file, I believe is just for Armorsmith and wouldn't be able to be opened without the program.
 
Unfortunately I don't know much about that. The DSX file, I believe is just for Armorsmith and wouldn't be able to be opened without the program.
Gotcha. I think I figured out that bit, looks like it's merely a matter of printing to PDF, then going and getting that file printed if I can't directly print the file from my PC.
If you have a moment this weekend or something, I wouldn't mind getting with you briefly to figure out the armorsmith pattern stuff that seems to be confusing me, since you're a user as well.

What is still confusing me, is the pattern pieces off in La La Land, seem to be still patterns used in the model but not applying onto the paper for the pattern..

For example: The Foam Glove

Below is a picture of the pattern I get, when creating said pattern from the foam glove.


But if you'll notice here, as highlighted in Red, this part of the glove doesn't appear in the pattern but appears way off in La La Land of the darkness..


Same with the below, where part of it shows but the other does not..


Do I need to drag the highlighted pieces sitting in La La Land, onto the generated pattern? Or are those highlighted pieces in La La Land as you said, not needed.

I'd have assumed they were needed since it appears they are part of the model, but I could just be examining it wrong.
 
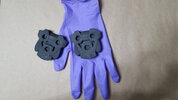
For the hand plate, the part in red and the circles are thrown into la la land cuz, you can just trace the pattern cut those areas out and just offset the foam to create the depth that is in the plate. 20170823_213831.jpg
Pretty much all the bits thrown off to the side are bits that would normally be used to create depth with the original Pepakura pattern. Since you're working with foam and is a 3 dimensional material, you don't need those bits. To create depth and different leveled details, foam can be either offset or layer different thicknesses of foam to achieve the desired effect.
 
For the hand plate, the part in red and the circles are thrown into la la land cuz, you can just trace the pattern cut those areas out and just offset the foam to create the depth that is in the plate. View attachment 323203
Pretty much all the bits thrown off to the side are bits that would normally be used to create depth with the original Pepakura pattern. Since you're working with foam and is a 3 dimensional material, you don't need those bits. To create depth and different leveled details, foam can be either offset or layer different thicknesses of foam to achieve the desired effect.
Alright that's what I thought, since it more so looked like the pieces missing in the generated pattern were more so bottom layers that can be added by a plain piece of foam underneath.

Just wanted to make sure I wasn't missing anything....I THINK that answers all of my questions at this point now, outside of learning the key to the different cut/fold methods like the mountain creases and valley's etc...Which aren't terribly difficult it seems.
Trying to figure out now where or how to flip/mirror the patterns in Armorsmith too if possible, like for the right thigh, to flip to be a left thigh
 
Last edited:
terribly difficult it seems.
Trying to figure out now where or how to flip/mirror the patterns in Armorsmith too if possible,
It's been a while since I was last on Armorsmith. There should be an option/drop menu that gives you the option to mirror the part on your dummy.
It won't flip/mirror the actual templates though. That is for you to flip and trace and mark the part to indicate its left or right side.
 
It's been a while since I was last on Armorsmith. There should be an option/drop menu that gives you the option to mirror the part on your dummy.
It won't flip/mirror the actual templates though. That is for you to flip and trace and mark the part to indicate its left or right side.
Ok, wasn't sure if the mirror function would also flip the template. Found the mirror function though at least!

This weekend I'm going to re-make his Avatar, and start placing the files to see how it looks.

He wants a costume now, which means closer to DragonCon I may have to make him a new one due to the chance he'll grow some
 
I wouldn't be worried of making it bigger - even if in worst case it turns out little too big next year, your son will keep growing so potentially could wear it in next 2 years before outgrows it.
 
An update, now that I had some time to unwind and measure the kid.

His avatar looked a little goofy to me, especially his big head but after measuring it 3 times...He does in fact have a big head I guess!

Fits look as best as I'll get, for a 6yo that weighs 35lbs heh

Using the MK6 Foam Armor Files..I only attached one of each piece since I can easily just mirror the pattern in Armorsmith when I get to that point, so less work for me during mockup lol


Status
Not open for further replies.
Back
Top