Spartan214
Member
Could you possibly go into a little bit how you're using the elastic/and velcro? i.e. attaching etc.
I am currently researching information (mostly safety) on the 3.5oz compressed gas duster cans. My theory is to mount them (2) into the exterior Rogue chest piece, and connect them to a rubberized chemical resistant hose that runs through my Exo-suit and next to my arterial areas. When the can is sprayed while inverted, it releases a gas which is extremely cold, which would then travel down the tubes and cool my body. My prediction is that I would have to perform two or three blasts (5-10 seconds each) every hour or so to help alleviate overheating. While performing my research so far, I have found that this is actually a documented and authorized use for this product, so I will not be breaking any laws! As if the "canned air police" roam around a convention! But just the same, I like to stay within the laws as they are generally there for a reason.
If my continued research and/or test runs give me an undesirable result, I will have to look into another option. This would most likely be some sort of radiator/fan cooled recirculating water system... ugh, more electronics = more batteries which equals more weight and higher costs!
Could you possibly go into a little bit how you're using the elastic/and velcro? i.e. attaching etc.


Excellent thread here EVAcura! I've read, scoured Youtube, and lurked for the last week before joining and had planned to make an EVA suit using this very method; only thing is that I got the idea from a video on Youtube that left me hopeful but largely uneducated. Your presentation of the information, execution, and results vastly outshines that experience and I'm much more confident now - thanks for sharing your learning with us!
As far as cooling goes any chemical-safe rubber, surgical tubing, PVC, or vinyl will not exchange heat (or cold) well enough to matter. The closed-loop liquid system with water would work best if you are set on a closed-loop setup - water being 70 or so times more dense than air and able to be passed through thinner material overall, like bladders that would be more suitable to actually exchanging heat in those critical places. Here again, though - weight mounts up fast to the tune of 8 lbs per gallon of water, much less the water-handling system, heat sink, and power supply.
Of all of your options I would bid a ram-air setup would be the most efficient. There are no shortage of low/ optimized voltage high-efficiency, high-speed electric fans to be had and these could pull air out of as well as push air into a network of ventilated hoses. Plus, this option has the least amount of moving/ working parts, and likely would have the least amount of overall weight. Best of luck to your build, though - this suit is coming along with panache!
This is AMAZINGBALLS!
Your foam work baffles me. Makes me want to just give up even attempting to get better at foam work haha. (Don't know why). On a serious/wishfull-thinking note, I would pay money to take a course in college that teaches me this stuff. I know you've been sharing info, but I learn so much faster and more efficiently when there's somebody there to stop me when I'm doing it wrong, and show me the right way.
At a loss for words, and feeling hella inspired.
Superb work, keep it up!
")


Very very very nice work man
Looks awesome.
Hey, when you going to finish your Light Rifles!?!? I keep going back to your thread, but all I keep seeing is your armor progressing (quite awesomely at that!). Also, if you don't mind sharing, what file did you use for them?
lets see I think he's wanting to get his armor done before the rifles evakura, I mean cosplay isn't cosplay with out some armor.


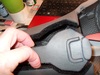
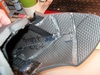
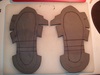
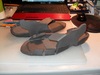
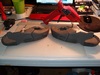
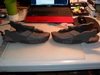
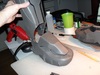
If you want to reinforce the soles of your boots, car matting might go a ways to helping out, particularly if you can get one with a grip that resembles the grip on the sole. Some strong glue to hold it in place wouldn't go amiss, but that seems like a good way to ensure you've got hard-wearing soles that won't let you down on smooth floors.
Evakura, My son uses a product called "Shoe Goo" on his shoes to be able to continue wearing them and it lasts a long time. I've considered using it to create soles for Halo boots but just never got that far yet. It would bond readily to EVA and add a long lasting sole.
Two questions for you, first being, How are you going to stop the "arch" of you boot from crushing down and possibly tearing the boot apart while stepping down on it? My last question is, Can you make a video showing us how you are heating and bending some of those complex bends on you boots? Pictures are great but a video log would be outstanding and I'm sure others would agree much easier to understand.
Your build is amazing on you armor and weapons and extremely inspirational.
If I could vote any higher than 5 stars on your build I certainly would..