- Member DIN
- S090
Well, I really failed at finishing this build thread, so.....here it is.
To answer the question of weird paint reaction....I think it was the automotive reacting with the plastidip. Didn't seem to have a problem when I put it right on the foam so....I dunno.
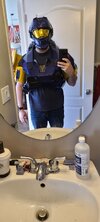
Anyway, I finally finished the suit, more or less. I changed to a 3D printed chest piece which I scaled WAY too big... my undersuit became black tactical work pants and a long sleeve black shirt. This all happened because of the LA event, kinda kicked me to see if I could cobble it together.
Things I finished in 2ish-3 weeks before flying it to LA:
-Cut a new seam on the already painted chest rig to make it easier to get into, added clips to it, and the underarm pieces
-Added foam and fake leather "seals" to the chest around the arms.
-Installed straps and clips on shins, thighs, and shoulders
-Installed the gold visor
-Installed fans in helmet
-Glued in magnets for the little bottom piece of the helmet that was made removable to get my head in
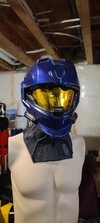
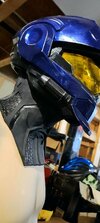
-Cut neck seal bought from WelshCreations and installed velcro
-Installed LEDs and LED covers in chest
-Stole "Armor Ability" module from SpartanProps which is a little small for this but worked well...
-Wired LED Wifi chip and programmed lighting effects/scenes to be controllable from handler's cell phone
-LEDs run off a 5v usb battery bank. (With a solar panel just to feel cool...but it's hidden inside anyway)
-Glued boot pieces to old boots, even though they aren't quite right...but time crunch.
-Added a tactical leg pouch to left leg. Bought on amazon and weathered with paint brush
-Printed the missing "ab plate" for the bottom of the chest in flexible filament then DROWNED in plastidip
-Printed out decals on clear sticker paper and begged them to stay on long enough for the event...most did
-Installed acrylic tacpad screen I had done as a test with some little "pendant LEDs" I use for necklaces (Meaning I dumped a ton of hot glue into the tacpad and held them in place while it cooled....poor mans light diffuser for the "power" light though)
Things I didn't do:
-Proper inner thigh pieces
-Undersuit/ab and spine pieces
-helmet mic system
-Sleep
Things I did, and regret:
-Dropping my helmet after the event and cracking it
Next steps for this guy will be:
Minor:
-Print a better belt/cod so it doesn't look like a 5 year old crayon drawing
-Fix or replace boots
-Repair travel damage (ie. on my Commando Shoulder)
-Install Mic System
Less than minor:
-Replace thighs
-Reprint chest in normal person size so I can put my hands together and hold a weapon
-Possibly remake helmet after the dropping incident, but also because it could probably be a touch bigger
Anyway, here are the pretty, pretty photos we all came for:
Neck Seal
Oversized test fit
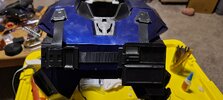
LED tests
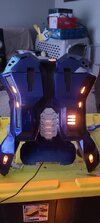
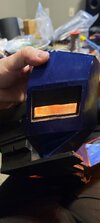
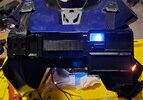
Fans and TPU Ab Plate
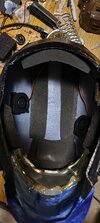
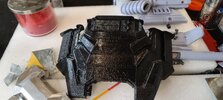
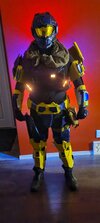
First suit up minus boots
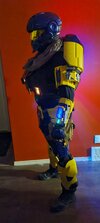
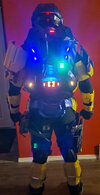
Stickers and Final Checks
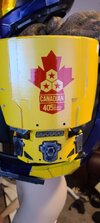
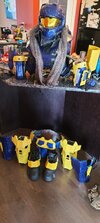
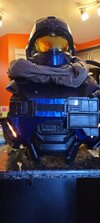
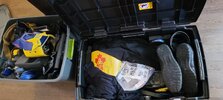
Packing for Flights
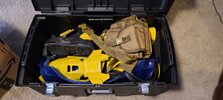
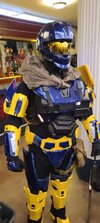
At the event

THE DAMAGE

Wrap up with one of my favorite shots from the red carpet with TurboCharizard :

To answer the question of weird paint reaction....I think it was the automotive reacting with the plastidip. Didn't seem to have a problem when I put it right on the foam so....I dunno.
Anyway, I finally finished the suit, more or less. I changed to a 3D printed chest piece which I scaled WAY too big... my undersuit became black tactical work pants and a long sleeve black shirt. This all happened because of the LA event, kinda kicked me to see if I could cobble it together.
Things I finished in 2ish-3 weeks before flying it to LA:
-Cut a new seam on the already painted chest rig to make it easier to get into, added clips to it, and the underarm pieces
-Added foam and fake leather "seals" to the chest around the arms.
-Installed straps and clips on shins, thighs, and shoulders
-Installed the gold visor
-Installed fans in helmet
-Glued in magnets for the little bottom piece of the helmet that was made removable to get my head in
-Cut neck seal bought from WelshCreations and installed velcro
-Installed LEDs and LED covers in chest
-Stole "Armor Ability" module from SpartanProps which is a little small for this but worked well...
-Wired LED Wifi chip and programmed lighting effects/scenes to be controllable from handler's cell phone
-LEDs run off a 5v usb battery bank. (With a solar panel just to feel cool...but it's hidden inside anyway)
-Glued boot pieces to old boots, even though they aren't quite right...but time crunch.
-Added a tactical leg pouch to left leg. Bought on amazon and weathered with paint brush
-Printed the missing "ab plate" for the bottom of the chest in flexible filament then DROWNED in plastidip
-Printed out decals on clear sticker paper and begged them to stay on long enough for the event...most did
-Installed acrylic tacpad screen I had done as a test with some little "pendant LEDs" I use for necklaces (Meaning I dumped a ton of hot glue into the tacpad and held them in place while it cooled....poor mans light diffuser for the "power" light though)
Things I didn't do:
-Proper inner thigh pieces
-Undersuit/ab and spine pieces
-helmet mic system
-Sleep
Things I did, and regret:
-Dropping my helmet after the event and cracking it
Next steps for this guy will be:
Minor:
-Print a better belt/cod so it doesn't look like a 5 year old crayon drawing
-Fix or replace boots
-Repair travel damage (ie. on my Commando Shoulder)
-Install Mic System
Less than minor:
-Replace thighs
-Reprint chest in normal person size so I can put my hands together and hold a weapon
-Possibly remake helmet after the dropping incident, but also because it could probably be a touch bigger
Anyway, here are the pretty, pretty photos we all came for:
Neck Seal


Oversized test fit


LED tests


Fans and TPU Ab Plate


First suit up minus boots


Stickers and Final Checks


Packing for Flights


At the event

THE DAMAGE
Wrap up with one of my favorite shots from the red carpet with TurboCharizard :


