Fallout New Vegas Ranger but Dumb (& 3D Environment)

Status
Not open for further replies.

PlanetAlexander

RMO
405th Regiment Officer
Member DIN
S018
It felt weird not writing a build thread for this costume, plus I know it's great for feedback, so here I am.

For a while I've been wanting to make a Fallout NV NCR Ranger. Not only is the uniform hecking awesome, but it's also lightly armoured so it's easy to walk around in. Also, the ranger is one of three reasons I originally bought myself a leather trench coat years ago, so time to put it to good use.

Oh, but if you know me, you know I never like to do things the same way others have approached it. I like to do what no one has done before, or at the very least, put my own spin on it. So, this costume is gonna be a big meme.

What am I thinking? A ranger full of references AND cel shaded. The patterns I'm using are from Ashen Warrior Props, and I've adapted them to
a. Fit the Advanced Riot Gear that can be found in the Divide (as this is what my character wears in-game, or did before mods tore it apart)
b. Better suit my construction style, including how I approach foamsmithing and my access to a 3D printer.
c. Add details that weren't originally on the templates

To entertain your thirsty eyes, here is where I'm currently up to. Or at least, the last pictures I took.
NCRPortrait1.jpg
DSC07632.JPG
DSC07631.JPG


DSC07594.JPG


I've actually finished everything but the strapping on the chestplate, so I'll have to include pictures of that soon.

One small accessory I'm including with this is my 3D printed modular bandolier, which can also be found for sale here. Shameless self plug achieved.
The components were themed around the card suits, to tie into the Vegas theme.
DSC07555.JPG


Currently I've got some clear plastic sheets and red one-way window tint to hopefully make the visor, which I'm looking forward to. I'm also in the middle of making another gag prop that hopefully some nerds here will understand.
 
Last edited:
Anyone here a fan on Life of Brian? That was a trick question, I know you're here somewhere.

That film is FULL of references I can lovingly rip off and incorporate into my chestplate (You see that? I just ripped off a Monty Python rip off joke. Boom.)

It's a wee bit dusty as you can tell by the strips I left in the middle when checking how dusty it is.
DSC07968.JPG

The first reference in the top right hand corner is actually a combination of the two franchises. On the NCR Ranger chestplate, there's the fist symbol with a ring around it. This same symbol is used in the People's Front of Judea from Life of Brian (don't you dare talk to me about the Judean's People Front).

The second one I was already long beaten to - the latin phrase "Romanes eunt domus" can be seen on the walls of Cottonwood Cove with the Wild Wasteland trait taken. But it's such a befitting quote, how could I not again infringe on intellectual property reference it? I of course wanted the incorrect grammar for that quote, to suit the story of how little the Rangers would know the Leigon.

The chest piece is split into three - bottom row, mid/top row and neck guard, held together with velcro. This is for easy transportation. Individual parts have been held together with nylon to give everything some flexibility. As mentioned before, I just need more nylon straps to make the strapping system.
 
Woo, suit up time!
FullTest1.png
FullTest4.png

FullTest2.png
FullTest3.png


I added a new piece of graffiti to the helmet; "Hey, Blondie!" This is in reference to what Tuco calls "The Man With No Name" in The Good, The Bad and The Ugly. I wanted to have "See you soon, idiots" on my wrist instead but deemed it too innapropriate for places with kids (like cons and general public). But now instead I've got another great quote to go on my armguard!

The visor is a sheet of clear PETG with red window tint on it. I then used oil paints to dirty up the edges and smudged my finger along it to look like I've been wiping the dirt off.
DSC08057.JPG


Oh and also a cheeky wink because a friend wanted a video:

 
Every time a friend buys some merchandise from a convention, I'll have to say "You're gonna carry that weight".
Got the armguard mostly finished up, just have to adjust the belt strapping to fit properly and look a little tidier. Really bad photos, BUT I did just buy a light reflector to help improve portrait photography!
DSC08071.JPG
DSC08073.JPG

DSC08074.JPG


For those who may not recognise it, "See you desert cowboy..." is a reference to the anime Cowboy Bebop. The protagonists being bounty hunters (and the cowboy references), I thought it appropriate. The original saying from the show is "See you space cowboy..."
 
So, alongside the cosplay, over the uni holidays I'm planning on making a 3D environment to insert myself into! I've done something similar with my Borderlands 3 Psycho Mask and Halo CE Magnum, but instead of using photogrammetry I'm planning on using a cutout image of the cosplay, and making it fit into the scene as best as possible. I love environment design and props/cosplay so I'm doing my best to mix it all together and get the best of both worlds (yes, I did seriously just quote that). I also plan to animate the environment.
I'm going to use Blender for all of it. Gonna try and make what textures I can from scratch, using procedural textures in the node editor, but I can see myself using some from Texture Haven or HDRI Haven (which is where this HDRI comes from). I'm taking the project slow whilst I can, and starting out by sketching the environment layout, and creating procedural textures/models with what I can.

To start, here's a texture for a rusty crane which will sit in the foreground. The same (though slightly different) texture and same model structure will be used on building frames in the background too. Here's the node setup too - it may look messy but I think that's just because I haven't tidied it up!
CraneMatRender1.png
CraneShaderNodes.PNG


Yesterday I was working on some textures for background buildings, including a basic concrete texture and glass panels. Because they will be in the background, I wasn't worried about perfecting them.
BuildingMatRender1.png
 
So, here's where I'm at so far with the Divide environment. Not done yet, but pretty happy with how it has turned out so far, though I'd love to hear some constructive feedback. The final scene will look a little different overall because I'll be optimising the scene so it doesn't take 20 minutes to render a single frame at 4K.
If anyone is wondering how I did a particular element, I'm happy to share some knowledge!
TestRender5.png


Oh right yea, nearly forgot, I've got a cosplay too haven't I? Well, some tactical gloves came in the other day which work alright I think, we'll see when I do another cos-test. The "gag prop" I've been working on is coming along and right now I'm just waiting on some oil paints to dry. Thanks to TillXValhalla I got an idea of how I can make the spurs jingle jangle jingle, just gotta find some nice cowboy boots before I can start 3D modelling the spurs.
 
DSC08238.JPG


Did a suit up today just to check everything before a first photoshoot in this costume next week! Unfortunately though this picture doesn't show anything new, though I did re-outline the black marks on the helmet.
So a note about that - in the past I did all my black "cartoonish" outlines with black paint and a liner brush. On the bright side, it leaves a really nice smooth stroke (because it's being dragged) that makes it look drawn. However it takes a lot longer to achieve then using a caligraphy marker, which can do it really quickly. The drawback to the marker is that you don't get the smooth brush stroke, so minor shakes in the hand show up. So there's a tradeoff each way - just be sure if you're using the marker to spot test it first, as the solvents in the ink may tear up the paint (which they didn't for me, using acrylics).

I got the gloves in, and for weathering I thoroughly bathed them in some moist sawdust that was around after chopping up some scrap timber. It gave it a real nice dirt colour, don't ya think? I also then outlined some of it.
DSC08252.JPG


Oh and finally, the gag prop is finished! I had a few ideas on how I was gonna incorporate the "Big Iron" reference, and in the end settled on something less subtle that I'm sure some nerds will pick up. It's attached to my belt via two nylon straps with magnets that attach to the book, and is hollowed out with a magnetised bottom to allow me to store things such as business cards.
DSC08251.JPG

DSC08256.JPG
DSC08257.JPG
 
First photoshoot! My friend missymoo.creative and I went to a few different places so we could get pictures of each other's cosplay. I only got pictures at the one spot though because the beach wouldn't work so well for this theming.

DSC07369.jpg
DSC07373.jpg
DSC07376.jpg
DSC07377.jpg
DSC07382.jpg
DSC07387.jpg


What I was going for with that last one was something like this:
steamuserimages-a.akamaihd.jpg


Oh, and I've also got a skit I'll be sharing when I get it sorted ;)
 
Can you get a small wooden snake and put it in a lead pipe? Technically a tunnel snake... attach that bad boy and you've got another reference.
And if I put it in my boot, I can add ANOTHER cowboy reference... double reference... yee haw!
 
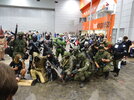
First con debut! I went down for the Saturday of Brisbane Supanova and had a great time. Even made the news!

And had some fun shenanigans with this mob:

DSC08361.JPG

DSC08348.JPG

CP: rainbow_n_roller

DSC08357.JPG

Fighting Roman copycats since the Fourth Era

DSC08352.JPG

Spartan: deathcustard

DSC08363.JPG


Only two minor costume failures during the day. The glue on the faux leather in the wristband came off so it got taped back on - even that came loose but it held up for long enough. The magnets that attach the book to the belt loops also came off and stuck to the book, fortunately that was easy enough to carry 'round and hold up for photos.

ALSO... that environment animation? It's now on display at my uni's gallery for an exhibition, and I'll be sharing it here soon enough too!
 

Attachments

  • DSC08355.JPG
    DSC08355.JPG
    4.1 MB · Views: 176
Last edited:
And now for the aformentioned animation:

Apparently I didn't mention how I was trying to use photogrammetry on my cosplay so I'd have a full model to animate, so I won't mention how I spent $10 and a beer to get a month's subscription on PolyCam and invited my friend over with a LiDAR scanner in his phone to scan me. Cool program, just wasn't able to capture enough geometry to make it work. Also asked a family member to do it the usual way and take photos all around me (even had to pin up the jacket), but to no avail.

So... what I did in the end, with the gallery exhibition bolting closer, is using one of the photos posted earlier, cut out the background, flip it to match the lighting in the scene, then flip the text so it is the right way around (and blend it back in). Then I made some adjustments to its brightness/contrast, saturation and temperature to make it fit in the environment.

Within Blender, I subdivided the plane that the image was texturing, and added bones to parts like the head, arms and body. Using weight painting I could control how much of the body was to be affected by each bone. I then animated them very simply to give the body a little life.

In the environment itself, you can see the clouds flying over the Divide, dust blowing in the wind, the glow of the nuclear warhead throbbing and a slight camera shake.

And that's stage one done and done! As I've said, I've got plans to add more dumb stuff to my cosplay, which hopefully I'll make/add before the next con in March 2022.
 
Status
Not open for further replies.
Back
Top