Status
Not open for further replies.
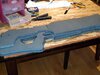
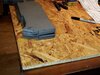
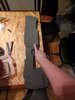
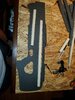
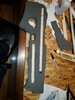
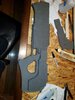
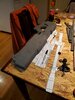
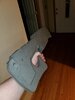
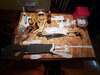
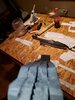
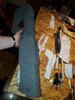
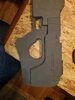
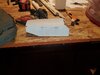
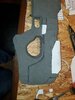
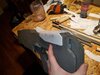
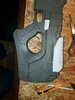
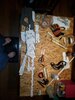
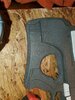
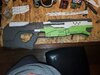
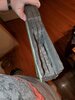
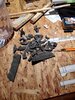
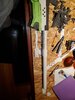
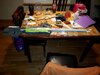
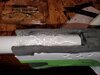
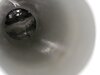
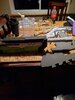
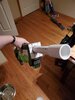
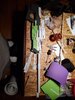
This is the end of the first day. 4 layers thick for the front part of the frame, and the buttstock. I will probably work on the magazine tomorrow and maybe the bipod. Weather or no everything gets glued and sanded is limited to the funds unfortunately. Worst case scenario the craft foam PVC pipe and dowel rods will be purchased friday and build will continue next week.
 

Attachments

  • 14.jpeg
    14.jpeg
    857.3 KB · Views: 156
  • 15.jpeg
    15.jpeg
    972.8 KB · Views: 153
  • 16.jpeg
    16.jpeg
    1,015.4 KB · Views: 158
So decided to reinforce the frame so it doesn't just wiggle and bend
 

Attachments

  • 20200909_202252.jpg
    20200909_202252.jpg
    2.1 MB · Views: 147
  • 20200909_204615.jpg
    20200909_204615.jpg
    1.6 MB · Views: 152
So I've sanded the outer edges to be mostly flush. Have alot of ugly edges from the process but most will get covered with craft foam or smoothed out with quick sealant. Only wiggle room we have at the moment is actually in the grip. Just means we won't be able to 1 hand it much. It also has a good heft to it as well.
 

Attachments

  • 20200909_211024.jpg
    20200909_211024.jpg
    6.8 MB · Views: 143
  • 20200909_211138.jpg
    20200909_211138.jpg
    1.1 MB · Views: 154
  • 20200909_211351.jpg
    20200909_211351.jpg
    6.4 MB · Views: 149
  • 20200909_213533.jpg
    20200909_213533.jpg
    1.6 MB · Views: 142
  • 20200909_213551.jpg
    20200909_213551.jpg
    1.7 MB · Views: 140
So started some of the detailing. Got the cheek pad on the stock and what appears to be the magazine release not 100% both done in the white foam i got from Michael's specifically labeled as cosplay eva foam and got to say for those little pieces it worked pretty well. It works like craft foam but still has a solid thickness to it. Unfortunately too thick to do the detail work on the frame of the body past the trigger assembly.
 

Attachments

  • 20200910_015845.jpg
    20200910_015845.jpg
    1.7 MB · Views: 134
  • 20200910_015903.jpg
    20200910_015903.jpg
    5.1 MB · Views: 142
  • 20200910_024620.jpg
    20200910_024620.jpg
    1.8 MB · Views: 143
  • 20200910_024627.jpg
    20200910_024627.jpg
    5.8 MB · Views: 143
That's wrapping up day 2 as its to cold out side to dremmel out the grips and stock to make them rounded and i dont have craft foam yet. After those 2 are done its just hollowness out a spot for the magazine so I can reload it with magnets holding it in place. A very obvious over site not cutting that out of the 2 inner pieces now. But you know what they say about hind site. After that its just barrel gastube gas block muzzle break and the scope.
 
Great job TillXValhalla. Looks very smooth and clean. Cut lines are nice and straight......you might want to focus a bit more at those cut lines that intersect with others. It looks like once you heat treated it, it pulls in a funny direction. This is caused by the cuts being at a different depths.....I know....nit picking.....only because it looks so damn good, I would want it to be perfect for you....and its all in the details.
 
Great job TillXValhalla. Looks very smooth and clean. Cut lines are nice and straight......you might want to focus a bit more at those cut lines that intersect with others. It looks like once you heat treated it, it pulls in a funny direction. This is caused by the cuts being at a different depths.....I know....nit picking.....only because it looks so damn good, I would want it to be perfect for you....and its all in the details.
100 % did not know that was a thing. I really appreciate the heads up. I will keep that in mind for all future scoring lines. Also thanks for the praise. This is my first prop thats this big or really this many parts.
 
Sorry forgot to take progress pics for this step, kind if just fell into the groove. This is the first time I have ever worked with craft foam. Its not the best but I'm certain the paint job will fix or hide many of the blemishes. Seeing as how my girlfriend now wants one too this one may go to her as the prototype because she is really likening it.
 

Attachments

  • 20200913_025824.jpg
    20200913_025824.jpg
    6 MB · Views: 147
So its come to my attention I suck and did not leave room for the barrel. So I hollowed out about 5 inches deep for it. Notes for next time.
 

Attachments

  • 20200913_041807.jpg
    20200913_041807.jpg
    1.6 MB · Views: 135
  • 20200913_043516.jpg
    20200913_043516.jpg
    2.4 MB · Views: 139
And this lady and gents is where I call it at the end of the 3rd day of actually working on it. Next up will be the rails on top. Finishing up the detail on the frame. Then the gas tube and gas block and muzzle break. Stay tuned for next time.
 

Attachments

  • 20200913_051026.jpg
    20200913_051026.jpg
    1.7 MB · Views: 136
Status
Not open for further replies.
Back
Top