Update 2/08/2021: Armor done! here's the link:
 www.thingiverse.com
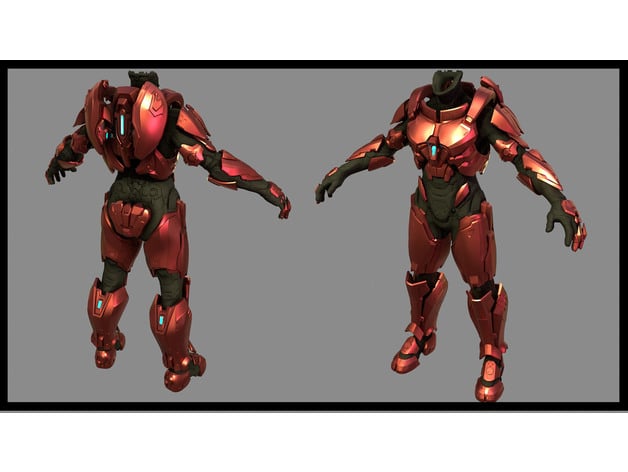
So since I'm starved for filament right now, to keep myself busy I started work on my conversion of the Hellcat armor which is one of my favorites in Halo 5. I through it would be cool if i wont through if I shared my workflow and process. Similar to the Mark IV armor I an using a rip of the in game mesh, this time provided by "Jeffw773", and converting it into a Hi-Res mesh suitable for 3D printing and cosplay. This armor is pretty simple in design however it does have its quirks and has some interesting design elements. Right now I'm just breaking down the game mesh to see what I need to remodel and how I'm going to break it down for printing and construction.

To start I import the model into Maya and sent my workspace scale to inches, then I scaled to 5'10". Since the model doesn't have a head I removed 6" bring it down down to 64" from the neck to account. Next I apply the texture to see the detail and then chop the model in half.

Fist thing I noticed was that the thigh was clipping and looked really tight. So I slightly scaled it up along the X and Z axis. There is a lot of padding that is exposed as part of the thigh plate, normally I would remove this but in this case since it is a big part of the piece, I'm leaving it and will sculpt texture on it later. Then I when look at the back, it's broken up in a bunch of pieces with tiny separated details. I group them up to be combined later and get rid if anything that's to hidden or small to really matter. Some of these piece will need to be remodeled due to just bad geometry.


The side was just one big piece that makes up both the front and back. This will need to be separated and will merge some of the pieces with the front and back plating. The shoulder has an interesting quirk as this doesn't actually touch the shoulder by design. I got two ideas to deal with that. One is to leave it as is and then you can just put a shoulder strap that connects the front and back to preserve the aesthetic. Second, model a new piece that will rest against the shoulder and make it more modular for other armor.


One thing I'm thinking about is the big lights on the front and back. For the more electrically inclined I want to make separate covers that can be printed with like a transparent filament. should someone want to add lights with out cutting a big hold into these areas.

That's all I've got so far, Let me know if you guys have any ideas that I can incorporate or that would simplify anything.
Halo 5: Guardians Hellcat Armor Build by BreakerboxCosplay
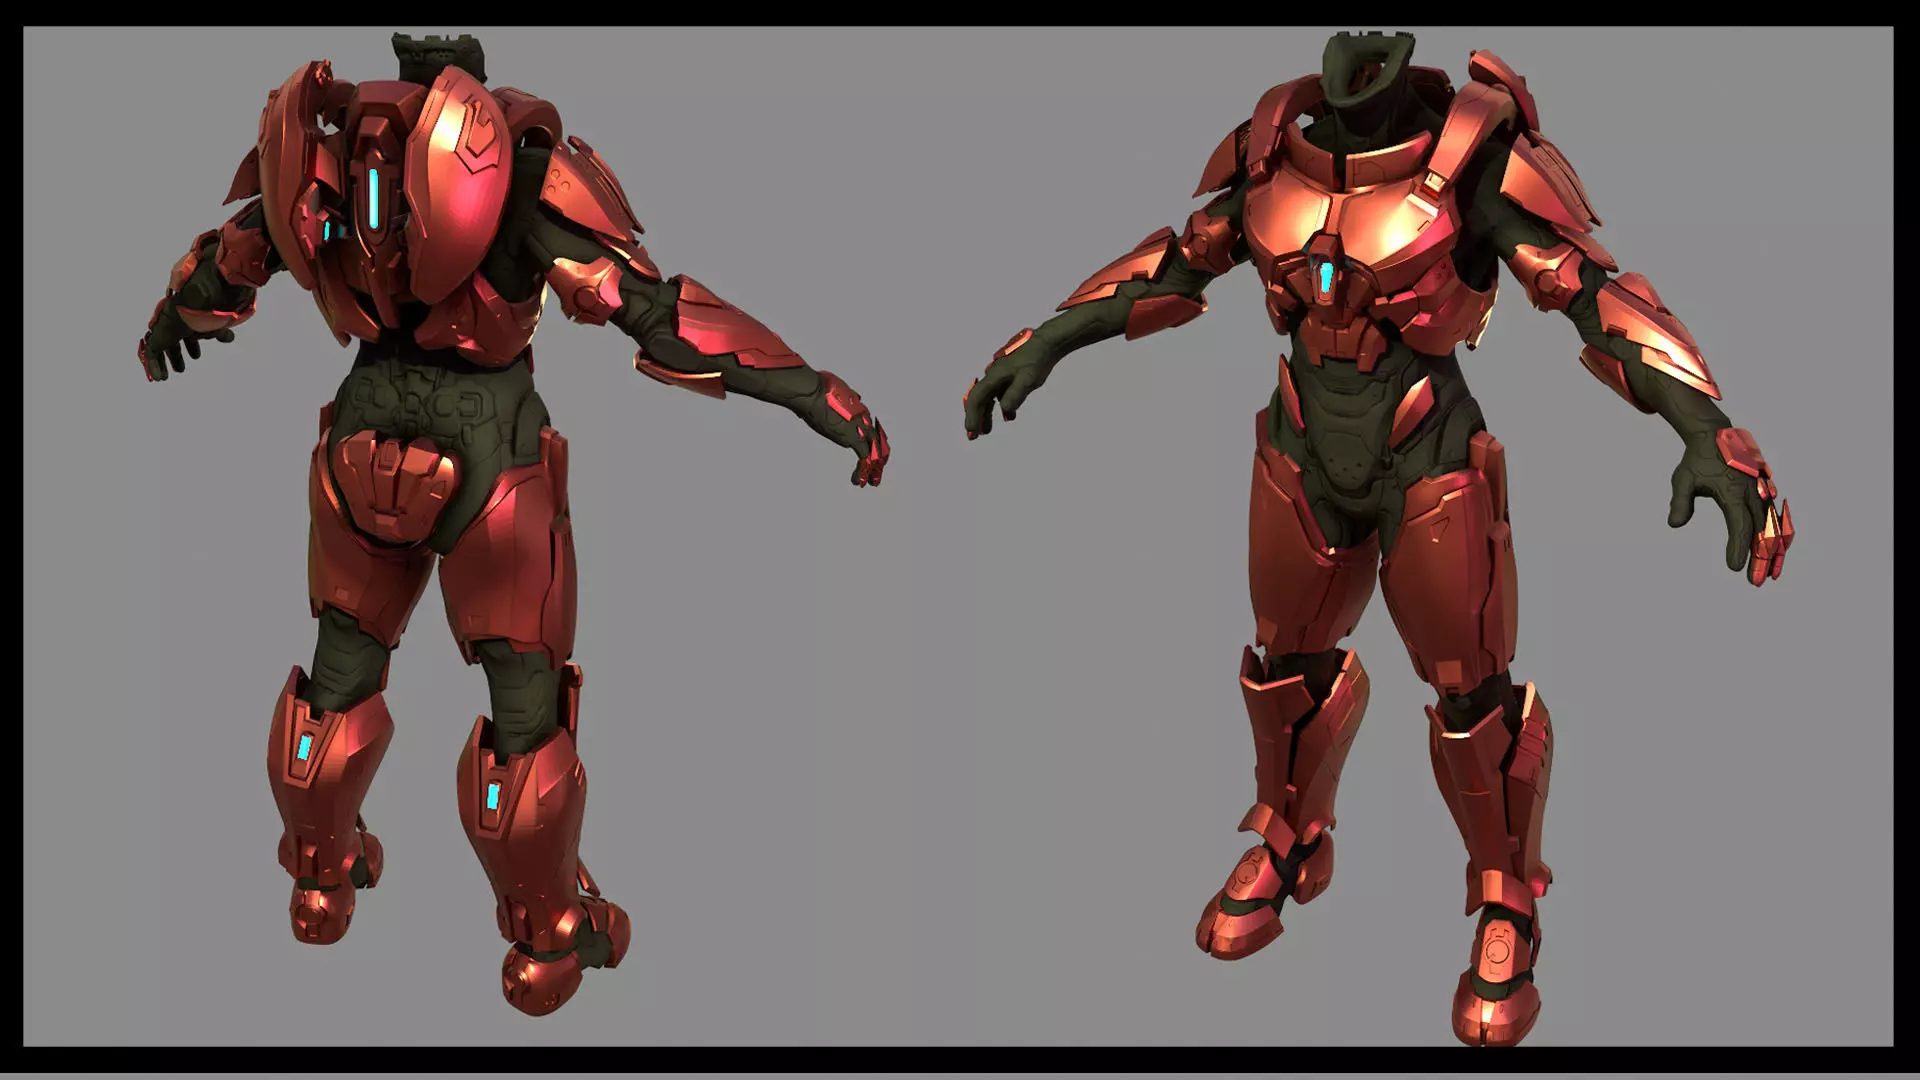
Update 04/07/2021: Fixed freaky issue with "Pauldron" causing slicers to encase the model in supports regardless of settings. The Halo 5 Hellcat Multiplayer armor. Armor is scaled for 5'10" and modeled for the lefts side so mirror right. I opted not to make the helmet as its design doesn't have...
www.thingiverse.com
Halo 5 Guardians Hellcat Armor | 3D Print Model
Model available for download in OBJ format. Visit CGTrader and browse more than 1 million 3D models, including 3D print and real-time assets
www.cgtrader.com
So since I'm starved for filament right now, to keep myself busy I started work on my conversion of the Hellcat armor which is one of my favorites in Halo 5. I through it would be cool if i wont through if I shared my workflow and process. Similar to the Mark IV armor I an using a rip of the in game mesh, this time provided by "Jeffw773", and converting it into a Hi-Res mesh suitable for 3D printing and cosplay. This armor is pretty simple in design however it does have its quirks and has some interesting design elements. Right now I'm just breaking down the game mesh to see what I need to remodel and how I'm going to break it down for printing and construction.
To start I import the model into Maya and sent my workspace scale to inches, then I scaled to 5'10". Since the model doesn't have a head I removed 6" bring it down down to 64" from the neck to account. Next I apply the texture to see the detail and then chop the model in half.
Fist thing I noticed was that the thigh was clipping and looked really tight. So I slightly scaled it up along the X and Z axis. There is a lot of padding that is exposed as part of the thigh plate, normally I would remove this but in this case since it is a big part of the piece, I'm leaving it and will sculpt texture on it later. Then I when look at the back, it's broken up in a bunch of pieces with tiny separated details. I group them up to be combined later and get rid if anything that's to hidden or small to really matter. Some of these piece will need to be remodeled due to just bad geometry.
The side was just one big piece that makes up both the front and back. This will need to be separated and will merge some of the pieces with the front and back plating. The shoulder has an interesting quirk as this doesn't actually touch the shoulder by design. I got two ideas to deal with that. One is to leave it as is and then you can just put a shoulder strap that connects the front and back to preserve the aesthetic. Second, model a new piece that will rest against the shoulder and make it more modular for other armor.
One thing I'm thinking about is the big lights on the front and back. For the more electrically inclined I want to make separate covers that can be printed with like a transparent filament. should someone want to add lights with out cutting a big hold into these areas.
That's all I've got so far, Let me know if you guys have any ideas that I can incorporate or that would simplify anything.
Last edited: