How to Mold using (Gel-25)

Status
Not open for further replies.

RYNO 666

Well-Known Member
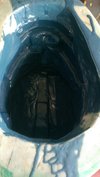
Hey everybody I'm excited to share this video of my helmet being molded via Brick in the yard.
u8e9ezug.jpg

I wanted to give back to the community I've so graciously taken from. Everyone on the 405th has helped me immensely over the year that I have been working on papercraftmodels. This is my attempt to show yet another variant on the mold process. This method is a good method for exactly what I'm doing and that is to create a harder version of my paper craft model so that I can expand with details made of the same materials and have five or six different variant copies of the same helmet.

Also most of the sources on how to mold a helmet are not near as comprehensive as they could be. My good friends at Brick in the Yard mold supply and I together have created a tutorial video that shows you guys a cheaper and more rapid alternative to the very expensive molding methods available right now.

This is a brand new technology and material that has just come out. I hope all of my fellow 405th members enjoy this tutorial.

Thank you to all who watch.

Helmet Mold Tutorial: Gel-25 1 Piece Mold Halo He…: http://youtu.be/qEPQBtYJKsQ

Sent from my 831C using Tapatalk
 

Attachments

  • u8e9ezug.jpg
    u8e9ezug.jpg
    144.2 KB · Views: 219
Thanks, it's not much to look at. I mainly wanted to show a novice can do great things with the right tools.

Sent from my 831C using Tapatalk
 
I think I learned things from the tut because I'm a noob. I have seen other mold tuts that shows and teach much less.[emoji3]
 
I would never say that you are a noob. Also I think everyone learns something even if they watch the same thing twice.

Sent from my 831C using Tapatalk
 
I didn't mean that you said I'm a noob. [emoji1]
I mean that I'm learned much from your tut even if you say there was not much to Show.[emoji1]


Sry if I understand you wrong english is not my native language.

Sent from somewhere that is not home.
 
I meant that you don't have to call yourself noob. It was just lost in translation.

Sent from my 831C using Tapatalk
 
It's my anniversary with the 405th today ! Working on the second pull. Playing with colors.
e8ydy2a4.jpg
upe3avum.jpg
u2ahesam.jpg


Sent from my 831C using Tapatalk
 

Attachments

  • e8ydy2a4.jpg
    e8ydy2a4.jpg
    102.1 KB · Views: 221
  • upe3avum.jpg
    upe3avum.jpg
    131.4 KB · Views: 212
  • u2ahesam.jpg
    u2ahesam.jpg
    127.8 KB · Views: 229
I've always been curious about the molding process, primarily the part that wasn't covered in the video (actually pouring the cast). I've seen a few variations, ranging from just dumping the casting material in and swishing the mold around (either by hand or putting it into a framework with a spinwheel) to essentially mirroring the mold-making process by "painting" the casting material onto the inside of the mold. I feel that pouring would probably get into all the details better than brushing, but short of constantly rotating until it's dried, how do you keep the material from pooling in one spot and leaving other areas too thin?

Another thought I've played with in my head but don't know how practical/possible it would be is to have an "inner" and "outer" mold. The video shows what I would call the "outer" mold, something that holds the shape of the outside of the piece being cast. An inner mold would be a second piece stuffed inside the outer mold to fill up the "negative space" so to speak and thus make it possible to pour in the casting material without needing a great deal of swishing or rotating to get it where you want it to go. The "inner mold" would basically be what defines the thickness of the cast piece. I'm trying to think of how best to describe this and I'm not sure if it's making sense.

The second scenario you described sounds like injection molding. I worked for a company that made plastics and stuff briefly. I had to repair the machines that made spoons, cups etc. The use a cavity mold then compressed air to shoot plastics inside.

That's expensive to do.

Pouring in casting materials is easy. You can just keep pouring in and out product to keep it from pooling. But unless you have a fancy rotocast it will pool. However if you want subscribe to the videos and there's a resource for pouring a cast. It is very informative.
Resin Casting Tutorial: Skull Cast: http://youtu.be/hGoVXV86aFE
Sent from my 831C using Tapatalk

I was wondering if it would be possible to do something similar with the gel. For instance, after making and removing the outer mold, make a second mold on the inside, building up until it has a semi-smooth "bowl" shape to it, then form a plaster plug to help it hold shape, and add enough of a lip that it can rest on the outer mold without touching. Obviously this would necessitate air holes and at least one pour hole. I was just wondering if it was possible, as it could speed up the process of reproducing mounting studs, wire tracts, etc. on the inside of the piece that would otherwise have to be redone by hand (and thus would be prone to inaccuracies).
 
I think I see what you mean. I'm sure with enough brute strength and ignorance it could be done. I'm not sure how the benefits would pan out.

Slush casting when done right can come out very nice. I think if it matters the rotocast would be most cost effective. The results from rotational casting are pretty spot on.

Sent from my 831C using Tapatalk
 
Whether slush or rotational, it still only reproduces the exterior of the piece. I'm more curious about methods to reproduce any internal structure accurately and universally. Just to give an example, let's say I pepped a helmet complete with mounting brackets for an electronics kit and indentations in which to seat the bolts for mounting the visor in place. I can easily cast a copy of the helmet using the tutorial here, but all the internal mounting points and details would be lost. Even if I waited until the helmet was cast before adding these internal structures, if that helmet got damaged I'd have to replicate all that structure by hand, which again is prone to inaccuracy.

And the same goes for prop making as well. I've seen numerous weapon kits around that are basically just the shell, and I've seen electronics kits for these props that typically require having to cut holes and build mounting structures themselves. Being able to cast the outer shell and the internal structure would make it much more simple to add universal mounting points for the electronics kits.

I'm not trying to "ignorantly brute" my way through anything. I'm just trying to find a cheaper alternative to injection molding (as you said, it's an expensive process) so that the community as a whole can add another tool to their belt here. If it's not really a viable option, that's understandable, but please, say so without the belittlement. I'm just trying to find as many ways to lighten the workload of repetitive building. I know not everyone is in the same boat I am, having at least 20 different color schemes to the same armor configuration floating in their head and wanting to at least make a few of them to wear, and being able to cast a handful of copies for each piece and have one "internals kit" that can be universally swapped from one set to another without having to reinvent the wheel for each suit would save a lot of time and money, otherwise I'd need a new set of internals for each suit (more lights, more fans, more wire, etc.). But even if someone only wants a mold for the sake of casting replacements should something get damaged, being able to pull a "universal internals" kit out of the damaged shell and stick it into the newly cast piece without having to rebuild the inside all over again would have benefits. If nothing else, it could save a day or two's work and the tedium of trying to make it exactly the same (which is why casting was used in the first place, so we don't have to try to remake the exact same thing the exact same way). But again, if it's not really feasible, then there's nothing that can be done about it and butting heads over the matter won't change that. I'm just scratching around for the most efficient and yet still cost-effective methods available.
 
It's a Scottish expression Brute strength and ignorance. (Best said in a throaty accent.) It basically is a way of saying anything is possible with enough perseverance. I in no way was belittling you or anyone. If anything I was trying to express my own humble perspective on the matter and therefore speaking of myself.

Now I can understand your matter at hand better. If you were to Mold the inner workings of any prop you could definitely do this. Example if you have a complete positive to work on you can make stand offs and channels for wiring etc. I think it's worth figuring out.

My suggestion would make sure that it's sealed or made with components that won't tear off during demold. Maybe something like a smooth liner inside to protect complex pieces with stand offs directly mounted so as to replicate them as well.

The product is so forgiving that you can just stretch it right out of the cavity without tearing then you could make a nice access panel into the piece.

I love this idea. I'm imagining that you would need three steps. First mold of interior of positive without components. Second mold of interior with components. Lastly the exterior.
Then when casting you can make the helmet cast and inner shell using the liner you created.

Peace be with you Guardian.

Sent from my 831C using Tapatalk
 
My thought for the internal structure would be to construct it from fiberglass/bondo during the hardening/reinforcing stage. I figure that would give it the most stability and security as opposed to tacking something onto the finished piece.

Now, to see if I understand your suggested process correctly, the first and second molds would be combined to create an "inner shell" that would then be slid into the newly cast helmet (third mold)?

I'll run my thoughts by you and see if you, an obviously more experienced caster, think it's a viable method.Now, being that I am not an experienced molder/caster, I have no clue regarding the proper lingo or terminology, so hopefully I can get the concept from my imagination to yours without too much being lost in transition.

I'm thinking essentially a 5-piece mold kit. The video here showed a 3-piece mold kit, consisting of the soft main mold, and two halves that formed the hard outer shell that keeps the main mold from warping. What I'm thinking is, using the video as a reference point, once those three parts are set, complete with a matching flange on the hard shell halves, remove the clay build-up and replace it with a "washer" of sorts, essentially a ring with a few straws/tubes fed through it that will become the pour and vent holes. Could be nothing more than cardboard with the straws attached with glue/putty and coated with some saran/plastic wrap just so the molding gel (as well as the release agent) doesn't soak into it. The basic function of this piece is to provide the aforementioned holes and to create enough of a gap between the inner and outer gel molds that the clay build up (intended to extend the mold enough that the "rough edges" of the cast will be beyond the intended mold area) won't be rendered useless. With the first 3 pieces of the mold (from the video) and this washer in place, the entire inside (including the washer) would be sprayed with release agent, then the first of the two internal mold pieces would be made with the gel, being sure to get it fully into any groove, indentation, and around every stud and/or support strut, and build it all the way up to the top of the washer, which should sit evenly with the flange from the external mold. Straws should stick up a bit higher than that. The idea is to build this part of the mold up enough so that the inside of it it as smooth as possible. Once it sets, the fifth and final piece would be a plaster "plug" starting from the basin created by the inner gel mold, and build it all the way up and out to the edge of the flange, working around the straws to retain the air holes. Maybe a ring of saran wrap/tin foil should be made first to cover over the exterior gel and plaster so that the internal and external molds don't fuse together. Anyway, once the internal plaster mold/plug if set, pull it out, remove the internal gel mold, take off the external plaster halves and the external gel mold to get the washer and the part to be cast out. Honestly I'm not sure whether it's better to make sure the straws can be removed, or to just trim them enough that they won't disrupt the "buffer" created by the clay build up. At least one straw should be pulled out and the hole made large enough to pour through.

To make a cast, assemble the first three pieces as you normally would. Then insert the plaster "plug" piece into the cavity of the internal gel mold. The purpose of the plug is to keep the internal mold from collapsing/shifting during the casting process, and to make sure the internal mold is properly aligned. Once the internal mold assembly is together it can be bolted/clamped to the flange of the external mold to seal it (if the external gel mold extends out as much as the plaster, that will provide a perfect built-in gasket to seal it tight). The casting material can then be poured through the holes (tapping the mold frequently to help release any trapped air) until it's sufficiently filled (I'd assume between the pour and vent holes it would be fairly easy to see when the mold is sufficiently filled). Once the cast is set, unbolt/unclamp the flanges, pull the plug out, peel the internal gel mold out, remove the external hard shell, and peel off the external gel mold.

In addition to being able to reproduce internal structures, I would imagine that this method would also eliminate a lot of the "guesswork" or slush casting as well as the tedium of rotational casting, as far as getting a uniform thickness throughout the entire piece, as once it's filled, the mold is essentially complete.

Although thinking on it now, I can see one potential complication. With the majority of the casting material trapped between the two molds and the only air coming in from the vent holes, curing time could be rather lengthy. And I don't know what the probability would be for air bubbles to form inside the mold after the cast is poured. If there is a good chance of that, frequent tapping might still be necessary. Without having any experience I can't even hazard a guess to how big or even how likely a problem either of those might be. What are your thoughts on it? And if any clarification is needed on the concept and/or process (I know I'm not always the best at taking what's in my head and turning it into coherent speech) just let me know and I'll try to clear it up.

I'll attach a rough diagram I threw together in MS Paint just to give an idea of how it would all look together.
Mold.JPG
 
Yeah that's about right.
zy2utase.jpg

Pulled another cast. It looks like it's melting when I set it on top of the stove.

Sent from my 831C using Tapatalk
 

Attachments

  • zy2utase.jpg
    zy2utase.jpg
    211 KB · Views: 220
So I was looking at the site and I saw the price of materials. It seemed to be about the same as buying smooth-on materials. I see how a one piece mold could be easier to deal with, but is it really that much cheaper making it this way?
 
Depending on the deal you can work from Smooth On. I had $70 worth wrapped up in this mold from Brick in the Yard. I've priced many places and some where as high as $300.

There's tons of applications for this product and mold creation is just one.


Sent from my 831C using Tapatalk
 
Status
Not open for further replies.
Back
Top