- Member DIN
- S078
Time for update.
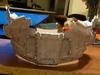
This is the status of the helmet:

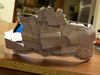
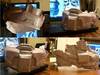
This is the butt piece after 3 layers of bondo and one of putty where needed (I also did some hole for future battle damage)

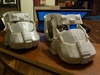
And the butt with the primer. No green paint yet since there are several details I want to add...

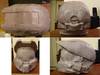
This is the status of the helmet:
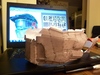
This is the butt piece after 3 layers of bondo and one of putty where needed (I also did some hole for future battle damage)
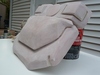
And the butt with the primer. No green paint yet since there are several details I want to add...

")