My Infinite Chief build thread.

Status
Not open for further replies.

JSLund

Member
Member DIN
S125
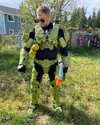
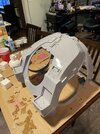
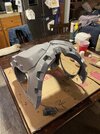
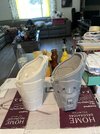
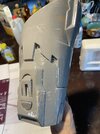
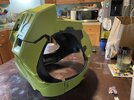
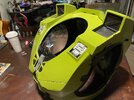
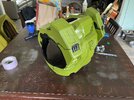
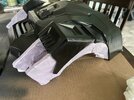
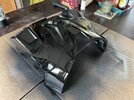
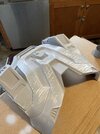
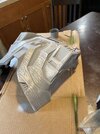
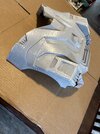
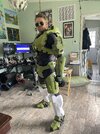
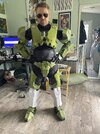
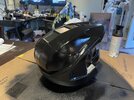
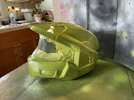
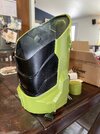
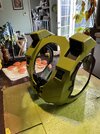
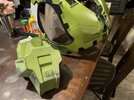
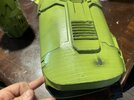
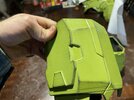
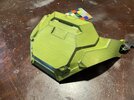
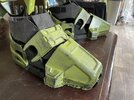
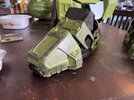
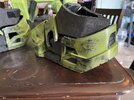
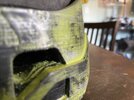
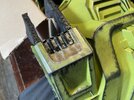
I wanted to share my journey building the Chief over the last year before meeting you guys. Please ask me anything as I will share over a series of several posts.

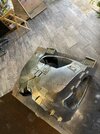
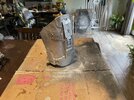
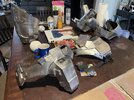
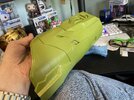
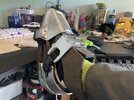
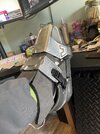
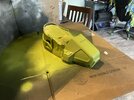
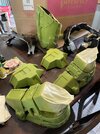
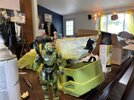
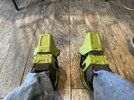
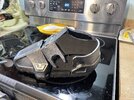
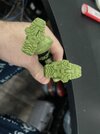
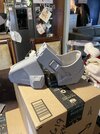
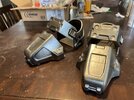
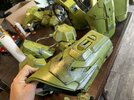
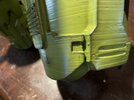
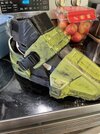
so here we go...the 3D print phase.
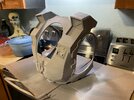
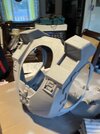
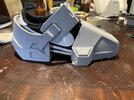
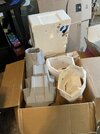
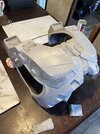
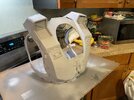
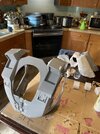
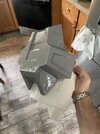
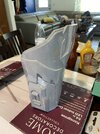
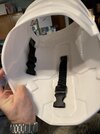
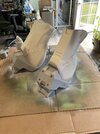
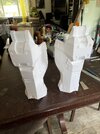
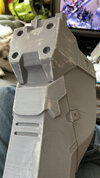
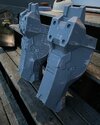
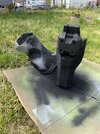
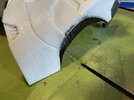
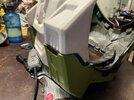
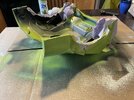
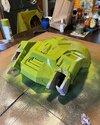
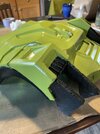
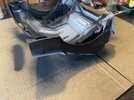
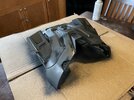
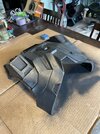
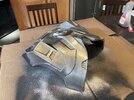
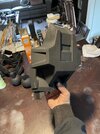
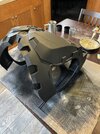
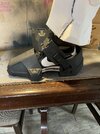
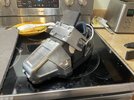
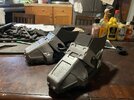
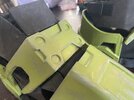
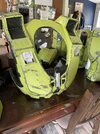
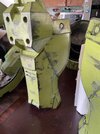
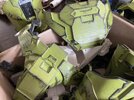
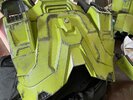
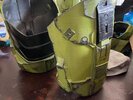
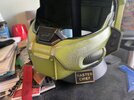
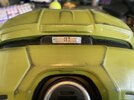
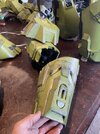
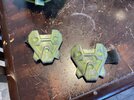
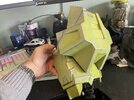
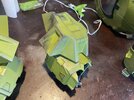
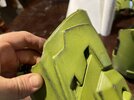
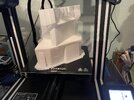
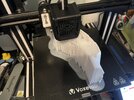
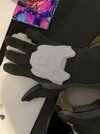
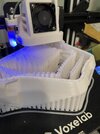
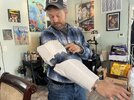
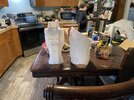
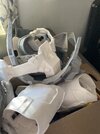
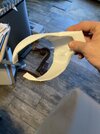
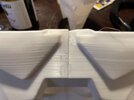
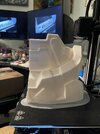
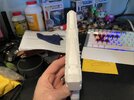
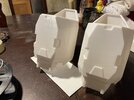
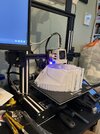
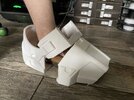
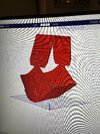
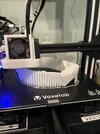
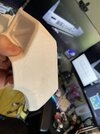
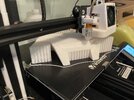
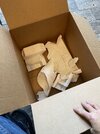
We use a Voxelab Aquilla for all the small parts and we use an Anycubic Chiron for the chest, back, and thighs.

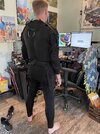
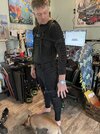
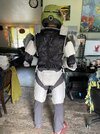
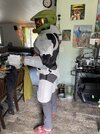
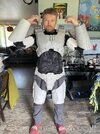
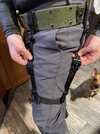
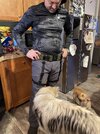
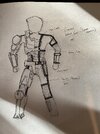
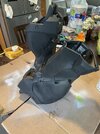
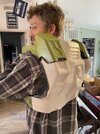
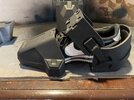
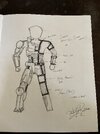
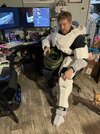
We started with some free files courtesy of thingeverse and I’m assuming the 405th. After printing chest and back panels we abandoned those for a set of paid files. During the print phase I designed and fit a strap suit based on the iron man cosplayers under-suit types. We also printed at 100 percent the first time to see the sizes of the parts. This took a lot of time but helped us with scaling later.

AMA and more to come!

We purchased these from DO3d.
 

Attachments

  • 6627A41A-ECAC-4DD5-8A41-029741B835D9.jpeg
    6627A41A-ECAC-4DD5-8A41-029741B835D9.jpeg
    1.5 MB · Views: 119
  • B34DCC35-1280-45A2-8BE0-BCC75A5A9A14.jpeg
    B34DCC35-1280-45A2-8BE0-BCC75A5A9A14.jpeg
    3.3 MB · Views: 108
  • 62BCEA17-239D-41D9-AE56-4E8B3882BDA8.jpeg
    62BCEA17-239D-41D9-AE56-4E8B3882BDA8.jpeg
    2.7 MB · Views: 99
  • 8FCC4FF4-08EE-4346-BFD0-103276931A0C.jpeg
    8FCC4FF4-08EE-4346-BFD0-103276931A0C.jpeg
    3.1 MB · Views: 98
  • 9DC9BB4E-8F9C-4905-899B-86E2981E015D.jpeg
    9DC9BB4E-8F9C-4905-899B-86E2981E015D.jpeg
    2.5 MB · Views: 96
  • CD020105-5F51-45B0-B86F-EAAAAE7B7B73.jpeg
    CD020105-5F51-45B0-B86F-EAAAAE7B7B73.jpeg
    1.4 MB · Views: 94
  • 340EA2E6-6CAD-453F-A419-9CF1C260B2FC.jpeg
    340EA2E6-6CAD-453F-A419-9CF1C260B2FC.jpeg
    1.4 MB · Views: 100
  • 3FC9D052-BEBA-48A0-BEDE-E69AD4A19BFD.jpeg
    3FC9D052-BEBA-48A0-BEDE-E69AD4A19BFD.jpeg
    1.7 MB · Views: 111
  • 2C4D9E20-15B9-482D-83DE-ABAB5D121FB5.jpeg
    2C4D9E20-15B9-482D-83DE-ABAB5D121FB5.jpeg
    4.1 MB · Views: 128
  • 451D556D-C2CF-4CB7-A0A5-EA87B8FB5D0A.jpeg
    451D556D-C2CF-4CB7-A0A5-EA87B8FB5D0A.jpeg
    1.9 MB · Views: 127
  • FFE86320-8F9E-4568-A1C3-2B4506AA3A36.jpeg
    FFE86320-8F9E-4568-A1C3-2B4506AA3A36.jpeg
    3.2 MB · Views: 117
  • A1EC6867-B605-44A2-8CC8-EB58C3944194.jpeg
    A1EC6867-B605-44A2-8CC8-EB58C3944194.jpeg
    1.7 MB · Views: 102
  • 7C06FD5C-1FD4-446A-BAD6-4E45C08C79F9.jpeg
    7C06FD5C-1FD4-446A-BAD6-4E45C08C79F9.jpeg
    1.2 MB · Views: 91
  • 8DEA68A1-ECCD-4A90-89AB-6758D773F3D4.jpeg
    8DEA68A1-ECCD-4A90-89AB-6758D773F3D4.jpeg
    2.4 MB · Views: 89
  • DA56C557-807E-43FF-AB5B-D2339683EF5C.jpeg
    DA56C557-807E-43FF-AB5B-D2339683EF5C.jpeg
    1.3 MB · Views: 97
  • A47A5E09-3B68-4397-9A66-D45D6954AEEA.jpeg
    A47A5E09-3B68-4397-9A66-D45D6954AEEA.jpeg
    2.8 MB · Views: 93
  • 7C84A0B2-EE24-49DD-A261-4CD225E14AE4.jpeg
    7C84A0B2-EE24-49DD-A261-4CD225E14AE4.jpeg
    3.2 MB · Views: 96
  • 21649223-405A-40CD-B6BF-39BB510DC0CB.jpeg
    21649223-405A-40CD-B6BF-39BB510DC0CB.jpeg
    1.3 MB · Views: 95
  • B0719C6E-9536-4593-8DF4-0181D84F3335.jpeg
    B0719C6E-9536-4593-8DF4-0181D84F3335.jpeg
    1.6 MB · Views: 107
  • A8356980-412B-4E11-BBED-B40E4F871980.jpeg
    A8356980-412B-4E11-BBED-B40E4F871980.jpeg
    1.2 MB · Views: 100
  • 85C952BC-DDC8-4ECC-952D-9A51795F8063.jpeg
    85C952BC-DDC8-4ECC-952D-9A51795F8063.jpeg
    4 MB · Views: 99
  • 822D7EAD-E351-4F53-B3E3-4218CBDD57C3.jpeg
    822D7EAD-E351-4F53-B3E3-4218CBDD57C3.jpeg
    1.4 MB · Views: 88
  • AF34ABBD-1D18-432B-9126-921398AFD799.jpeg
    AF34ABBD-1D18-432B-9126-921398AFD799.jpeg
    1.5 MB · Views: 92
  • A0B75F78-EE82-474A-853D-5A49D73355BD.jpeg
    A0B75F78-EE82-474A-853D-5A49D73355BD.jpeg
    2.7 MB · Views: 88
  • 34440651-1342-44BB-89AB-5959F8257104.jpeg
    34440651-1342-44BB-89AB-5959F8257104.jpeg
    1.7 MB · Views: 107
Last edited:
Also in the last pic some parts are already in primer. I will expound on this in the nest post!
 
After several months of printing I started assembling armor and massaging the finish.

After research I landed on sand and Bondo, this wasn’t the best choice. After bondo and sand and primer and sand and, and, and… I ended up with a nice chest. I continued this way for several pieces depicted in gray in the photos. You can also see the print errors in this post, I didn’t end up sealing or filling these at all. I just used the damage later for weather in the final stages. I always figured on updates and replacement I could make these issues disappear with better prints and more experience.
 

Attachments

  • 0863E9C5-57F7-4DD6-BCC9-D227D9BC9658.jpeg
    0863E9C5-57F7-4DD6-BCC9-D227D9BC9658.jpeg
    3.2 MB · Views: 94
  • D03FD285-E3C0-4BFD-ACC4-CA2B222522F2.jpeg
    D03FD285-E3C0-4BFD-ACC4-CA2B222522F2.jpeg
    962.2 KB · Views: 89
  • BAB0C7B0-0D01-4982-A19D-0E42F0C3DDF7.jpeg
    BAB0C7B0-0D01-4982-A19D-0E42F0C3DDF7.jpeg
    3.1 MB · Views: 92
  • DF25D236-7C95-408C-BD06-753E748614D3.jpeg
    DF25D236-7C95-408C-BD06-753E748614D3.jpeg
    1.7 MB · Views: 79
  • 80D901B4-B2BF-40CA-A238-819A1FCA5E97.jpeg
    80D901B4-B2BF-40CA-A238-819A1FCA5E97.jpeg
    1.4 MB · Views: 88
  • C5A49776-1FA4-4E33-A53A-0053A6DCE295.jpeg
    C5A49776-1FA4-4E33-A53A-0053A6DCE295.jpeg
    2 MB · Views: 93
At this point I had also started adjusting the scale of the individual pieces. The original scale was claimed as 100 percent for a 6ft person. I am 5 -9 3/4in so the scales for me were as follows.

Chest and Back- 100% with exception to width, which was 99%
COD- 100%
Thighs- 85%
shins- 87%
biceps- 85%
forearms- 100%
Hands- 65%
Helmet....I bought one, from Jazwares, and repainted it.
 

Attachments

  • 48389E8C-78B9-4E48-9DD6-8C1F463FC6F9.JPG
    48389E8C-78B9-4E48-9DD6-8C1F463FC6F9.JPG
    1.4 MB · Views: 109
I used a combination of a cosplay caliper, some OG renders of infinite chief, and the Jazwares 6.5 long neck chief, action figure to scale the parts to myself. It was maths but it wasnt bad.
 
Once that or started to come together I learned about XTC-3D. After some experiments I found a useable and nice formula that yielded consistent results. I did applied at least one coat to each piece. I did not subsequent sanding and reapplication improved finish while further hiding and eliminating print lines. I ended up coating all of the parts, including pre primed and sanded parts. After finding out about the resin, I no longer invested time in pre priming or sanding. The xtc product filled and smoother the prints with at least one coat to a better finish than the previous work had yielded.the trick was not to rush and allow ample time for each phase to completely cure before working it.
 

Attachments

  • B797677F-242D-46DF-A2B3-2A6D8B6985F1.jpeg
    B797677F-242D-46DF-A2B3-2A6D8B6985F1.jpeg
    1.9 MB · Views: 80
  • FCDB7A0F-8EB2-47E5-8F01-62AB869694C2.jpeg
    FCDB7A0F-8EB2-47E5-8F01-62AB869694C2.jpeg
    3.3 MB · Views: 78
  • D113A860-9EAC-438C-862E-9F754BF74F46.jpeg
    D113A860-9EAC-438C-862E-9F754BF74F46.jpeg
    962.2 KB · Views: 73
  • 276AB9A6-D70A-4824-BBF0-149503BEDE40.jpeg
    276AB9A6-D70A-4824-BBF0-149503BEDE40.jpeg
    1.3 MB · Views: 73
  • FBB3F5B8-34E7-4C6D-B558-98B52FBCC8CA.jpeg
    FBB3F5B8-34E7-4C6D-B558-98B52FBCC8CA.jpeg
    1.7 MB · Views: 77
  • 607080AA-0AFA-44C5-A38C-C3AD8E23FAD0.jpeg
    607080AA-0AFA-44C5-A38C-C3AD8E23FAD0.jpeg
    1.5 MB · Views: 73
  • E21B7B12-E0E9-45C5-A272-34F84A648851.jpeg
    E21B7B12-E0E9-45C5-A272-34F84A648851.jpeg
    1.3 MB · Views: 73
  • A8316866-0C29-41D1-AB1C-5FE17570F351.jpeg
    A8316866-0C29-41D1-AB1C-5FE17570F351.jpeg
    1.4 MB · Views: 70
  • 8C97AD17-4661-4693-91A5-BDEC062F34A8.jpeg
    8C97AD17-4661-4693-91A5-BDEC062F34A8.jpeg
    1.4 MB · Views: 73
  • CA1C9EFE-FAE1-4FD5-A6E8-C6F75341F203.jpeg
    CA1C9EFE-FAE1-4FD5-A6E8-C6F75341F203.jpeg
    1.5 MB · Views: 85
If you see a photo or want to see a specific part ask me, I may have a picture.
 
After building a fair amount of armor pieces I began addressing the way the armor wears on the body. So I went back to the drawing. I’ll repost it. I purchased two 1in nylon and clip kits from Amazon, and some 3in metal rings from Michael’s craft store. And I went to work. I chose to make the suit so it was adjustable, and the armor could hang. All of the clips began adjustable on the strap suit side and the armor side. For fit and test this was great. I intimately eliminated the adjustability on the armor side at the end for ease of attachment. We also experimented with several under suits. We ultimately landed on a football style padded under suit. We added extra details which I will cover in a later post. But this serves as a good under suit with added details on the elbows, knees, hips and chest of the suit.
 

Attachments

  • C5A37209-C9FC-4BE4-95D6-79A9137C9B4F.jpeg
    C5A37209-C9FC-4BE4-95D6-79A9137C9B4F.jpeg
    1.9 MB · Views: 115
  • C107FD7C-A102-4BD1-92F7-49D981246EEC.jpeg
    C107FD7C-A102-4BD1-92F7-49D981246EEC.jpeg
    2 MB · Views: 107
  • 42468A88-B009-4857-9FB5-CB3BB74E7DB2.jpeg
    42468A88-B009-4857-9FB5-CB3BB74E7DB2.jpeg
    1.9 MB · Views: 96
  • EBCF68C9-EABD-41D5-B2F6-750927182D33.jpeg
    EBCF68C9-EABD-41D5-B2F6-750927182D33.jpeg
    1.9 MB · Views: 97
  • D4F41334-3B32-43D0-BC3E-1E0BAF0160A8.jpeg
    D4F41334-3B32-43D0-BC3E-1E0BAF0160A8.jpeg
    1.5 MB · Views: 88
  • 29D950C7-B3D1-41B9-93B8-F0467553C517.jpeg
    29D950C7-B3D1-41B9-93B8-F0467553C517.jpeg
    1.9 MB · Views: 95
  • 7F01C9FE-A370-4B6C-8F33-F963CDFE97E6.jpeg
    7F01C9FE-A370-4B6C-8F33-F963CDFE97E6.jpeg
    1.9 MB · Views: 96
  • E8EA6490-9CD1-4C7D-9CE6-4C85321E73D4.jpeg
    E8EA6490-9CD1-4C7D-9CE6-4C85321E73D4.jpeg
    2 MB · Views: 93
  • 9BD0672F-FAC6-4AA0-8A8A-93F98333C5B3.jpeg
    9BD0672F-FAC6-4AA0-8A8A-93F98333C5B3.jpeg
    1.8 MB · Views: 93
  • 6CD91ADB-1F9F-4E22-9370-0F869F1CD4B7.jpeg
    6CD91ADB-1F9F-4E22-9370-0F869F1CD4B7.jpeg
    1.6 MB · Views: 98
  • 56574150-328F-4F46-8696-9E5F05EE8720.jpeg
    56574150-328F-4F46-8696-9E5F05EE8720.jpeg
    2.4 MB · Views: 93
  • 19CF5EA3-4ECF-4898-8F77-6CB2127B770E.jpeg
    19CF5EA3-4ECF-4898-8F77-6CB2127B770E.jpeg
    2.4 MB · Views: 102
  • 8523A6FC-BCA3-401D-A2B9-78DD11FCCC36.jpeg
    8523A6FC-BCA3-401D-A2B9-78DD11FCCC36.jpeg
    1.2 MB · Views: 90
  • 6F64CE6A-3C2E-478A-B731-859A8433EDEC.jpeg
    6F64CE6A-3C2E-478A-B731-859A8433EDEC.jpeg
    1.9 MB · Views: 90
  • C080CFD6-71FF-46D5-830E-4A5DE9916A7E.jpeg
    C080CFD6-71FF-46D5-830E-4A5DE9916A7E.jpeg
    1.9 MB · Views: 92
  • 4BBE350E-4A45-4A1C-8B4E-E14578300D7E.jpeg
    4BBE350E-4A45-4A1C-8B4E-E14578300D7E.jpeg
    2.1 MB · Views: 99
  • 515F4B26-2F2F-4263-B0C3-FB051E3E9EF4.jpeg
    515F4B26-2F2F-4263-B0C3-FB051E3E9EF4.jpeg
    2.4 MB · Views: 99
  • F44B235A-A041-45D1-AFD0-84E1CB1AA3D4.jpeg
    F44B235A-A041-45D1-AFD0-84E1CB1AA3D4.jpeg
    1.8 MB · Views: 114
Last edited:
I was trying to make sure the armor was evenly distributed as far as weight across the body. The printed parts aren't all weightless after all, and so this was my best solution for supporting all of the armor and indexing it to my body so it wouldn't sag or move out of turn. I used elastic straps on some parts like the shoulder pauldrons to maintain tension on them which forced them to maintain orientation to the shoulder.
 
Some parts are already in various stages of prep, and paint, in these photos, but I wont cover that until later so just enjoy the spoilers!
 
Once parts started to come together and pieces were ready for work I began sanding and planning my paint.
 
This is where armor gets it story. I decided to think about the armor like it’s real armor. So, the first stage was primer and sand and finish. When the armor was smooth enough I would paint it flat black. As I completed the parts each stage of finishing got better. As I got better at crafting so times carried on each stage. Once in black I painted a metallic coat or two, or three. After the metallic layer satin black comes. The idea is to create depth and give the armor a chance to tell a story. On top of the satin black I painted the green. This gives the armor the brand new feel like the day your spartan got it new.
 

Attachments

  • 520F75A2-1F96-4E6D-B48F-99765EADCBB6.jpeg
    520F75A2-1F96-4E6D-B48F-99765EADCBB6.jpeg
    1.6 MB · Views: 68
  • 338EA1A2-E100-4562-BE7A-49BA03844665.jpeg
    338EA1A2-E100-4562-BE7A-49BA03844665.jpeg
    1.5 MB · Views: 69
  • B72697C5-52BB-4090-A88E-E746A6933F0B.jpeg
    B72697C5-52BB-4090-A88E-E746A6933F0B.jpeg
    1.4 MB · Views: 63
  • B5144E0D-24D4-41B1-9E7F-444EA640F7EF.jpeg
    B5144E0D-24D4-41B1-9E7F-444EA640F7EF.jpeg
    374.5 KB · Views: 71
  • 6312BFBF-5670-42C3-BE85-D99418CC900D.jpeg
    6312BFBF-5670-42C3-BE85-D99418CC900D.jpeg
    3 MB · Views: 76
  • 65FBAE8F-A84C-48D0-A7D4-923AEC6B2D4B.jpeg
    65FBAE8F-A84C-48D0-A7D4-923AEC6B2D4B.jpeg
    1.7 MB · Views: 68
We did run in to some file issues and requested help from the maker of the files and received no response so we had to do some plastic welding here and cutting for fit and finish and we backed the gaps with Eva foam that was later coated in flex seal for finish. This blacked and sealed the gaps in the armor for finishing.
 

Attachments

  • 9EB6A9FA-E47A-4844-B97F-1FA037FA0C19.jpeg
    9EB6A9FA-E47A-4844-B97F-1FA037FA0C19.jpeg
    3.4 MB · Views: 87
  • 1D77C008-7BFF-4454-8DF3-5A3C8B0BD9F3.jpeg
    1D77C008-7BFF-4454-8DF3-5A3C8B0BD9F3.jpeg
    1.7 MB · Views: 79
  • D8203679-2A7E-4DDA-A850-CD715BE1E05D.jpeg
    D8203679-2A7E-4DDA-A850-CD715BE1E05D.jpeg
    2.7 MB · Views: 76
  • 47335AB7-D621-4E55-BF4C-D0FCB6460534.jpeg
    47335AB7-D621-4E55-BF4C-D0FCB6460534.jpeg
    1.2 MB · Views: 83
  • A5A6984B-265F-4082-9C36-B6C309D94786.jpeg
    A5A6984B-265F-4082-9C36-B6C309D94786.jpeg
    2.5 MB · Views: 77
After building a fair amount of armor pieces I began addressing the way the armor wears on the body. So I went back to the drawing. I’ll repost it. I purchased two 1in nylon and clip kits from Amazon, and some 3in metal rings from Michael’s craft store. And I went to work. I chose to make the suit so it was adjustable, and the armor could hang. All of the clips began adjustable on the strap suit side and the armor side. For fit and test this was great. I intimately eliminated the adjustability on the armor side at the end for ease of attachment. We also experimented with several under suits. We ultimately landed on a football style padded under suit. We added extra details which I will cover in a later post. But this serves as a good indersuit with added details on the elbows, knees, hips and chest of the suit.
I like the distribution of the shoulder straps and ring. I've seen some variance of this with armor suspenders before but not using the ring in the back. That's a really interesting idea. Might take that in the future.
 
This the fit and finish for the back and chest finally. This didn’t happen until about the 70 days to Em-city mark. So I was definitely feeling rushed. Each panel went through this process with a light buff at between each paint coat. All the layers of paint after primer black were in either satin or metallic finish.
 

Attachments

  • F7ABB12B-1EB1-4EBE-BBBE-4AD554D5E3CC.jpeg
    F7ABB12B-1EB1-4EBE-BBBE-4AD554D5E3CC.jpeg
    3.6 MB · Views: 72
  • 29DD323B-23FC-4A41-B3AA-A6940A4F2617.jpeg
    29DD323B-23FC-4A41-B3AA-A6940A4F2617.jpeg
    2.2 MB · Views: 70
  • C7DCF0EE-E13E-4688-8DFB-85A4AD8CCAC0.jpeg
    C7DCF0EE-E13E-4688-8DFB-85A4AD8CCAC0.jpeg
    738.4 KB · Views: 67
  • 4AFEE9C5-054B-403F-846E-C5A48C7A4F5D.jpeg
    4AFEE9C5-054B-403F-846E-C5A48C7A4F5D.jpeg
    1.5 MB · Views: 71
  • EF6D0FE8-F6E3-4769-A62C-80255E6B1776.jpeg
    EF6D0FE8-F6E3-4769-A62C-80255E6B1776.jpeg
    2.7 MB · Views: 68
  • DAEB3591-55FD-4A09-8729-3CEB5377A26A.jpeg
    DAEB3591-55FD-4A09-8729-3CEB5377A26A.jpeg
    2.7 MB · Views: 69
  • E4A05BEC-C90E-4C95-B859-B7C1940C13C9.jpeg
    E4A05BEC-C90E-4C95-B859-B7C1940C13C9.jpeg
    264.8 KB · Views: 74
  • 77527A40-C607-4446-8222-AF455BADF6D5.jpeg
    77527A40-C607-4446-8222-AF455BADF6D5.jpeg
    349.2 KB · Views: 68
  • 2070454B-190B-4BD9-8B6A-5C3E5268E5E1.jpeg
    2070454B-190B-4BD9-8B6A-5C3E5268E5E1.jpeg
    2.7 MB · Views: 72
  • 8C923C0B-B3D4-4FE6-A3AF-B6B80EE8B48D.jpeg
    8C923C0B-B3D4-4FE6-A3AF-B6B80EE8B48D.jpeg
    501.3 KB · Views: 66
  • 5AC608B4-ECAD-464D-8854-D4FE4B8268A6.jpeg
    5AC608B4-ECAD-464D-8854-D4FE4B8268A6.jpeg
    3.7 MB · Views: 75
  • 7EE7E735-63E5-4D40-AF38-09D6003DA012.jpeg
    7EE7E735-63E5-4D40-AF38-09D6003DA012.jpeg
    1.9 MB · Views: 65
  • A9F36182-0549-4A7C-AB98-14233C743519.jpeg
    A9F36182-0549-4A7C-AB98-14233C743519.jpeg
    1.8 MB · Views: 72
  • FFA2DC1B-236D-496F-A36A-2C443A39267C.jpeg
    FFA2DC1B-236D-496F-A36A-2C443A39267C.jpeg
    1.7 MB · Views: 61
  • 516053BE-B7E1-44DE-9B3B-771AC25C6BFF.jpeg
    516053BE-B7E1-44DE-9B3B-771AC25C6BFF.jpeg
    2.1 MB · Views: 58
  • ABD1BC14-F4B4-488C-9F62-2DD9115FAD87.jpeg
    ABD1BC14-F4B4-488C-9F62-2DD9115FAD87.jpeg
    3.6 MB · Views: 68
  • 9F7C9432-DBFD-4422-B7C9-FA5320C14E3A.jpeg
    9F7C9432-DBFD-4422-B7C9-FA5320C14E3A.jpeg
    4.2 MB · Views: 60
  • 15A1517D-CD6C-429B-A28D-36FA5C68AD3D.jpeg
    15A1517D-CD6C-429B-A28D-36FA5C68AD3D.jpeg
    2.2 MB · Views: 64
  • A7120EA8-1BC2-42D0-8D1C-F65660E073CC.jpeg
    A7120EA8-1BC2-42D0-8D1C-F65660E073CC.jpeg
    4.3 MB · Views: 76
More green parts and various paint stages. I also did a wear test for heat and mobility.
 

Attachments

  • 9DF36FB4-B57C-4FB0-94BB-B4D1396E1B15.jpeg
    9DF36FB4-B57C-4FB0-94BB-B4D1396E1B15.jpeg
    2.1 MB · Views: 67
  • 5BEF6501-6F2F-4E87-B742-D9BCFA661F55.jpeg
    5BEF6501-6F2F-4E87-B742-D9BCFA661F55.jpeg
    2.5 MB · Views: 62
  • 0FA90EB8-8831-4089-AF7F-042EF8DB61B9.jpeg
    0FA90EB8-8831-4089-AF7F-042EF8DB61B9.jpeg
    3.8 MB · Views: 68
  • 1902C6B2-50E6-4B73-8DA2-FEA8DE7BA097.jpeg
    1902C6B2-50E6-4B73-8DA2-FEA8DE7BA097.jpeg
    3.5 MB · Views: 71
  • AF90BF8C-83A7-48BB-97F4-EACDA398875C.jpeg
    AF90BF8C-83A7-48BB-97F4-EACDA398875C.jpeg
    2.7 MB · Views: 62
  • 6A6CEB98-2F0F-4C07-8404-46AB2B9BDEF9.jpeg
    6A6CEB98-2F0F-4C07-8404-46AB2B9BDEF9.jpeg
    1.4 MB · Views: 89
  • EB4415E0-BEA1-472E-BC8F-E0FB2FBB88F1.jpeg
    EB4415E0-BEA1-472E-BC8F-E0FB2FBB88F1.jpeg
    1.8 MB · Views: 89
  • 483DD15E-9FAD-46AC-95AE-AB7BE062EECA.jpeg
    483DD15E-9FAD-46AC-95AE-AB7BE062EECA.jpeg
    2.3 MB · Views: 85
  • 2ED62EA2-288E-479D-8951-D3EE72D98F54.jpeg
    2ED62EA2-288E-479D-8951-D3EE72D98F54.jpeg
    2 MB · Views: 83
  • 51505ADF-B8FB-47C2-942A-22C8AC45CA5A.jpeg
    51505ADF-B8FB-47C2-942A-22C8AC45CA5A.jpeg
    1.9 MB · Views: 83
  • 93E39CD1-2357-4B56-A196-6BC5F476577E.jpeg
    93E39CD1-2357-4B56-A196-6BC5F476577E.jpeg
    4.1 MB · Views: 70
  • E7454BAE-6E9C-491B-9852-1C3156E3AFE8.jpeg
    E7454BAE-6E9C-491B-9852-1C3156E3AFE8.jpeg
    2.7 MB · Views: 63
  • 82E09DAD-9A7D-4D24-BFF5-2F42CC7216D1.jpeg
    82E09DAD-9A7D-4D24-BFF5-2F42CC7216D1.jpeg
    1.6 MB · Views: 61
  • ED4098ED-FB6C-4365-AB5C-7CE3B44A9EDF.jpeg
    ED4098ED-FB6C-4365-AB5C-7CE3B44A9EDF.jpeg
    3.9 MB · Views: 65
  • E585928B-C350-498B-BE86-B4D232A6635F.jpeg
    E585928B-C350-498B-BE86-B4D232A6635F.jpeg
    1.6 MB · Views: 60
  • ECE96C15-71C6-43EE-ADA4-553FED2FB564.jpeg
    ECE96C15-71C6-43EE-ADA4-553FED2FB564.jpeg
    3.4 MB · Views: 67
  • A2692052-BFE1-412D-940B-EED884C1A0F9.jpeg
    A2692052-BFE1-412D-940B-EED884C1A0F9.jpeg
    2 MB · Views: 61
  • 1034E918-DE24-417C-B905-5B899E759524.jpeg
    1034E918-DE24-417C-B905-5B899E759524.jpeg
    3.6 MB · Views: 66
The boots were interesting and awesome. I came up with an idea out necessity. I wear an ankle brace that is tied to my military service. I needed a way to wear the boots and have the brace on. So I made the boot wearable with any 9.5 shoe. It didn’t take long and it articulates with your foot. It’s a simple compressions style fit. I used Eva for the padding and friction fit, the toe has clips that clip to the boot which is one piece connected by Eva foam at the sole of the boot. It is arrested inside by a nylon strap that prevents over articulating or the boot when walking. The boot has two points of articulation, one at the heel and one inside of the arch allowing the boot to function with your shoes. The addition of padding had an unexpected side effect of making my feet hurt less during the days use. The boots have proven durable and comfortable to this point.
 

Attachments

  • 52D5236E-F37A-4489-9282-2521E09DBED2.jpeg
    52D5236E-F37A-4489-9282-2521E09DBED2.jpeg
    2.5 MB · Views: 68
  • CAFC3AFF-8BCF-4087-9CF7-3291A4D25FF7.jpeg
    CAFC3AFF-8BCF-4087-9CF7-3291A4D25FF7.jpeg
    2.8 MB · Views: 69
  • 362BB114-5409-46E1-9FA0-3615DDE3EBB2.jpeg
    362BB114-5409-46E1-9FA0-3615DDE3EBB2.jpeg
    949.2 KB · Views: 73
  • 6219FE50-0F83-44BB-8B12-AFBC4703C6B8.jpeg
    6219FE50-0F83-44BB-8B12-AFBC4703C6B8.jpeg
    2 MB · Views: 68
  • 7E8F6372-94C4-42D0-ADAB-FF7BFD375955.jpeg
    7E8F6372-94C4-42D0-ADAB-FF7BFD375955.jpeg
    4.2 MB · Views: 74
  • A639277C-0D7B-492C-91C0-AA6CE7D1ADC1.jpeg
    A639277C-0D7B-492C-91C0-AA6CE7D1ADC1.jpeg
    2.6 MB · Views: 76
  • 87B80054-95A2-4E11-9BB6-5767AFB74D48.jpeg
    87B80054-95A2-4E11-9BB6-5767AFB74D48.jpeg
    1.6 MB · Views: 78
  • E6DE0354-9981-4136-AE6B-6CF57409DD58.jpeg
    E6DE0354-9981-4136-AE6B-6CF57409DD58.jpeg
    5.1 MB · Views: 70
  • 003D1FBF-B15B-4990-82D3-DD45FA460E8B.jpeg
    003D1FBF-B15B-4990-82D3-DD45FA460E8B.jpeg
    2.4 MB · Views: 69
  • C1BFD166-623C-45DB-96E5-273EF0D7D0B5.jpeg
    C1BFD166-623C-45DB-96E5-273EF0D7D0B5.jpeg
    4.7 MB · Views: 66
  • E121308A-E7CF-4EE4-A3DA-C4BD2756FEC5.jpeg
    E121308A-E7CF-4EE4-A3DA-C4BD2756FEC5.jpeg
    1.4 MB · Views: 71
  • 93C09C85-5A22-412D-8501-F685623DE854.jpeg
    93C09C85-5A22-412D-8501-F685623DE854.jpeg
    3.1 MB · Views: 63
  • C9E07E9E-5172-4F9F-9361-4FADC953C315.jpeg
    C9E07E9E-5172-4F9F-9361-4FADC953C315.jpeg
    3.1 MB · Views: 75
  • 3D36FCA4-EE6B-41F2-A98E-222776AA2C8D.jpeg
    3D36FCA4-EE6B-41F2-A98E-222776AA2C8D.jpeg
    2.9 MB · Views: 72
  • 22352F5E-C10A-4144-B3E9-FB4B11FF16A4.jpeg
    22352F5E-C10A-4144-B3E9-FB4B11FF16A4.jpeg
    1.2 MB · Views: 72
  • 829EFD44-F46E-47EC-8D17-48C88B25085B.jpeg
    829EFD44-F46E-47EC-8D17-48C88B25085B.jpeg
    1.6 MB · Views: 74
  • 1C9A6A1B-E67B-41F2-8C2E-9567CB4078DF.jpeg
    1C9A6A1B-E67B-41F2-8C2E-9567CB4078DF.jpeg
    3.1 MB · Views: 74
  • 4C42B0C7-002A-4582-8B56-F46EBF3D3F66.jpeg
    4C42B0C7-002A-4582-8B56-F46EBF3D3F66.jpeg
    2.5 MB · Views: 63
  • D5C23C95-19C5-4068-A998-2854C38826AF.jpeg
    D5C23C95-19C5-4068-A998-2854C38826AF.jpeg
    3.8 MB · Views: 63
  • B89DC99B-7566-4FDE-8003-B9039E1CBF34.jpeg
    B89DC99B-7566-4FDE-8003-B9039E1CBF34.jpeg
    1.5 MB · Views: 66
  • B6C597A6-0F5F-476C-9E85-5630726D4B94.jpeg
    B6C597A6-0F5F-476C-9E85-5630726D4B94.jpeg
    3.9 MB · Views: 63
  • 14FCE2FB-4F3C-4822-A615-C572D7D30AE5.jpeg
    14FCE2FB-4F3C-4822-A615-C572D7D30AE5.jpeg
    2.3 MB · Views: 64
  • BBACB95A-DA78-4998-ACD0-A17BD4FFC7BC.jpeg
    BBACB95A-DA78-4998-ACD0-A17BD4FFC7BC.jpeg
    2.9 MB · Views: 75
So we have a whole suit of armor and its new and green now. So we did some wear on the armor. It wasn’t hard and it didn’t take long. We used a scotch brite sponge and buffed the armor out. For an understanding of this I recommend you find me on twitch JSLund. The live stream archive has about 50 hours of cosplay stream covering the entire build. It has a lot of depth so if you are interested in the best of the suit go there. Or ask me in the discord. As you can see here we used some of the print rash when we weathered to hide it and add depth to the prints. I wasn’t perfect and after 11 months I wanted to go to the con not sit at home still printing for perfection. And with the post work most of the rash went away. This is what the weather looked like on the panels before the next stage which was sealing and decals. I also added a shot of the exhaust ports on the suit. This was hand painted over a couple of days but I am really happy with how it turned out.
 

Attachments

  • 36E57A19-8334-49FD-AF4C-DC5BC377C3C3.jpeg
    36E57A19-8334-49FD-AF4C-DC5BC377C3C3.jpeg
    3 MB · Views: 75
  • 6B1A5A2A-ECA9-480E-ACA4-9075807D372F.jpeg
    6B1A5A2A-ECA9-480E-ACA4-9075807D372F.jpeg
    1.9 MB · Views: 68
  • CCAC6892-FCAA-43FA-A909-230E18FC9E7D.jpeg
    CCAC6892-FCAA-43FA-A909-230E18FC9E7D.jpeg
    2.6 MB · Views: 73
  • 243A66AD-DE49-4410-BDFE-34D71A088DE0.jpeg
    243A66AD-DE49-4410-BDFE-34D71A088DE0.jpeg
    3.3 MB · Views: 68
  • 588AD3F7-87FD-4C54-9B18-B3E06DBB70F8.jpeg
    588AD3F7-87FD-4C54-9B18-B3E06DBB70F8.jpeg
    2.4 MB · Views: 76
  • 4C15DD8A-7795-4E28-957D-FC60B47338F2.jpeg
    4C15DD8A-7795-4E28-957D-FC60B47338F2.jpeg
    1.9 MB · Views: 66
  • 4FE239CE-B18B-4034-AACF-178706A963E1.jpeg
    4FE239CE-B18B-4034-AACF-178706A963E1.jpeg
    393.1 KB · Views: 73
  • DD2A31A7-30B2-4F6C-9730-581477FFB10F.jpeg
    DD2A31A7-30B2-4F6C-9730-581477FFB10F.jpeg
    2 MB · Views: 67
  • FFAE9858-D51E-49DB-A875-39AE68556AD5.jpeg
    FFAE9858-D51E-49DB-A875-39AE68556AD5.jpeg
    1.6 MB · Views: 75
  • A9CA0A6F-611D-49C5-A89D-7DDEAB9A661B.jpeg
    A9CA0A6F-611D-49C5-A89D-7DDEAB9A661B.jpeg
    3.5 MB · Views: 61
  • CC376C7B-4432-4DF9-92AB-BAC5036A6FD3.jpeg
    CC376C7B-4432-4DF9-92AB-BAC5036A6FD3.jpeg
    380.9 KB · Views: 69
  • 66FF1832-4C91-4F0D-9C5F-3C024BD41B37.jpeg
    66FF1832-4C91-4F0D-9C5F-3C024BD41B37.jpeg
    309.3 KB · Views: 59
  • 7D5AF22B-83AE-492F-806C-513CEA888599.jpeg
    7D5AF22B-83AE-492F-806C-513CEA888599.jpeg
    2.9 MB · Views: 63
  • 78C14217-5126-492B-9E1D-D981659CD093.jpeg
    78C14217-5126-492B-9E1D-D981659CD093.jpeg
    2.7 MB · Views: 64
  • 4FD50E99-417A-43F4-80AE-522732F6C6AC.jpeg
    4FD50E99-417A-43F4-80AE-522732F6C6AC.jpeg
    1.8 MB · Views: 65
  • 3D142DB1-994B-40EA-A5A3-0EA3D61D59A1.jpeg
    3D142DB1-994B-40EA-A5A3-0EA3D61D59A1.jpeg
    3.5 MB · Views: 68
  • 5E4C3A89-87CF-4030-AD6E-B33CC214C21D.jpeg
    5E4C3A89-87CF-4030-AD6E-B33CC214C21D.jpeg
    3.1 MB · Views: 62
  • 641A3362-44EA-46CD-9209-E8C199A7E6C7.jpeg
    641A3362-44EA-46CD-9209-E8C199A7E6C7.jpeg
    3 MB · Views: 63
  • 136291D5-AD17-4A7D-BC4F-73EE6FA745DB.jpeg
    136291D5-AD17-4A7D-BC4F-73EE6FA745DB.jpeg
    2.7 MB · Views: 65
  • F6483C04-A06A-4C16-B752-F60A8C7FCB92.jpeg
    F6483C04-A06A-4C16-B752-F60A8C7FCB92.jpeg
    2.8 MB · Views: 61
  • A495B431-0501-4BE0-B29F-248B2D614252.jpeg
    A495B431-0501-4BE0-B29F-248B2D614252.jpeg
    2.7 MB · Views: 59
  • 1ED020DB-AEFE-4C44-99B9-D846F58DBED5.jpeg
    1ED020DB-AEFE-4C44-99B9-D846F58DBED5.jpeg
    3.1 MB · Views: 62
  • D16F4D46-E949-4FFE-B582-9C993AF0A8BB.jpeg
    D16F4D46-E949-4FFE-B582-9C993AF0A8BB.jpeg
    3.1 MB · Views: 72
  • EB2C4F5E-1B7A-4FDE-AD61-E241B63E3F70.jpeg
    EB2C4F5E-1B7A-4FDE-AD61-E241B63E3F70.jpeg
    2.8 MB · Views: 63
  • D6CC9B6A-BCA9-4EDF-A776-5931B0030038.jpeg
    D6CC9B6A-BCA9-4EDF-A776-5931B0030038.jpeg
    2.8 MB · Views: 71
  • 341334B2-CDCF-4823-9956-FB12D700F5C0.jpeg
    341334B2-CDCF-4823-9956-FB12D700F5C0.jpeg
    2.9 MB · Views: 72
  • 1B55F588-661A-42A9-95E1-7A5DE69946D8.jpeg
    1B55F588-661A-42A9-95E1-7A5DE69946D8.jpeg
    3.5 MB · Views: 74
I like the distribution of the shoulder straps and ring. I've seen some variance of this with armor suspenders before but not using the ring in the back. That's a really interesting idea. Might take that in the future.
the ring allows the weight to sit lower in the back between the blades, and allows the suspender style chest straps for weight and alignment.
 
Status
Not open for further replies.
Back
Top