Hello everyone! I am new to prop/costume making. I work during the night so the weekends and a couple hours during the daytime are all i have available to me currently. I am currently researching into getting a 3d printer and think I will ultimately purchase a ender 5plus. This will probably happen sometime during tax season in the US and I have no prior experience in this area so i will also be purchasing a much smaller printer to learn on. My ultimate goal here is to 3d print an entire halo 2 mark VI series armor set. I will have tons of questions along the way and i will glady post and keep everyone updated on my progress once im available to start. I will be starting much smaller scale with mini figures and start working my way up to much larger projects such as weapon props before moving onto helmets and armor.
You are using an out of date browser. It may not display this or other websites correctly.
You should upgrade or use an alternative browser.
You should upgrade or use an alternative browser.
My Journey to the Space Circlet
- Thread starter MaxImpactGaming
- Start date
- Status
- Not open for further replies.
Also, my profile pic is actually a pic of my spartan from halo 4 mp back in the xbox 360 days. Im tempted to break out an old 360 and load it up to see my old spartan once again and possibly use it as reference to print matching armor possibly in the future. Any thoughts or comments on this are welcome.

KingBadger13
New Member
The Ender 3 is a fantastic start to 3D printing. I have one myself and I’m having a blast. Things are easier with a larger printing bed but by no means the only way to do things. I printed an ODST helmet on the 3 pro and I’m impressed with the results. If you need any help setting up your printer or anything just let us know!so just bought an ender 3! Cannot wait for it to arrive so i can start my journey in 3d printing!
Ok guys and gals, got my ender 3 in, assembled, and managed to make my first print! Now I need a list of things Ill need like paints, sandpaper, other kinds of printable filaments, etc and where i can get them. Ill be posting pics real soon, just gotta wait for my phone to recharge. Cant wait to start printing all kinds of fun stuffs!
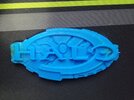
Ok, here is my first official print. I think it came out great! Obviously there's some issues I gotta get worked out, as well as adhesion on this print was not optimal but I'm learning! I've already got it going again printing more stuffs, and I've got files loaded to start printing components directly for my ender 3 to add better cable management and such.
Attachments
- Member DIN
- S970
Nice first print! Can't wait to see you start printing some props and armor!Ok, here is my first official print. I think it came out great! Obviously there's some issues I gotta get worked out, as well as adhesion on this print was not optimal but I'm learning! I've already got it going again printing more stuffs, and I've got files loaded to start printing components directly for my ender 3 to add better cable management and such.
Ok sorry I havent posted much in awhile, ive been busy with work and figuring out issues with my printer. Come with me as I take you on a journey of failed prints, broken pieces, and unsanded models. Compiling the posts and images now, update will come soon.
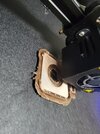
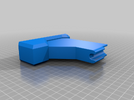
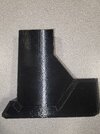
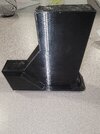
Alright, lets start off with something small here. I needed new angled feet for my keyboard as years of use and abuse had deleted the old ones. So thanks to the power of the interwebs, I was able to find the right print files needed to print a temporary set for my keyboard, and after about 2 failed prints due to bad bed leveling and no adhesion, I managed to scrape off a usable set for the time being. These were printed in low quality as they were more of a test bed for future improvements to make them stronger than they were for actually providing usefulness.
Attachments
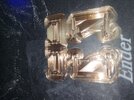
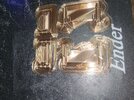

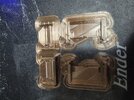
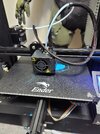
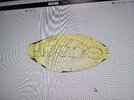
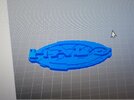
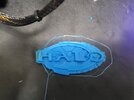
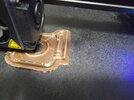
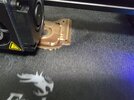
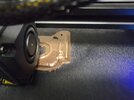
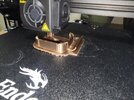
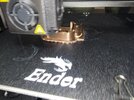
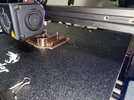
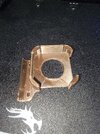
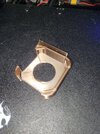
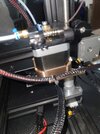
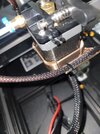
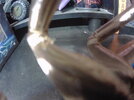
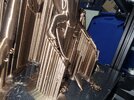
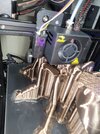
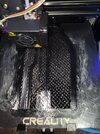
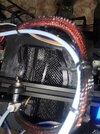
Ok, now on my next project: Better cable routing for the cable lines from the gun. I just happened across this while doom scrolling thingiverse at random not really searching for anything in particular. Its very basic and I dont really have a long-winded story here for this one so im just gonna post the pictures and let you guys see. Also, I only had a couple basic colors of filament starting off and none of them were black so you'll notice I have been using alot of the rose gold color as its the only one that seemed best at the time.
Attachments
-
 20221205_001300.jpg1.3 MB · Views: 103
 -
 20221205_001308.jpg2.4 MB · Views: 92
 -
 20221205_001310.jpg2.3 MB · Views: 101
 -
 20221205_001312.jpg2.7 MB · Views: 97
 -
 20221205_004146.jpg3.3 MB · Views: 95
 -
 20221205_004150.jpg3.3 MB · Views: 88
 -
 20221205_004154.jpg3.4 MB · Views: 91
 -
 20221205_004847.jpg2.8 MB · Views: 83
 -
 20221205_004851.jpg2.4 MB · Views: 103
 -
 20221205_005152.jpg1.6 MB · Views: 88
 -
 20221205_005158.jpg1.6 MB · Views: 97
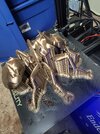
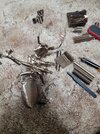
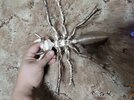
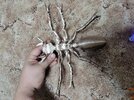
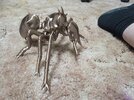
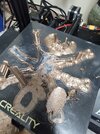
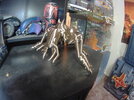
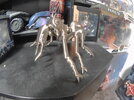
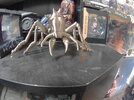
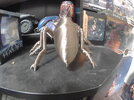
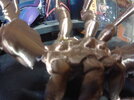
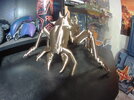
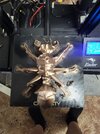
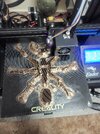
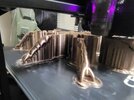
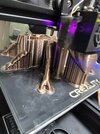
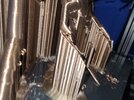
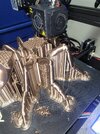
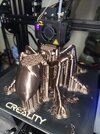
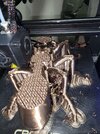
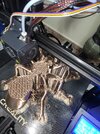
Now for my most ambitious project yet: The giant Bull Ant from Fallout: New Vegas. I am a fan of the fallout series, as any decent story-driven and open-world explorer should be. To be fair, its hard NOT to be a fan as bethesda has been making these types of games for longer than ive been alive. Something about their quirky, broken ragdoll physics, random glitching objects that ignore the laws of physics, and just off-the-wall antics and encounters just draws me in. Im sure if I ever got the opportunity to tour bethesda studios, Ill find different objects and plants imbedded in the walls, floors, and ceilings, if not just hanging through. And of course I expect everyone working there to continue on about their business like an npc from one of their games like its normal and not out-of-place. ANYWAYS, back to the original reason for this post -> G I A N T A** A N T
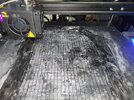
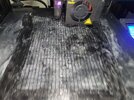
Sorry for the photo dump, but I figured Id get yelled at either way for either creating too many posts or for dumping them all in one go so here we are. Bed adhesion on this was definitely a pain in the ass, I basically spent like 4 hours watching just the brim layer going down and adding more glue as necessary to ensure nothing came loose and remained in place. After that, it was just watch and wait for 3 and 1/2 days to complete. It wasn't without issue, as I printed the support density way too high and wasn't able to remove the supports without breaking the legs off by accident. Luckily, I have quick curing uv plastic resin on hand that allowed me to glue the legs back on, albeit not perfectly. Still beats holding each leg inplace for like 10 minutes with superglue only for it to break while attempting to glue another leg. The front pincers also did not adhere correctly, and one of them fell off entirely during print. The other one managed to remain intact, although it did have some stringing and loss of print quality. Other than that, I am absolutely thrilled with how it turned out! The print bed, on the other hand, I was not too excited to have to
de-grunge and clean.
Attachments
-
 20221217_173444.jpg1.7 MB · Views: 87
 -
 20221217_173448.jpg1.4 MB · Views: 92
 -
 20221217_174516.jpg2.5 MB · Views: 95
 -
 20221217_182400.jpg2.5 MB · Views: 105
 -
 20221217_182401.jpg2.8 MB · Views: 92
 -
 20221217_182407.jpg2 MB · Views: 90
 -
 20221217_182747.jpg1.6 MB · Views: 95
 -
 2019_0620_232221_013.JPG4.5 MB · Views: 89
 -
 2019_0620_232226_014.JPG4.5 MB · Views: 86
 -
 2019_0620_232234_015.JPG4.5 MB · Views: 99
 -
 2019_0620_232240_016.JPG4.6 MB · Views: 101
 -
 2019_0620_232246_017.JPG4.5 MB · Views: 87
 -
 2019_0620_232259_018.JPG4.5 MB · Views: 86
 -
 2019_0620_232342_019.JPG4.4 MB · Views: 87
 -
 2019_0620_232347_020.JPG4.5 MB · Views: 88
 -
 2019_0620_232412_021.JPG4.5 MB · Views: 97
 -
 20221217_173442.jpg1.4 MB · Views: 92
 -
 20221217_114110.jpg2.3 MB · Views: 89
 -
 350.jpg15.6 KB · Views: 87
 -
 20221215_163551.jpg2 MB · Views: 99
 -
 20221215_163553.jpg2.4 MB · Views: 91
 -
 20221216_050122.jpg2.2 MB · Views: 89
 -
 20221216_050127.jpg3.7 MB · Views: 94
 -
 20221216_130713.jpg1.3 MB · Views: 82
 -
 20221216_161531.jpg1.3 MB · Views: 93
 -
 20221216_161534.jpg1.4 MB · Views: 89
 -
 20221216_161536.jpg1.6 MB · Views: 87
 -
 20221217_114106.jpg2.2 MB · Views: 83
 -
 20221217_114058.jpg2.3 MB · Views: 73
 -
 20221217_114052.jpg2.1 MB · Views: 87
 -
 20221217_114048.jpg1.6 MB · Views: 83
 -
 20221217_111803.jpg1.4 MB · Views: 82
 -
 20221217_071938.jpg2.2 MB · Views: 84
 -
 20221217_071933.jpg2.4 MB · Views: 79
Last edited:
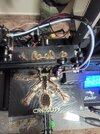
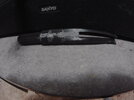
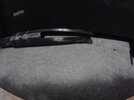
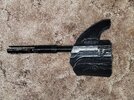
Now onto my next build: Halo 2 Battle Rifle
This one is currently a WIP, so this thread will be updated as I as get more printed. Lets start with what I have so far:
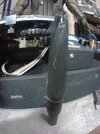
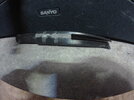
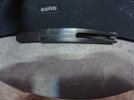
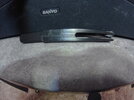
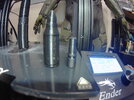
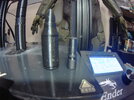
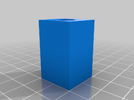
1 finished but failed weapon barrel- I honestly do not know what happened here. I assume it started drooping from lack of support and eventually welded itself to the other half of the shroud. Hard to tell from the pictures but it definitely deformed both parts of the flash hider on the end of the barrel. Next we move onto a bullet, magnet cube to connect the rest of the weapon parts together, the bolt for the receiver, and my now updated and finished barrel. Once again, things did not go as plan during the barrel printing process. Since this was printed vertical, whereas the last barrel was printed flush with the bed, it had to build a support ring to house the barrel within. About 85% of the way done, the barrel separated from the support ring while printing the end of the barrel. This causes the print to slip slightly off of the rest of the barrel, causing a very weak seam in the print that I went ahead and separated, then re-glued back on using uv cured resin. Its not pretty but its now adhered together so it shouldn't break as easily now.
This one is currently a WIP, so this thread will be updated as I as get more printed. Lets start with what I have so far:
1 finished but failed weapon barrel- I honestly do not know what happened here. I assume it started drooping from lack of support and eventually welded itself to the other half of the shroud. Hard to tell from the pictures but it definitely deformed both parts of the flash hider on the end of the barrel. Next we move onto a bullet, magnet cube to connect the rest of the weapon parts together, the bolt for the receiver, and my now updated and finished barrel. Once again, things did not go as plan during the barrel printing process. Since this was printed vertical, whereas the last barrel was printed flush with the bed, it had to build a support ring to house the barrel within. About 85% of the way done, the barrel separated from the support ring while printing the end of the barrel. This causes the print to slip slightly off of the rest of the barrel, causing a very weak seam in the print that I went ahead and separated, then re-glued back on using uv cured resin. Its not pretty but its now adhered together so it shouldn't break as easily now.
Attachments
-
 2019_0620_232137_010.JPG1.9 MB · Views: 76
 -
 2019_0620_232111_007.JPG4.9 MB · Views: 77
 -
 2019_0620_232100_006.JPG4.8 MB · Views: 79
 -
 2019_0620_232057_005.JPG4.9 MB · Views: 78
 -
 2019_0620_232002_004.JPG4.3 MB · Views: 81
 -
 2019_0620_231959_003.JPG4.1 MB · Views: 79
 -
 2019_0620_231941_002.JPG1.6 MB · Views: 88
 -
 2019_0620_231926_001.JPG1.7 MB · Views: 79
 -
 2019_0620_232119_008.JPG2 MB · Views: 81
 -
 2019_0620_232152_011.JPG4.5 MB · Views: 80
 -
 2019_0620_232157_012.JPG4.6 MB · Views: 82
 -
 2019_0620_234450_001.JPG1.8 MB · Views: 75
 -
 2019_0620_234507_002.JPG2 MB · Views: 80
 -
 2019_0620_235824_001.JPG4.8 MB · Views: 83
 -
 2019_0620_235827_002.JPG4.6 MB · Views: 92
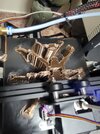
Now for my current print: I am now printing the magazine as well as 5 more magnet blocks to help finish assembling the rest of the parts once I get them printed. Sorry for the horrible photo quality, ive been using an action camera to take the pics instead of my phone. I need to invest in an actual camera .
.Attachments
-
 2019_0621_004923_001.JPG4.6 MB · Views: 86
 -
 2019_0621_004954_006.JPG4.6 MB · Views: 81
 -
 2019_0621_005018_012.JPG4.6 MB · Views: 79
 -
 2019_0621_005022_013.JPG4.5 MB · Views: 85
 -
 2019_0621_005030_015.JPG4.6 MB · Views: 82
 -
 BR_Magazine_Remix.png259.9 KB · Views: 76
 -
 Peg_for_Magnet.png216.2 KB · Views: 84
Ok the magazine has been printed along with the assembly blocks. Currently printing the first chunk of the receiver to accept the barrel. To be continued......
Attachments
-
 20221220_062323.jpg2.1 MB · Views: 83
 -
 20221220_062315.jpg2.1 MB · Views: 74
 -
 20221220_062303.jpg1.5 MB · Views: 90
 -
 20221220_044313.jpg2.3 MB · Views: 89
 -
 20221220_044311.jpg1.3 MB · Views: 92
 -
 20221219_160300.jpg3.6 MB · Views: 78
 -
 20221219_160254.jpg2.2 MB · Views: 79
 -
 20221219_160252.jpg2.4 MB · Views: 76
 -
 20221220_062333.jpg2.2 MB · Views: 85
 -
 20221220_162907.jpg2.1 MB · Views: 82
 -
 20221220_185835.jpg2.4 MB · Views: 86
 -
 20221220_185848.jpg2.2 MB · Views: 82
Alright, sorry for the lapse in time since last post. Its the holidays and I have been traveling across the country. Will update post soon with new content for my Battle rifle print. Stay tuned.
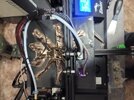
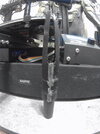
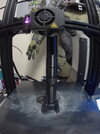
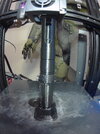
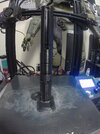
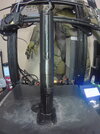
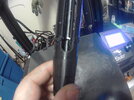
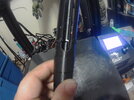
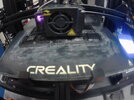
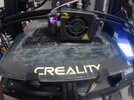
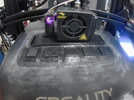
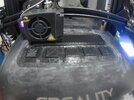
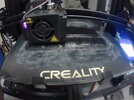
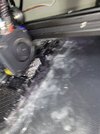
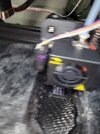
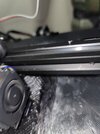
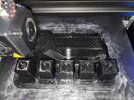
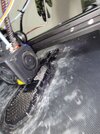
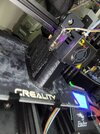
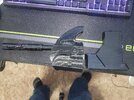
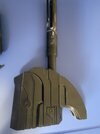
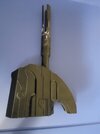
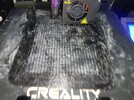
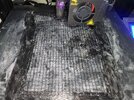
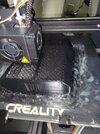
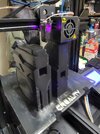
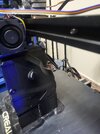
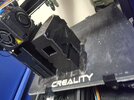
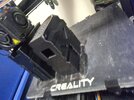
Ok so in this post I have assembled the barrel and first part of the receiver together. What you don't see is all 3 of the barrel
flanges broke at some point and I'm still glueing them back on at this point, I may end up reprinting the barrel with thicker walls to help this. You will also see my ender starting the print for the next piece. Also, ignore the large quantities of glue on the bed, I didn't know how large the print was gonna be with the brim so I decided to glue the whole bed and hope for the best. In hindsight, this was a bad idea as I now cannot seem to remove the support material from that side of the print. Pics to follow.
flanges broke at some point and I'm still glueing them back on at this point, I may end up reprinting the barrel with thicker walls to help this. You will also see my ender starting the print for the next piece. Also, ignore the large quantities of glue on the bed, I didn't know how large the print was gonna be with the brim so I decided to glue the whole bed and hope for the best. In hindsight, this was a bad idea as I now cannot seem to remove the support material from that side of the print. Pics to follow.
Attachments
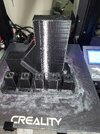
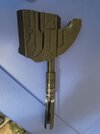
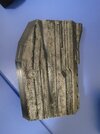
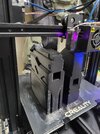
Ok so the next piece of the puzzle is done. As mentioned in the post before, the support material will not come off despite only printing support for bed adhesion and only 5% infill. I've had to take sandpaper and a dremmel to clean it up, but the support structure fused itself to the print so it looks terrible compared to the opposite side. I guess I'm just gonna have to sand both sides down and paint to match/cover up the deformities.
Attachments
-
 20221231_223923.jpg918.4 KB · Views: 87
 -
 20221231_223929.jpg870.3 KB · Views: 90
 -
 20221231_223935.jpg1 MB · Views: 74
 -
 20221231_223941.jpg1.3 MB · Views: 88
 -
 20221231_223945.jpg1.1 MB · Views: 93
 -
 20221221_160418.jpg1.4 MB · Views: 81
 -
 20221221_155510.jpg2.1 MB · Views: 85
 -
 20221221_052738.jpg3.7 MB · Views: 80
 -
 20221221_052741.jpg3.7 MB · Views: 78
 -
 20221221_052801.jpg3.6 MB · Views: 81
 -
 20221221_052805.jpg4.1 MB · Views: 86
 -
 20221221_155506.jpg2.2 MB · Views: 87
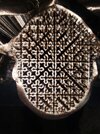
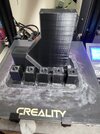
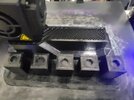
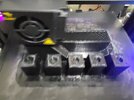
In this one i decided to print 2 of the next segments together, to save time and increase productivity. My ender 3 is happily chirping along, especially after I have begun taming it and learned how to increase the print speed and flow output. Compared to my first print, which was basically a solid block with 40% infill that turned into my magazine, I am running at only 5% infill with 4-6 walls to add structural integrity and saved substancial time and filament. Seriously, that magazine used about 1.3 lbs of filament alone. Good thing this is a learning process, was beginning to think I could never make this profitable. I just now had to switch filament rolls, after printing everything thusfar on a single 2.2lb roll of petg. I couldn't be happier with my results.
Attachments
-
20221231_122810.mp485.6 MB
-
 20221231_170854.jpg1.4 MB · Views: 69
 -
 20221231_170848.jpg1.2 MB · Views: 78
 -
 20221231_170739.jpg860.9 KB · Views: 72
 -
 20221231_170737.jpg1.1 MB · Views: 78
 -
 20221231_170711.jpg3.2 MB · Views: 74
 -
 20221231_122856.jpg2.3 MB · Views: 74
 -
 20221231_122855.jpg2.4 MB · Views: 83
 -
 20221231_122853.jpg2.2 MB · Views: 90
 -
20221231_122905.mp443.8 MB
- Status
- Not open for further replies.
Similar threads
- Replies
- 9
- Views
- 502
Similar threads
- Replies
- 9
- Views
- 502