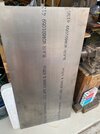
1st Build Noble 6 from sheet aluminum

Status
Not open for further replies.
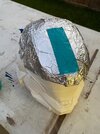
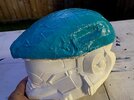
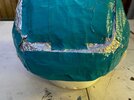
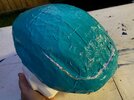
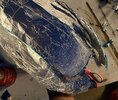
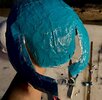
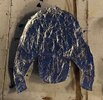
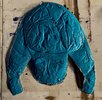
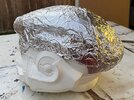
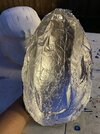
Actually had clear skies today! I got my sheet metal package in so I pulled out the resin helm and started doing a pattern. This is just like you see people doing for fabric patterns. I wrap foil around my positive form then start putting duct tape over it. The foil is so I can see where the features are in the resin helm. To make this one easier, it has some cuts. This will allow a couple things. First, it makes it really easy to get the helm features on the upper rear by overlapping the steel. Secondly, it makes it like a "belt buckle" so I can size the top as needed by pulling in the metal on the overlap. You can see where I left the aluminum uncovered by the tape along the ridge in the rear.
1.jpg2.jpg3.jpg4.jpg6.jpg5.jpg

7.jpg8.jpg9.jpg10.jpgsheet metal.jpg

The top part of this one will be hot formed from 0.063" thick 4130 chrome moly steel. 16 ga steel will stretch quite a bit when dishing the curves in. The resin helm is about 15% too big already. To compensate for this, I'm going to cut a 3/4" wide strip out of the center of this in both X and Y directions. If I need to, I can always stretch the metal out a little more. That's the nice thing about steel!

How do you gauge where to trim, where to add more metal, where to remove sections? Well, that's just something you have to learn over time, and it's different for every type of alloy and every thickness. Like I said though, hot working steel allows to to adjust things where you need. I can't do that with aluminum. Once heat treated, this helm top could probably stop a glancing bullet, so upkeep over time will only amount to paint touch up.

Tomorrow I'll weld up the front lower portion and do a pattern for the rear section. Then you'll see more on how to size steel armor and why I choose certain lines for sectioning this into segments.
 
I was all happy to try out my brand new wide view welding mask. It was so vivid and clear when I melted holes right through my helmet parts! :)

I couldn’t figure out why my metal was vaporizing instantly, until it dawned on me I grabbed 1095 very high carbon steel instead of the 4130 alloy. 1095 welds like crap. I needed way less heat and more feed. On the bright side, I found an entire stack of 4130 sheet sections, so I have plenty of steel!


78D0E3E6-3AC2-4C9E-9401-C262F280E33F.jpeg

Edited to add:
I think it's actually a welder problem. The pic above is the underside of the thin sheet steel. I cut the amperage down and it seemed to get "hotter". I think my transformer control may have gotten bonked during moving. This is just a dinky little Lincoln wire feed welder that's 20 yrs old. I have a much better Miller MIG 180 machine, but I haven't wired the garage for 240 V service yet. I'll have to try some settings on some actual 4130 and see what difference it makes.

In the mean time, I have stacks of aluminum sheet to get back on the leg armor building!
 
Last edited:
I was getting ready to make a bunch of forming stakes for all the armor parts, starting with some planishing stakes to smooth out the leg sections.

In the process, I found the source of my welding inconsistencies! Hah, looks like I almost severed my MIG line. Cut goes down well into the conductive sheath, but not into the liner. This will darn sure give you poor current control….and possibly light you up a bit! Guess I probably shouldn’t weld out in the driveway during the tropical storm this evening! :)

69030F2B-ADAA-4BF1-8F8F-935926AE35A0.jpeg
 
I had a severe manic moment last night. :)
I think this is my Christmas and birthday present all rolled into one. I couldn't resist. I've been wanting a TIG welded for years. These units, even though they're from Harbor Fright, get really good reviews. They just came out with the AC/DC TIG version here. I can pretty much weld any metal from aluminum, to titanium, to cast iron brazing, stainless and alloy steels...etc.

Now I can use the lower face section I botched and try and re-learn my TIG welding skills. It's been almost 30 years now!

welder.jpg
 
Status
Not open for further replies.
Back
Top