That's actually a really good start! You've especially followed the shape of the patterns well. I'll give you a few of my thoughts:
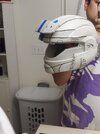
1. In relation to the warping in the first picture, that's generally an easy fix. At the very least, you can take a heat gun to it, warm it up and them manipulate it to try and hold the proper shape. If it needs more "encouragement", you can glue in an armature wire that will fix it to the right shape.
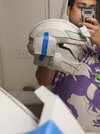
2. Foam floor mats are good for most of the build, but unfortunately when using it to stack on layers, gaps show up between parts because of the textured surface. If you have a belt sander, or a band saw, you can take that off easily enough. If you were willing to dish out a little bit more on foam, you can get cosplay foam that won't have that texture. Otherwise, you can fill those gaps with something like Kwik Seal or similar (a kind of caulking silicone that you can smooth out with water).
3. For the most part your bevels look great, but I think they're a bit too sharp at the top though. That's a very easy mistake anyone can make though, and if you wanted to reuse this helmet, you could cut most of the way through the back of the seam, bend it to shape and fill it up with hot glue.
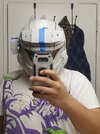
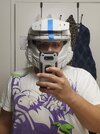
4. For the grooves on the helmet, there's a couple of things you can do. Firstly, if the grooves fall on a seam, you can lightly round the edges of the pieces that lie on that seam so when they join together, they form that groove. Secondly, you could use ye old "knife, score and heatgun" or "soldering iron/woodburner" method.