AChooChooTrain
New Member
I hope that I use this lots and document my journey for making an ODST cosplay.
I recently had a life changing surgery, so I will finally live my dream of having an ODST suit.
I'm still early into planning though, because I have to be extremely careful of fumes and dust, or other breathables. So I'm deciding if I buy hard armour parts made and sew ect myself, or what materials I can use myself that won't harm me.
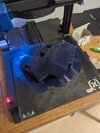
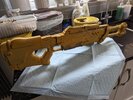
So far the options seem to be printing with PLA+ as it's low fumes, although I'm scared of toughness and the amount of effort to 3d print in general. Or if I buy a seanbradley type kit off of Etsy which will have done a large bulk of it for me. I could also look at getting parts 3d printed locally but I don't know anyone or how I'd go about that...
I recently had a life changing surgery, so I will finally live my dream of having an ODST suit.
I'm still early into planning though, because I have to be extremely careful of fumes and dust, or other breathables. So I'm deciding if I buy hard armour parts made and sew ect myself, or what materials I can use myself that won't harm me.
So far the options seem to be printing with PLA+ as it's low fumes, although I'm scared of toughness and the amount of effort to 3d print in general. Or if I buy a seanbradley type kit off of Etsy which will have done a large bulk of it for me. I could also look at getting parts 3d printed locally but I don't know anyone or how I'd go about that...
")