Project Thanos

Status
Not open for further replies.

OJ102

Member
Her there,

Following making a small prop toy for my son ive been energized to start a more complicated foam project! I have a lot ive wanted to try but as my kids are marvel fans and most of their prop toys are from there I thought id do the crown jewel of the set.

Thanos Armour, with infinity gauntlet and his sword.

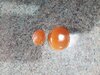
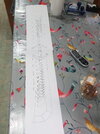
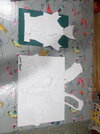
I couldn't find a decent pep file for the Gauntlet so Ive ended up making my own templates for it, hopefully the supplies for the trial run will arrive in the next few days. The current plan is to use 10mm 100* High density foam for the vambrace, and nucklebrace, 5mm foam for the side plates and fingers and 2mm for the surface raised details. The 10mm foam is rock hard and doesnt move much so I wanted to use that for pats that shouldnt bend, and also as its 10mm, I can literally embed electronics inside it and fill the hole behind them. Each of the 6 infinity stones will be made using Resin/Hardener in wax casts, set inside the nucklebrace with 3-embedded- LED circuit boards under each one run together off a power pack that will house 4 AAA batteries. Ill need to check the power rating for that but it runs one fine so they wont explode at least!

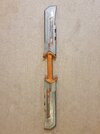
The sword is just a solid prop and I have a file for that so is a nice easy one.

The Armour is proving harder as I cant find any files and its a lot to make from scratch! If anyone knows of any floating around the internet it would be much appreciated.

Current plan is to do the gauntlet first as its got some very fine details, then take it from there as there are a lot of stand along parts.

Anyone seen any other builds for this I can snoop on? just to see the standards :D
 
Ive had a look at them, Theirs is a scale version! a cool one but that thing looks like you would cook inside it:D

I also cant seem to get the templates from the group, cant find them there to look at... Ill watch the show as it might give some handy tips for parts, I watched the fitting one and liked how they didnt use a Cod Piece, I too found that it was sooooo restrictive, not to mention you cant sit down!

My supplies for it should arrive today, It played with the lights in the pic attached with the 6 infinity stones. They are actually LED tea lights! they are 3cm high tho with the casing so im taking them apart down to the 5mm board, ill then rehouse them directly into the gauntlet so the glove doesn't have bulges.

Ive "hopefully" got some replica plastic infinity stones coming in the post, depending on how they look i may not use them directly but rather make a cast using them and make my own using resin. tbh i have no idea the geometric properties of the stones, the sizes, edges etc so until they are available i cant make the handplate as the housing will be made to match the stones!


20200820_045456.jpg

Im going to ease into this with the Infinity Gauntlet half size first as my 4 year old really wants it. It will also let me see any flaws before I commit more foam to it! he will also get 6 single LED;s rather then embedded LED boards !
 
Not been well so not had an opportunity to work on this. I spent a few hours today working on the templates on low density 2mm and 5mm foam to see where pitfalls will occur. Its held together with pins atm but it's going in the right direction!
 

Attachments

  • 20200901_160514.jpg
    20200901_160514.jpg
    1.4 MB · Views: 186
So, I've been puzzling my way through this project, the main hurdles being dexterity, while incorporating electronics and non foam components, aka stones.

I'm building a test one out of low density foam which is almost done, although it's not all glued together as I'll use it for making templates.

I've been working on the handplate recently as that's where all the action is. 6 infinity stones all with led back lighting to sit on the back of your hand. I couldn't find anywhere online who sold something usable so I've made my own! The pic shows the test moulds from my 1st and 2nd attempt. The small one is attempt 1. I didnt like the finish but it's the right shape. The one on the left is my second attempt, a much smoother finish. I'll use these to make the moulds for all 6 stones, by pressing them into play dough then filling them with coloured resin.

The back lights will hopefully be test ready soon, and will consist of 6 tri-led mounted boards connected in parallel to a 2xAAA power supply. I'm just waiting on more solder to arrive.

Next post will hopefully be the stones and electronics part finalised!
 

Attachments

  • 20200911_134125.jpg
    20200911_134125.jpg
    2.2 MB · Views: 191
Update: good news bad news...

As you can see in the image there is unlimited power radiating from the gauntlet. Unfortunately due to the way the scavamged components are made, they change colour in unison every 2 seconds..

They came from tea lights designed to work underwater from 2xcr2032 batteries. So I wired up 6 in parallel from 2xAAA to avoid organ selling to power it. The lights have a fatal flaw tho, they leak power continually even if off, from the moment you put the batteries in, they last 7-10 days if on or off. Crap design considering they go in ponds. But it returns out the lights need that power to retain the colour they are told to emit, since each one has 4 different brightness levels in 12 different colours with 3 modes.

So now I have to reprogram the boards to the 6 colours on each power up. Either that or have them all reset to white and make the 6 gems a strong colour to give it the effect.

The other option is to use a rechargeable 10kmA pack to give it enough power to last 3 months between charges.. but I worry they will overheat if they are always drawing power.
 

Attachments

  • 20200916_061945.jpg
    20200916_061945.jpg
    997.9 KB · Views: 184
I had to take a break from foam to deal with christmas duties but thanks to a new lockdown I decided buger it, I'm making something! The stage 1 sketch of thanks sword.

Hopefully I'll have it layered soon after christmas and can begin construction!
How long is that sword?
 
Currently about 110cm. I drew it for my 4 year old! I could have just as easily made it scaled up.

It's now in layers too. The blade is comprised of the base rod extending the full length of the weapon, then a 10mm 100gsm sheet of eva foam for the blade, and 2 additional layers of 5mm 100gsm foam for the detail and raised detail. Note that's òn both sides so the blade will be 20mm on each side of the rod, the rod being 2cm thick. Total blade thickness should be clost to 6cm.

The handle will be 8cm thick as it has a lot of detail on the hilt I want to highlight.

The 100gsm foam blade edges tend to keep their shape well over time even when hit against things so I'm hopeful this will be in many battles for my 4 year old! Will get started crafting after Christmas
 
Sword is done. Attached a pic of just the sword and also one of it with the armoury for a scale. Kids are overjoyed with their new weapons. Now on to the armour!
 

Attachments

  • 20210104_180313.jpg
    20210104_180313.jpg
    1.9 MB · Views: 172
  • 20210104_180205.jpg
    20210104_180205.jpg
    1.7 MB · Views: 169
Update: the armour has been taking a while. Really struggled to get a decent model for it and even that was a paper unfold. Finally managed to piece one together and scale it for a 4 year old!

I'm now fine tuning the parts and assigning them layers.

The goal is to have the base layer out of 10mm foam for a ridgid structure. A second layer of 10mm will be used for major detailing where sections need to be very raised. Finer details will use 5mm foam with any engraving details using 2mm. All foam will be 100gsm grade donuts tough.

I'm not going to use poly filler this time, I've ended up sanding it off the last 2 projects as it just didn't look great. Instead I'm using a 80 grit sanding block and running it along the seals by hand very fast, which seems to almost melt the edges together. Going across the seam seems to cause ripping. I'm also avoiding the dremel sander as it seems to eat the foam and spoil the finish.
 

Attachments

  • 20210106_192331.jpg
    20210106_192331.jpg
    1.5 MB · Views: 144
Status
Not open for further replies.
Back
Top