Rage's first build!!! The MK IV and Halo 3 Assault Rifle

RageGoblin

New Member
My Spartan name is Georgia (where I'm from) and my AI is Madison (my penname)
I'm going to be building this in conjunction with OFiveTwo, so my intention is for this to be a slow and steady progress.
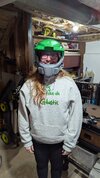
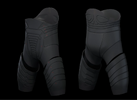
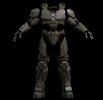
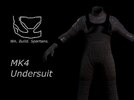
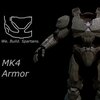
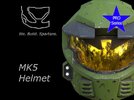
I have decided on a MK IV Suit with an MK V helmet.
I bought the files from TitleWaveDesigns on Etsy.
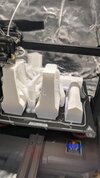
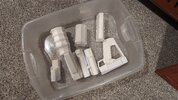
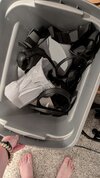
I will be using TPU to print the under suit and PLA + to print the outer suit.
I will be painting this suit to mirror Texas from Red vs Blue
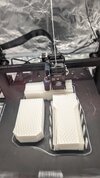
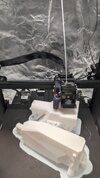
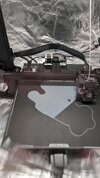
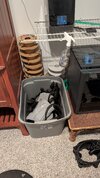
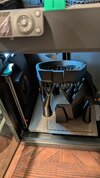
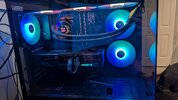
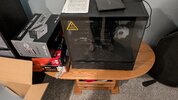
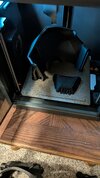
I have an Ender 3 S1 Plus.
This is my first time making armor or something I need to scale to wear. Armorsmith is an enigma to me. I don't know how much space I need in the gap between the armor piece and my model for it to fit once printed.
I am also trying to figure out the best way to secure the armor pieces to me to make it easier to remove the bottom half if I have to ...so bio things during a convention.
I don't know what kind of fabric actual soft gear to wear under the whole thing since I will be wearing two layers of suit.
I feel a bit too insecure to share my armorsmith model just with it being scaled the way it is without the armor. Once it has the armor layers on it, I will post a photo.
Tomorrow, I will start printing the first forearm piece
 

Attachments

  • il_794xN.4512298483_ceme.jpg
    il_794xN.4512298483_ceme.jpg
    53.8 KB · Views: 118
  • il_794xN.4717969438_64hu.jpg
    il_794xN.4717969438_64hu.jpg
    103.2 KB · Views: 133
  • il_794xN.5764872591_k1be.jpg
    il_794xN.5764872591_k1be.jpg
    91.3 KB · Views: 110
Last edited:
You can go with EVA for padding under your armor. Start with a forearm or smaller piece to figure your sizing then it will give you a scale to do the rest.
 
Printing parts 9-10/10!! The tree supports for each of the parts failed while printing for the previous parts, so, for these last two pieces, I printed them using a raft for the first time to see if it was an adhesion issue. This fixed the problem! We're 79% done now. Next up will be printing the TPU hand and elbow piece along with the accompanying forearm suit piece that was the actual homework assignment by OFiveTwo!
 

Attachments

  • PXL_20240314_040534883.jpg
    PXL_20240314_040534883.jpg
    2.9 MB · Views: 124
  • PXL_20240315_143219203.jpg
    PXL_20240315_143219203.jpg
    2 MB · Views: 126
  • PXL_20240314_040546938.jpg
    PXL_20240314_040546938.jpg
    2.1 MB · Views: 133
Ok!!
I have recently switched to a Bambu Lab P1S printer and traded in my Ender 3. I tell you what, so far this Bambu printer has been phenomenal.
The only downside is the build plate is much smaller than my previous one.
What does this mean for my suit?
I will have many more seams to smooth out.
Right now, I am working on printing a draft of my helmet to practice fusing and working on seam lines. It's going to take at least 4 days to print all of the parts for it. I have 8 build plates of data scaled and ready to go.
Currently, I am printing plate 1, which is the top back part of the helmet.
Build time: 10hours
1000006094.jpg
1000006093.png
 
Well ... The past few days have been interesting. I was successfully able to glue all the pieces of my helmet together and got the magnets all oriented the correct direction. I did struggle a bit figuring that out and had to pry some magnets out to fix the polarity.
I was very excited to have a completed helmet and put it on without verifying the glue was dry.
Needless to say, my husband and I spent 35 minutes getting super glue out of my hair so I didn't have to cut it all off.
Now comes the million hours of sanding before priming.

I have also changed the order of my printing schedule. I will focus now on printing the under suit first. I'm using tpu. This will be a fun adventure figuring this out!
 

Attachments

  • PXL_20250215_053901209.mp4
    47.5 MB
  • IMG_20250215_122346.jpg
    IMG_20250215_122346.jpg
    2.4 MB · Views: 66
  • PXL_20250215_053827553.jpg
    PXL_20250215_053827553.jpg
    1.7 MB · Views: 64
  • PXL_20250215_053936265.mp4
    30.4 MB
1000009659.jpg

The current state of my work table is a bit chaotic to say the least. However, I am making great headway (pun intended) on my helmet. I am just about ready to do my first coat of filler primer and start sanding that too. I feel like my life will be sanding for the foreseeable future. Lol
After almost 3 hrs of sanding and putting together my magnum, I went back and worked with Armorsmith and scaling my undersuit.
Somehow, the measurements for my mannequin were off, and I went through and realized the legs and torso proportions.
I am currently printing test rings for my right thigh piece. Printing with TPU has been a whole new animal. I'm looking into getting a smooth build plate to hopefully make it easier to get the print off the plate.
Any tips on how to make this easier would be most appreciated.
 
Ohh, my god, where did you get/find the idea for that helmet insert as a spacer? that's amazing there's so much good room up there for wires ands to help keep it ventilated.
 
Ohh, my god, where did you get/find the idea for that helmet insert as a spacer? that's amazing there's so much good room up there for wires ands to help keep it ventilated.
I honestly don't know if it will give me enough space for the battery packs/components/fans since the insert goes the whole way around on the inside. I might have to cut it to make a slot for the exhaust fans, but that might workout better in the end. lol. I have the tism, and the thought of having tape against my sweaty scalp gives me the willies.
 
I honestly don't know if it will give me enough space for the battery packs/components/fans since the insert goes the whole way around on the inside. I might have to cut it to make a slot for the exhaust fans, but that might workout better in the end. lol. I have the tism, and the thought of having tape against my sweaty scalp gives me the willies.
make the cut out in your 3d slicer before you print it so its already there (keeps the fun sharpe edges away from you).

I am also planning on mounting my fans with glue so i dont have to deal with the gross tape feeling.
 
Here's my proof of project life post. hehe
It's been quite a while since I have updated on the progress of my suit. Truth be told, there has been very little progress made due to trying to kick my husband off of the main computer that can handle Armorsmith and BambuLab, continued print failures and JUST. NOT. BEING. ABLE. TO. FIND. THE. RIGHT. SCALED. SIZE! However, I have not given up.
Recently, my husband surprised me with a new gaming PC that had the specs to be able to handle all the slicers and programs I could want whilst watching Youtube and VCing in Discord. I was absolutely not expecting this.
That's one hurdle down.
I think I finally have found the correct scale for my shin/lower leg pieces on my suit and am just about done printing the left leg (will update with photos soon)
Since I already have my TPU thigh pieces printed, it was a challenge to find the right length for the shin pieces to fit both my actual leg and the space between the shoe parts and the non-existent hard thigh pieces. But, again, will update in a separate post.
I have an entire tub of failed pieces and not correctly scaled test pieces/rings.
I am keeping all of the spools from the filaments I have used for my suit so that at the end of the project I can stand next to my invest that, I am sure, will have been enough to purchase a car. ... Maybe a used car, but still.
I have this weekend off, so it will be dedicated to figuring out assembly of the shin pieces and beginning the thigh outer armor.
 

Attachments

  • PXL_20250716_131330551.jpg
    PXL_20250716_131330551.jpg
    2 MB · Views: 7
  • PXL_20250716_131321737.jpg
    PXL_20250716_131321737.jpg
    2.8 MB · Views: 8
  • PXL_20250716_024046985.jpg
    PXL_20250716_024046985.jpg
    1.4 MB · Views: 7
  • PXL_20250716_131335061.jpg
    PXL_20250716_131335061.jpg
    1.3 MB · Views: 9
OOOO i love the idea of standing next to all the feels you have used. i have thrown/recycled half of mine so i can do that.

look forward to seeing the finished shin piece.

is the entire armor TPU?
 
What you’ve got is looking great, keep it up! With all the movement and interconnected parts, legs definitely seem tricky. TPU should help it at least be a bit more comfy. Can’t wait to see more progress, the helmet and armor combo looks really interesting!
 
The insert for the helmet is a really good idea. I’ve been trying to come up with a way to make the inside of mine look finished, and I’ll probably just sew a cloth liner. Yours will look so cool when it’s done though! I can’t wait to see it.

As for the bucket of parts, try not to look at them as parts that weren’t scaled correctly. Just because they don’t fit you doesn’t mean they wouldn’t fit someone else. Maybe you could donate them, or try to sell them to get some of your investment back. I’m sure they would fit someone here.
That is a great idea, I will keep that in mind if any of my parts come out too small. if they are too big for me I doubt they will fit anyone unless the rock decides to take up cosplay.
 
The insert for the helmet is a really good idea. I’ve been trying to come up with a way to make the inside of mine look finished, and I’ll probably just sew a cloth liner. Yours will look so cool when it’s done though! I can’t wait to see it.

As for the bucket of parts, try not to look at them as parts that weren’t scaled correctly. Just because they don’t fit you doesn’t mean they wouldn’t fit someone else. Maybe you could donate them, or try to sell them to get some of your investment back. I’m sure they would fit someone here.
That's not a bad idea. I have several forearm pieces that are completely prints and just sitting in my garage. They're too short for my long Slenderman arms. Lol. I'll have to figure out their measurements and list them in marketplace.
 
So the plan this weekend is to put together the left shin pieces, finalize the size, and then print the right piece.
While I'm working on those, I'm will start the scaling for the hard armor thigh pieces that will go over the under suit I already have printed.
I'm curious how that's going to go. I may need to alter the tpu thigh under armor pieces I already have, because the upper/inner thigh area already touches while I'm just standing without the outer part.
We'll see how that goes.
 

Attachments

  • PXL_20250716_131556848.jpg
    PXL_20250716_131556848.jpg
    3.1 MB · Views: 3
  • PXL_20250716_131342827.jpg
    PXL_20250716_131342827.jpg
    1.7 MB · Views: 4
  • Screenshot_20250716-141729.png
    Screenshot_20250716-141729.png
    244 KB · Views: 3
  • Screenshot_20250716-141654~2.jpg
    Screenshot_20250716-141654~2.jpg
    76.6 KB · Views: 4

Your message may be considered spam for the following reasons:

If you wish to reply despite these issues, check the box below before replying.
Be aware that malicious compliance may result in more severe penalties.
Back
Top