I am using some TPU in our builds. I expected some machine specific tuning, but the moisture aspect caught me surprise.
Moist & Moisture. I read somewhere that people think "Moist" is like one of the Ickiest and unpleasant words.
When it comes to TPU, It is all about the Moisture.
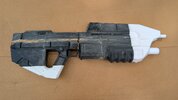
I'm doing our arm collars out of TPU, a total of 12 parts
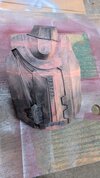
After half a dozen failures, dialing in settings I got frustrated

I finally read the Overture instructions
, which say to dry it for 7+ hours at 70c, even when new out of the vacuumed sealed bag.
I didn't even know I could manually set the dryer temp to 70c. It doesn't have a default that high. FWIW: I had been doing 2 hours at the 50c PETG setting. And, making things worse, this was during 4 days of cold (65-75 degrees with 55%+ Humidity) wet rainy weather here in Atlanta.
7 Hours later + 4 hours to print, and I produced my first near perfect TPU part
12 parts at 4 hours each with 5-6 hours drying between each one.... OK, check, they will be done by Dragon Con!
I can't wait to see everyone there!
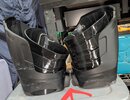
Now, How do I get these shoes/boots to work?