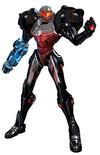
Bienvenue a 405th, monsieur!! Very awesome start you have going on! Always nice to see another Samus build! Yes, those shoulder bells are HUGE!! How big did you make those things? The bells that I'm making are about 10 inches (25cm) tall without the ridge/flange things, which add another 1.5 inches (3.75cm). Of course, I'm scaling by eye rather than by pepakura scaling values, but there is definitely going to be something of a trade-off between wearability and accuracy because, as has already been said, Samus is not proportioned anything like a real human (at least not in her full armor... zero suit is another story). Her waist is impossibly narrow, her shoulders are impossibly wide, and her head is impossibly small. Making a wearable suit to fit on a real person is not likely to be easy for either of us ")
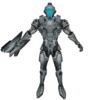
One quick commiserating note on the helmet... yours looks really good in profile, but a bit large from the front, but I TOTALLY understand why, and I feel your pain with the scaling!! Her helmet is proportionally wider than it is tall, so in order to make it big enough to fit on the head without exposing the jaw or pinching the chin, but small enough not to look bobble-headed, I had to tweak the scale and squash it sideways quite a bit, and I'm not entirely sure I was successful. And, like you, I'm worrying about the hips/waist/ribcage proportions, as well.
Good luck on your build!! Can't wait to see how it progresses, especially your plans for the lighting!!