Okay, so I’ve decided to share a small tutorial on how I do cardboard prototype armor to test scaling before moving on to foam.
(This is basically simple foamsmithing but with cardboard, therefore being much less expensive)
This method is something that I did for my H3 Marine Armor, and I did it to preserve my foam supplies. I didn’t want to waste foam, which led to my creation of cardboard armor prototypes, which helped me to better understand how the armor was put together(as a bonus) as I created the pieces to make sure I had the armor scaling right. Thanks to N8TEBB scaling the marine armor components last June it led me to actually making the armor, and the cardboard prototypes were mainly a way to make sure that they were scaled properly, and thankfully they were(because Nate’s awesome).
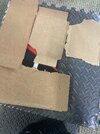
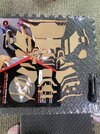
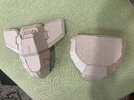
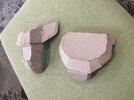
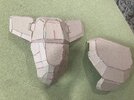
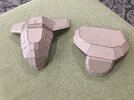
Anyways, first I’ll share a couple of examples of the marine cardboard prototype process:
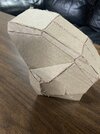
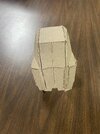
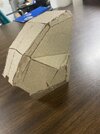
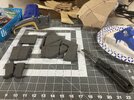
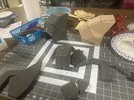
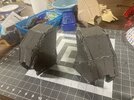
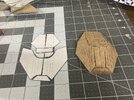
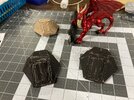
As you can probably see here, I did the cardboard piece first(of course, that is the role of a prototype) before moving on to foam. I completed the prototype, checked if it fit, and then made it out of foam while using the prototype as a reference for what to do and what not to do. It was very much so a learning process, and since I didn’t have Armorsmith at the time it just made things more difficult. However, I managed to figure things out and get through it.
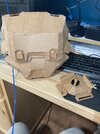
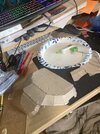
Of course, now that I do have Armorsmith the process is much more understandable and I can have an easier time putting the prototypes together the first time, as seen with the Rakshasa chestplate prototype for my current project:
I’ve been working toward assembling the belt for this suit, and that will be the piece that this tutorial is based around. So, without further ado, let’s get into it!
Step 1:
Scaling in Armorsmith
Of course, you can’t easily check armor scaling if you don’t have the ability to scale it first. You begin by making sure all of the armor pieces fit to your proportions on Armorsmith before unfolding and exporting/printing your templates.

Having your armor scaled beforehand will help in recognizing later on if your Armorsmith avatar isn’t quite to your proportions. And if it’s right, then that’s a good thing.
Step 2:
Unfolds, Templates, Exporting/Printing, and Cutting
Of course, in order to actually start creating with templates at all you need to have the physical pieces of pretty paper in front of you. You gotta make sure that they’re unfolded properly on Armorsmith or in Pepakura before exporting for the print, and after printing them(my Rakshasa templates were printed on card stock because it’s sturdier) you need to cut out the pretty little detailed pieces of paper that are templates, one of the most important parts when making armor that isn’t 3D/Resin printed.
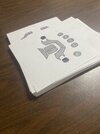
However, what good will templates do you if you don’t use them? That brings us to our next step.
Step 3:
Transferring Designs to Cardboard
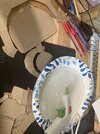
You can’t make cardboard armor if you don’t use cardboard, right? Well then you need to get yourself some cardboard, grab those pretty templates, and start tracing!

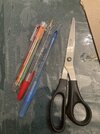
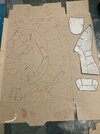
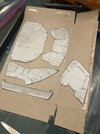
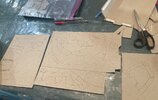
On my Rakshasa prototypes I’ve been color-coding different lines, specifically the base outline, smaller solid lines that need to be cut fully, and the lines(on the templates they’re dotted) that represent scoring or beveling and not full cuts through the material. Make sure that your lines are clean and distinguishable so you don’t have a breakdown later because you don’t know what’s going on.
Step 4:
Cutting the Cardboard
Of course you’ve probably been anticipating this. Why wouldn’t you? You finally have the opportunity to cut out your cardboard pieces! But be careful, remember which lines are clean cuts and which ones represent the piece bending! Don’t cut the dotted lines!(It’s okay to do that with foam in certain situations, but I’ll probably go over that later. But don't cut them on the cardboard!)
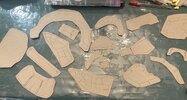
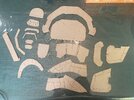
Step 5:
Scoring the Dotted Lines
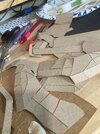
You guys know how I said not to cut the dotted lines? Well now it’s time to “score” them. As in, take your craft blade, put it on the cardboard, cut a line, and don’t push it entirely through the cardboard. That way you can handle the bends easier, but you also don’t have to do extra gluing.
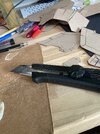
Step 6:
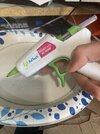
Glue!
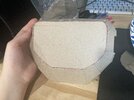
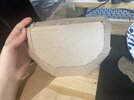
And now, last, and definitely most, you get to glue it all together! When it’s done, if done properly, all the pieces combine to become something amazing, just like a puzzle. If you don’t know exactly how to assemble the armor, never fear! Because if you have Armorsmith, you can use it as a reference to figure out which piece goes where. And don’t worry if the pieces don’t fit together perfectly, because this is(likely) still a prototype that you can improve on before actually moving to EVA foam.

That’s all for ZCAT! Zelda’s Cardboard Armor Tutorial! (Send me a direct message if you have any questions/concerns )
)
(This is basically simple foamsmithing but with cardboard, therefore being much less expensive)
This method is something that I did for my H3 Marine Armor, and I did it to preserve my foam supplies. I didn’t want to waste foam, which led to my creation of cardboard armor prototypes, which helped me to better understand how the armor was put together(as a bonus) as I created the pieces to make sure I had the armor scaling right. Thanks to N8TEBB scaling the marine armor components last June it led me to actually making the armor, and the cardboard prototypes were mainly a way to make sure that they were scaled properly, and thankfully they were(because Nate’s awesome).
Anyways, first I’ll share a couple of examples of the marine cardboard prototype process:


As you can probably see here, I did the cardboard piece first(of course, that is the role of a prototype) before moving on to foam. I completed the prototype, checked if it fit, and then made it out of foam while using the prototype as a reference for what to do and what not to do. It was very much so a learning process, and since I didn’t have Armorsmith at the time it just made things more difficult. However, I managed to figure things out and get through it.
Of course, now that I do have Armorsmith the process is much more understandable and I can have an easier time putting the prototypes together the first time, as seen with the Rakshasa chestplate prototype for my current project:


I’ve been working toward assembling the belt for this suit, and that will be the piece that this tutorial is based around. So, without further ado, let’s get into it!
Step 1:
Scaling in Armorsmith
Of course, you can’t easily check armor scaling if you don’t have the ability to scale it first. You begin by making sure all of the armor pieces fit to your proportions on Armorsmith before unfolding and exporting/printing your templates.

Having your armor scaled beforehand will help in recognizing later on if your Armorsmith avatar isn’t quite to your proportions. And if it’s right, then that’s a good thing.
Step 2:
Unfolds, Templates, Exporting/Printing, and Cutting
Of course, in order to actually start creating with templates at all you need to have the physical pieces of pretty paper in front of you. You gotta make sure that they’re unfolded properly on Armorsmith or in Pepakura before exporting for the print, and after printing them(my Rakshasa templates were printed on card stock because it’s sturdier) you need to cut out the pretty little detailed pieces of paper that are templates, one of the most important parts when making armor that isn’t 3D/Resin printed.

However, what good will templates do you if you don’t use them? That brings us to our next step.
Step 3:
Transferring Designs to Cardboard
You can’t make cardboard armor if you don’t use cardboard, right? Well then you need to get yourself some cardboard, grab those pretty templates, and start tracing!


On my Rakshasa prototypes I’ve been color-coding different lines, specifically the base outline, smaller solid lines that need to be cut fully, and the lines(on the templates they’re dotted) that represent scoring or beveling and not full cuts through the material. Make sure that your lines are clean and distinguishable so you don’t have a breakdown later because you don’t know what’s going on.
Step 4:
Cutting the Cardboard
Of course you’ve probably been anticipating this. Why wouldn’t you? You finally have the opportunity to cut out your cardboard pieces! But be careful, remember which lines are clean cuts and which ones represent the piece bending! Don’t cut the dotted lines!(It’s okay to do that with foam in certain situations, but I’ll probably go over that later. But don't cut them on the cardboard!)


Step 5:
Scoring the Dotted Lines
You guys know how I said not to cut the dotted lines? Well now it’s time to “score” them. As in, take your craft blade, put it on the cardboard, cut a line, and don’t push it entirely through the cardboard. That way you can handle the bends easier, but you also don’t have to do extra gluing.


Step 6:
Glue!
And now, last, and definitely most, you get to glue it all together! When it’s done, if done properly, all the pieces combine to become something amazing, just like a puzzle. If you don’t know exactly how to assemble the armor, never fear! Because if you have Armorsmith, you can use it as a reference to figure out which piece goes where. And don’t worry if the pieces don’t fit together perfectly, because this is(likely) still a prototype that you can improve on before actually moving to EVA foam.


That’s all for ZCAT! Zelda’s Cardboard Armor Tutorial! (Send me a direct message if you have any questions/concerns
Last edited:
