You are using an out of date browser. It may not display this or other websites correctly.
You should upgrade or use an alternative browser.
You should upgrade or use an alternative browser.
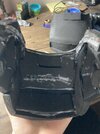
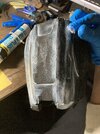
Both biceps, and the other part of the second boot, are all sealed and prepared for sealant! I also got a special mask so I don’t inhale any more of those fumes when I rubber seal stuff. I’m not sure where to go next since I don’t have a template printer at home. I’ll probably just work on my cod piece.
Attachments
Thanks! I'll try to find a way to Dragon-con when it comes around but if I cant, then I'll have to somehow get to another XDSomehow I've not come across your thread yet! Fantastic job on your foam work. It's looking very clean.
I hope to see it in person once you finish it!
- Member DIN
- S018
Your foamsmithing looks great! It's a good idea to put that extra time into making the notes on the patterns - that planning will save you more time and stress down the line.
Thanks! Well it's my first time foam smithing and I think I'm doing a really good job from what other failed foam armor look like. Ever since I've started on the helmet. I've made sure to not cut any corners down the line.Your foamsmithing looks great! It's a good idea to put that extra time into making the notes on the patterns - that planning will save you more time and stress down the line.
Dude, it's your FIRST time? Holy cow. You're making my first time with foam look like arts and crafts in a kindergarten classroom lol. Keep it up!
Thanks a lot dude! I try really hard, and while my next post is taking a while because it's the chest plate, I'm making sure it looks great!Dude, it's your FIRST time? Holy cow. You're making my first time with foam look like arts and crafts in a kindergarten classroom lol. Keep it up!
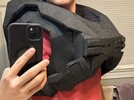
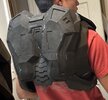
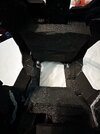
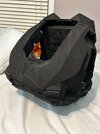
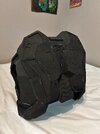
Finally after about 30 hours of work, it’s put together. There’s still plenty to do such as the neck seal, a lot of touch ups, and plenty of dremeling before I can even think of sealing it. It’s fits like a charm and I already padded the inside.
Attachments
The other forearm is getting done today and tommorow! I have a 4 or 5 day weekend for plenty of work time.
After this part is completed, I’ll have to work on my thigh pieces. For some reason, some parts are missing or misplaced on the templates, so I’ll have to freehand some. That’s okay since it’s always turned out pretty good.
Attachments
Sooo problem, but it’s already been solved so not really.
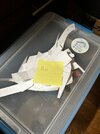
The templates I printed for the thigh were way too small for my actual thigh; almost half the size! I improvised and free handed my thigh templates and I think they turned out really well! All I did was wrap my leg in paper and go from there. Here’s some pics:


Although I’ll need to make some adjustments on the circle piece or side thigh. Also a quarter of the helmet is done printing! I haven’t started another but I will tonight.
The templates I printed for the thigh were way too small for my actual thigh; almost half the size! I improvised and free handed my thigh templates and I think they turned out really well! All I did was wrap my leg in paper and go from there. Here’s some pics:
Although I’ll need to make some adjustments on the circle piece or side thigh. Also a quarter of the helmet is done printing! I haven’t started another but I will tonight.
- Member DIN
- S410
Nice job!
Are you using the foam templates for the armoury? If they’re too small you can scale them up in pepakura designer. To scale in pepakura designer go to 2d menu -> change scale -> set scale


Here’s a simple scaling tutorial if you’re not too sure how much to scale:

 www.405th.com
If you want a more accurate way to scale, you can also look into the armorsmith tutorials in the tutorial index:

 www.405th.com
Are you using the foam templates for the armoury? If they’re too small you can scale them up in pepakura designer. To scale in pepakura designer go to 2d menu -> change scale -> set scale
Here’s a simple scaling tutorial if you’re not too sure how much to scale:

Tutorial: Simple Armor Scaling
Hi everyone, Though I haven't been a member here long, I’ve already seen several new threads pop up with noobs asking how to scale their armor pieces. Sometimes, they have already read the other scaling tutorials, and still have trouble. So, I thought I’d share my method for scaling that I...
If you want a more accurate way to scale, you can also look into the armorsmith tutorials in the tutorial index:

Tutorial Index
Tutorial Index Who can make a Tutorial? A: Anyone How do I make a tutorial? A: Create a thread in any part of the forum you think your tutorial pertains to such as Costume, Props, Soft Parts etc. How do I get the tutorial in the Tutorial Section? A: start a conversation with me...
Last edited:
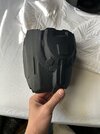
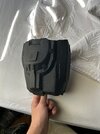
Since I haven't been very active on my build thread, I wanted to let whoever sees it know that I'm still actively working on my armor and I think I'll be done in the next 2-3 weeks. I have most of my stuff painted and would like to be done over spring break. I'm still debating on whether or not I should still post my progress though. Feedback would probably decide. I'll throw some photos in here just to have something in the build thread though.
Similar threads
- Replies
- 9
- Views
- 453
- Replies
- 37
- Views
- 1,678
- Replies
- 10
- Views
- 1,652

