3D printed mkVI build (Citruspers)

Well, no helmet parts yet because my printer broke again. Another broken lead in one of the drag chains, which is a pain to repair. I think it's time to re-do the wiring as it's clear they're just wearing out.

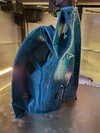
Meanwhile I did finish wetsanding the front and back armor panels to 800grit, so when they're dry I think I can move to painting:

Looks like a pencil sketch, lol

wet sanding.jpg
 
Well, no helmet parts yet because my printer broke again. Another broken lead in one of the drag chains, which is a pain to repair. I think it's time to re-do the wiring as it's clear they're just wearing out.

Meanwhile I did finish wetsanding the front and back armor panels to 800grit, so when they're dry I think I can move to painting:

Looks like a pencil sketch, lol

View attachment 324067
Very nice! A pencil sketch style might be a cool paint job to try one day.
 
Some more progress: I decided I've had enough of sanding the front and back armor parts; any remaining imperfections will hopefully get lost in my weathering job. So it was time for one last coat of primer, followed by a coat of silver that should make scratches etc look a bit more realistic:


silver coating.jpg


I've also settled on a color: RAL6011, Reseda Green, which is very close to the Halo 3 in-game armor color and also a bit subdued:
reseda green.jpg
 
Some more progress: I decided I've had enough of sanding the front and back armor parts; any remaining imperfections will hopefully get lost in my weathering job. So it was time for one last coat of primer, followed by a coat of silver that should make scratches etc look a bit more realistic:


View attachment 324395


I've also settled on a color: RAL6011, Reseda Green, which is very close to the Halo 3 in-game armor color and also a bit subdued:
View attachment 324394
Looks great, I can't see any seams what so ever!
 
This build is amazing, and thank you for sharing both your successes, struggles, and your own mistakes. Im excited to see your build and see what i am able to do with my printer following behind you on my armor. Those clear lenses for the helmet are awesome.
 
This build is amazing, and thank you for sharing both your successes, struggles, and your own mistakes. Im excited to see your build and see what i am able to do with my printer following behind you on my armor. Those clear lenses for the helmet are awesome.

Thanks mate! I'm watching your thread, looking forward to seeing the results.

Regarding the lenses: when I finish the design I'll probably upload them somewhere so more people can use them if they want :)
 
Progress update: the paint arrived!

First coat in Reseda Green looked a bit too clean and vibrant, so after it dried I finished it with a very light metallic black coat to give it some more depth.

There's some splotches where my paint application wasn't all too even, but I suppose I'll just use use those as a base for plasma scorching when I start weathering the thing :D

First coat:
first coat reseda.jpg


Second light metallic black coat
reseda black coat.jpg


Next steps: adding in notches/dowels, glueing in webbing and buckles and weathering the whole thing.
 
Did some weathering and detailing, pretty happy with how it turned out :D

If anyone's wondering what I did:

* Expose the base silver coat with some 800 grit sanding paper, including most edges
* Scratch the thing to hell with 80 grit sandpaper
* Hit it with a screwdriver to create dimples
* Use said screwdriver to create deeper scratches
* Put a tiny dab of black acrylic paint on a paper towel, and rub it into the scratches and dimples, creating a dirty, scorched look in the process.

chest detailing.jpg
 
Did some weathering and detailing, pretty happy with how it turned out :D

If anyone's wondering what I did:

* Expose the base silver coat with some 800 grit sanding paper, including most edges
* Scratch the thing to hell with 80 grit sandpaper
* Hit it with a screwdriver to create dimples
* Use said screwdriver to create deeper scratches
* Put a tiny dab of black acrylic paint on a paper towel, and rub it into the scratches and dimples, creating a dirty, scorched look in the process.

View attachment 324543
It's looking great you've gotten a lot of progress in in such a short time!
 
Friendly reminder to use tree supports in Cura. 72g part, 15g support structure, printed in under 4 hours and the supports removed itself in one pull.Tree supports.jpg

Now let's see about glueing that helmet together.....
 
I think you should use the lense with the lines through it on all 4, it makes it look more militaristic!

I just tried it, and I think you're right. :D I think having two different lenses makes more sense in a practical manner (as you'd get a wide and narrow beam), but using identical lenses looks better.

It also adds some additional detailing, and I presume it will also help hide the LEDs mounted behind it (which I've yet to do).
 

Your message may be considered spam for the following reasons:

If you wish to reply despite these issues, check the box below before replying.
Be aware that malicious compliance may result in more severe penalties.
Back
Top