Aztlan's Halo 4 Rogue + Binary Rifle + M6H + Exo-suit WIP, PIC HEAVY!

Status
Not open for further replies.
Dam-it.............I'm going to have to up my game after seeing this.....
Very Very impressive work.
 
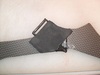
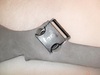
so not a one piece under suit.

Nope. If I understand your question right, I am not sure how a one piece Exo-suit could be accomplished and still be able to get it on/off. Also, looking at the reference pictures, there are latches at the waist area in the front, and clasp hooks in the rear which would indicate this is where the two pieces join. I also believe the arms are separate, but I am going with the permanently attached design.

My ultimate goal is to duplicate the mounting points for the armor plates so I won't have to use straps/snaps/Velcro. In theory, and like the reference image indicates, they will be inset soft mounts with quick release lever mechanisms.
 
Holy cheese and crackers dude! That is some amazing work!

LOL, you guys come up with some of the funniest comments! Thanks BTW :)

So, I don't think anyone is going to complain about the fact that I am always trying to perfect things and end up doing a TON of test on different methods. This test was specifically done for 405th members. Since I have a very unique process that I intent to use (pending results of yet another test of course!) using Polyamide Epoxy, and I know that this specific product is next to impossible to obtain, I wanted to find a different way to accomplish a similar result using common products that just about anyone could find. With that, here is the test.

TEST: To find the best way to coat EVA with a pliable colorant that will not flake off, rub off, or wash off. (Using PVA is a great sealant against the pores of foam, but it is brittle)

SAM_0997_zpsd6b3cc6b.jpg

IN ORDER OF WORST TO BEST

Method 1: Paint water based acrylic paint directly onto the foam, then coat with Rust-oleum matte clear spray.

Result: The foam soaked up most of the acrylic and also the clear spray. It is very mottled and could still soak up a bunch more.

Method 2: Spray with Plasti-dip, then acrylic, then clear spray.

Result: This too came out very mottled, but also has a ton of pin holes where the paints sealed around a larger pore.

Method 3: Spray adhesive (wait 5 minutes to dry), Plasti-dip, acrylic paint, clear spray.

Result: This one did not mottle, but still, tons of pin holes are visible.

Method 4: Spray adhesive (wait 5 minutes to dry), apply a dusting of corn starch, Plasti-dip, acrylic paint, clear spray.

Result: There was a tiny bit of mottling, and a few pin holes. Other than that, pretty close to perfect.

Method 5: Coat the plain piece of foam with a dusting of bleached wheat flour, Plasti-dip, acrylic paint, clear spray.

Result: Nearly a perfect surface was achieved. If I had added a second coat of acrylic to this or the last method, they probably would have been perfect.

In all cases, I used the super thin craft foam. Bending it still creates the creases, but it did not flake or chip off any particulates. Just as an FYI, I thought of this when I was applying PVA to a piece of foam after I had lightly sanded the surface with a piece of dirty 220. The PVA adhered to the foam perfectly (craft foam at that!). That is when I realized the dust particles most likely were "clogging" the pores of the foam. I also believe that if I were to spend a few more minutes and massage copious amounts of flour into the foam, then dusting off any excess, then hit it with the Plasti-dip, that too would have sealed it up even better.

I hope this information has been helpful :)

SAM_0997_zpsd6b3cc6b.jpg
 
Last edited by a moderator:
Can we give this man moderator status, please?
Thank you, I honestly believe you just solved one of the biggest problems foam-armorers are facing these days.
Your work continues to enlighten myself and others. So, seriously. Thank you.

-Ryan M-082
 
Can we give this man moderator status, please?
Thank you, I honestly believe you just solved one of the biggest problems foam-armorers are facing these days.
Your work continues to enlighten myself and others. So, seriously. Thank you.

-Ryan M-082

Totally agree. EVA this build seriously just needs to be compiled into a sticky in the noob forum, titled: Do What This Guy Did.
 
Well, thanks for the recommendation! I don't think I would even want moderator status though. Carpathia is doing a great job as it is :) I wouldn't mind a sticky though!!

Anyways... sorry for the delay, but I do live in the Seattle area and my day was mostly spend watching in awe as my team did what they do best... win!

I am still working on the Exo-suit, and have nearly completed the torso. It is time consuming and I am making sure that each seam's elastic band is double secured with glue. I took the picture below to show how all the pieces went together, and I am highly contemplating covering the whole inside with either thin foam and/or fabric as to hide the mess of glue and elastic. BTW, I must admit, it looks 100% better now that it is all assembled than it did in the photos! I have test fitted it several times and it seems that I have full mobility so far, which is pretty darned exciting to me.

SAM_0998_zps43deb193.jpg

Please post a comment if you think I may run into any unforeseen problems before I get too far! :) I can't think of any, so if I am just missing something, I would love to hear about it and be able to correct it.

and... thanks for looking!
 

Attachments

  • SAM_0998_zps43deb193.jpg
    SAM_0998_zps43deb193.jpg
    191 KB · Views: 155
Hello, EVAkura

First off nice job on this build...I am going with EVA foam for my armor but I do bondo/Rondo with my helmet. I was reading your post on the EVA foam sealing and hardening and was wondering did you use a heat gun to seal the foams cells before applying the coatings? Generally you use a heat gun to close the cell structure then when paint or other things are applied they don't get absorbed as much. Another product out there is called Epsilon, it hardens like plastic but can crack if hit to hard. Also it gets very hot while curing. Here is a video link comparing both Plasti-dip and Epsilon.

www.youtube.com/watch?v=XUGcZp6KR3Q

Awesome build, subscribed too :)

Renraku aka Dave
 
Hello, EVAkura

... did you use a heat gun to seal the foams cells before applying the coatings? Generally you use a heat gun to close the cell structure then when paint or other things are applied they don't get absorbed as much. Another product out there is called Epsilon, it hardens like plastic but can crack if hit to hard. Also it gets very hot while curing. Here is a video link comparing both Plasti-dip and Epsilon.

www.youtube.com/watch?v=XUGcZp6KR3Q

Awesome build, subscribed too :)

Renraku aka Dave

Thanks Renraku for the info and question. I did not hit the craft foam with heat. This was for a very specific reason. Unlike EVA, craft foam seems to be much lighter, porous, and comes in convenient 2mm and 6mm thickness (I am sure there are others, those are just the ones I have come across so far). Applying heat to craft foam has a tendency to distort it horribly. My technique I created is the only one I know of that allows the thinner foams to have a glossy surface, remain flexible without cracking/chipping, and retain its shape.

UPDATE TIME!!!! Front and back are mostly completed. I have about 6 more pieces to fabricate (sides) and then the torso shell will be done. I will be semi-loosely lining the inside to hide the unsightly elastic on the seams, as well as to give it added strength. I am doing it semi-loosely so that I am not defeating the purpose of the elastic :) Also, I am working on a design that I think will be fairly revolutionary.... but that will probably be in tomorrow's update!

To answer a couple of questions before they are asked. Yes, I have excellent mobility in the armor when it is on. No, it will not interfere with the exterior Rogue armor... in fact, the exterior armor mounting points are lining up beautifully with the exo-suit's mounting points

SAM_1000_zpsdfeee10f.jpg

SAM_0999_zps24e821ff.jpg
 

Attachments

  • SAM_0999_zps24e821ff.jpg
    SAM_0999_zps24e821ff.jpg
    181.7 KB · Views: 154
  • SAM_1000_zpsdfeee10f.jpg
    SAM_1000_zpsdfeee10f.jpg
    160.2 KB · Views: 148
*stares* but how... there is no possible way.... its so pretty!
Great job on everything you have done so far, man you are just a wizard with EVA foam. I am loving your build so far.
 
Witchcraft. Honestly I've never seen those kinds of shapes achieved before with foam and I am just stunned beyond belief. I didn't even think something like this was possible. That is just so beautiful, I'd say screw the armor and walk around wearing that! lol How do you even deconstruct/determine the shapes of sides and edges so that they match with the 3d (if that makes sense.) Like, for example, you've already cut up your flat foam piece with all the valleys cut out on the backside. But when you bend that into its 3d shape, the facets are distorted from a front-view perspective and are foreshortened. When I had tried scratch building templates before, based solely on pictures/concept art, the only way I found to get around that is by trial and error. I've just never seen someone translate 2d to 3d so efficiently.
 
Witchcraft. Honestly I've never seen those kinds of shapes achieved before with foam and I am just stunned beyond belief. I didn't even think something like this was possible. That is just so beautiful, I'd say screw the armor and walk around wearing that! lol How do you even deconstruct/determine the shapes of sides and edges so that they match with the 3d (if that makes sense.) Like, for example, you've already cut up your flat foam piece with all the valleys cut out on the backside. But when you bend that into its 3d shape, the facets are distorted from a front-view perspective and are foreshortened. When I had tried scratch building templates before, based solely on pictures/concept art, the only way I found to get around that is by trial and error. I've just never seen someone translate 2d to 3d so efficiently.

if he did just wear that I'd just be like where's the sticky debt.
 
I use a lot of platic-dip in prop building. I have never thought of using it the way you did. Thank you so much for the test info and results. I will definitely be trying new ideas with that info now. Completely mind blowing work on your build. That is just beyond amazing.
 
Mstruvmgc. Sorry, your quote was on the previous page, so I couldn't tag it.... but thank you!!!!!

Witchcraft. Honestly I've never seen those kinds of shapes achieved before with foam and I am just stunned beyond belief. I didn't even think something like this was possible. That is just so beautiful, I'd say screw the armor and walk around wearing that! lol How do you even deconstruct/determine the shapes of sides and edges so that they match with the 3d (if that makes sense.) Like, for example, you've already cut up your flat foam piece with all the valleys cut out on the backside. But when you bend that into its 3d shape, the facets are distorted from a front-view perspective and are foreshortened. When I had tried scratch building templates before, based solely on pictures/concept art, the only way I found to get around that is by trial and error. I've just never seen someone translate 2d to 3d so efficiently.

Thank you so much for the compliment and question. To be honest, I don't really know how I am able to transfer 2d to 3d so easily. I guess I just look at the image, and account for the amount of area a fold or crease will take up. I also REALLY look at the reference picture's shadows to account for where the cuts will be made. I then transfer the image's outline and folds onto cardstock, and then to EVA. It is trial and error, but to date, I have yet to have an error (I probably should not have jinxed myself by saying that!). I guess it also helps that I am aware that I have so much EVA, that if I do mess up, it would not be the end of the world. This gives me the "screw it, I am going for it!" kind of attitude :)

Dude.... Beast..... just beast...

Thanks! (Lovin' the quotes you all come up with!)

I use a lot of platic-dip in prop building. I have never thought of using it the way you did. Thank you so much for the test info and results. I will definitely be trying new ideas with that info now. Completely mind blowing work on your build. That is just beyond amazing.

My pleasure! I am trying to contribute what I can to the 405th. Even though I don't need that technique for myself (at least I don't "now"), I knew that was a huge speed bump for a lot of people, and I made it a mission to find a solution. Just as a FYI, I will continue to find a better way for that technique, and others when I find them. Thanks for the compliment too!

That exo-suit is amazing. Are you going to paint it, or leave it the colour of the EVA?

I was originally going to paint it, but now I am thinking I may just leave it this way... still undecided as of now (and as my wife says, "if it ain't broke, don't fix it!")

By the way everyone who is following this, I just got a toy from the thrift store today... $15 and it works perfectly! Now to tear it apart and see how it is put together so I can determine what project I would like to set this aside for (I kind of wish I had this before I decided to use the cell phone for the Binary Rifle's scope).

Maybe a future Tracker helmet now that the files are close to being released?!?! :)

SAM_1002_zps003c04e6.jpg
 

Attachments

  • SAM_1002_zps003c04e6.jpg
    SAM_1002_zps003c04e6.jpg
    143.8 KB · Views: 141
You know you're a 405th member when... you pick up random stuff from stores knowing that you will use it for costumes, but not sure on what. That just popped into my head as I read this...
 
thank you for sharing your innovations and for sharing your results from your experiments. that foam work is great and its only in the beginning stages, I am definitely subbed to this. I also don't want any straps on the armor and or showing period.
 
Thanks again for the comments :)

Crimmson... This one is just for you! (actually, I was planning on doing this tutorial today, but your comment about not wanting to see straps came at the perfect time!!!)

So, I planned on the armor having the dreaded connecting points, and like Crimmson, I HATE straps. This is for two reasons. The first is that they are unsightly. The second is that they are next to impossible to reach if you hide them on the inside of your armor.

Now, I like the look of the snap latches, but not the straps. My plan was to devise a way that I could use this method, while retaining a cool look. Here is what I came up with.

First, the closest ones are untouched. As you can see, the furthest ones have had non-essential parts cut off with my dremel.

SAM_1003_zps2e738c68.jpg

Here you can see that I have traced the outline of the buckle, and cut it out. I didn't go all the way through on that one part because I wanted to limit the amount of visibility of the buckle. Also, I cut out four pieces of 2mm craft foam, and also nylon strap. The strap is for two reasons. One is it gives added adhesion to the foam for the buckle, and second is as a safety in case the buckle ever becomes dislodged from the foam.

SAM_1004_zps815c2015.jpg

Here it is after gluing all the pieces together. I used my dremel's sanding barrel to notch out where your fingers go to release the two parts.

SAM_1005_zps5b144877.jpg

Here is the bottom side after gluing all the parts, then putting one last piece of craft foam over all the pieces to make them one.

SAM_1006_zpsd6de02a7.jpg

Here is the finished product on the bottom. I basically did the same with the other side, but this on this one, the whole piece was subset.

SAM_1008_zps9db143d4.jpg

Finished buckle connected

SAM_1007_zpsc933d619.jpg

Finished buckle apart

SAM_1009_zps663106ac.jpg

How about 'dem cookies? :)
 

Attachments

  • SAM_1006_zpsd6de02a7.jpg
    SAM_1006_zpsd6de02a7.jpg
    176.2 KB · Views: 138
  • SAM_1005_zps5b144877.jpg
    SAM_1005_zps5b144877.jpg
    141.8 KB · Views: 127
  • SAM_1004_zps815c2015.jpg
    SAM_1004_zps815c2015.jpg
    195.1 KB · Views: 151
  • SAM_1003_zps2e738c68.jpg
    SAM_1003_zps2e738c68.jpg
    144.8 KB · Views: 133
  • SAM_1007_zpsc933d619.jpg
    SAM_1007_zpsc933d619.jpg
    154.4 KB · Views: 129
  • SAM_1009_zps663106ac.jpg
    SAM_1009_zps663106ac.jpg
    170.7 KB · Views: 140
  • SAM_1008_zps9db143d4.jpg
    SAM_1008_zps9db143d4.jpg
    211.1 KB · Views: 140
Status
Not open for further replies.
Back
Top