Centurion Build

Status
Not open for further replies.
Just keep plugging along, Dirts! I do my pep work during lunch these days because I'm in the same boat as you.

I stay up late and wake early to get stuff done some times but the body rebels against my wishes........it some times ignores the alarm....then I'm in trouble at work cuse I get there late. But yeah, doing the lunch and wasting time till closing bit as well now........

Put on top half of armour.

And wear a kilt.

Instant Scottish regiment right there.


Sent from my iPhone using Tapatalk

HA!!!! Perhaps I should do the Ancestry DNA testing.......Being adopted and only knowing that I have some European background........maybe I'm am Scottish. I should stop building my weapon and build a set of bagpipes.
 
HA!!!! Perhaps I should do the Ancestry DNA testing.......Being adopted and only knowing that I have some European background........maybe I'm am Scottish. I should stop building my weapon and build a set of bagpipes.

That would be awesome!


"I don't know what is weirder - that you're fighting a stuffed animal, or that you seem to be losing." - Suzie
 
Hahaha, I was thinking more of like as you blow, the pipes shoot a plasma discharge out of the ends!
 
But don't bagpipe.......pipes, face backwards? I would be shooting plasma towards my own troops.....now if it turned around I would be facing the wrong way but the pipes would be facing the enemy........this is a very confusing weapon........back to the drawing board and leave off the drinking of Scotch........its messing up the design.
 
Hahaha, or plasma out of the flutey bit off the bottom?

ok.. ok.. I'm done... :p

OR

The pipes are just a big plasma satchel charge, and you play a battle tune then throw them at the enemy. Eh? EH??? *wink wink* *nudge nudge*
 
Hahaha, or plasma out of the flutey bit off the bottom?

ok.. ok.. I'm done... :p

OR

The pipes are just a big plasma satchel charge, and you play a battle tune then throw them at the enemy. Eh? EH??? *wink wink* *nudge nudge*


Play.....a......battle.......tune.....and then......throw.........So in essence what your saying is that......... you'll blow them away? Ok I'm done now.........:facepalm
 
Precisely... Breaking Benjamin understood this...

Maybe we should get back to your build :p
 
Last edited by a moderator:
One little suggestion and all hell breaks loose.


"I don't know what is weirder - that you're fighting a stuffed animal, or that you seem to be losing." - Suzie
 
It's all good......But yes back to the build.....progress continues.......snail's pace but still, PHOTO DUMP TIME!!!!


IMG-20160928-01492.jpgok I know they are bad pics.....I have a crappy phone. This was the first time trying it on since sealing and plasta dipping. I have the boosters on, already started putting on some detailing w/ some white craft foam....which I got a great surprise from......it glows in the dark!!!!! Got to save some of this for later.......I have both of the bicep and shoulder pieces attached together, just wearing 1 right now....

IMG-20160929-01495.jpgLike I said, bad camera pic.......and as everyone else in the house was asleep...I had to take pic myself. It fits great, looks cool but still has a lot more to go before I call it finished.

IMG-20160929-01496.jpg I found these gloves in Home Depto and they came out great. Painted the finger and back of the hand "armor" the color I'm going for and will do the same w/ the added foam plate.

IMG-20160929-01497.jpg This is the right shoulder, I had made a huge mistake when I assembled this. I had originally cut out pieces that would have given the piece more depth. But since I wasn't putting lights in to this one.....it didn't need it so much.....50/50 on redo.

IMG-20160929-01500.jpg Now the other shoulder armor will have lights. I've cut a nice piece of plexi as a cover which I will attach w/ hot glue after all is painted. The top flap will be held down w/ a small strip of velcro so I can get to the switch and change batteries when needed. This one came out better of the 2 by far......

IMG-20160929-01501.jpg 
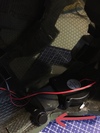
Again a Home Depot item.....a 6 pack of LED flashlights. I cut the end off the flashlight so it would fit facing outward in the shoulder pad, kept the battery pack and even used the switch from the flashlight itself.....recycling is key. Saves money as well.

IMG-20160929-01499.jpg And a quick look at the full chest w/ shoulders. Added some more of my special glow in the dark foam........Still needs a few more details but it's finally coming together.


Now I have a question:........I accidentally glued the back piece in the wrong location.......If you look at the last pic, the piece between the 2 boosters (those will have lights as well) looks centered but it's off by 1-1/12 inches. When I wear it, it is very noticeable. How can I remove it w/o destroying it and the back piece. If I use my heat gun to melt the glue I will seriously warp my piece. I don't want to cut the whole thing apart and try and patch it up. Unless some one has a better idea/method, I might be forced to do so.
 
First of all congratulations! That first test fit after sealing and Plasti Dip is so much fun!

The sizing looks really good. For getting that part off the back (the image was broken for me) do you have a hot knife? If so you can either run the tip if the hot knife into the glue to loosen it and remove the piece (allows you to direct the heat only to the area you want to remove unlike the heat gun, which just blasts everything). Or you can cut the foam beside the joint to remove the piece (this allows for a cleaner cut to remove the piece but you have to be concerned with sizing issues when you go to re-install).

The gloves turned out really nice, they will look amazing when you get the plate on.

You are inspiring me with those lights. They look killer. I have to admit that I kind of wish I had cut the light locations out before sealing and paint. The thought of taking my hot knife or dremel to the pieces now scares me. But if it looks as good as yours it will be worth it.


"I don't know what is weirder - that you're fighting a stuffed animal, or that you seem to be losing." - Suzie
 
I will admit that I didn't think of doing lights till after I did the chest piece. Now I'm in the same boat as you.....do I cut or just go w/o? I did plan of putting lights in the boosters......the front top section is open. I'm taking another flashlight apart and attaching it to some gold plexi (which I have yet to make/locate), and making it a solid piece which I can wedge into the opening after I turn it on.


Bit of bad news though.....my helmet is a soggy mess. After I put in the last layer of fiberglass.......it stayed very soft and pliable. I can push on the side of the helmet and it caves in.......Not sure what I did wrong. Have to try something. Would heat fix that or just melt the resin? At least I don't have the pressure of a time frame any more. NY Comicon is next week and I've decided that the suit will be staying home unfinished. Worse case scenario....I redo the helmet.......It's the 4th or 5th try so why not a 6th?.......
 
So sorry to hear about the helmet. I am not sure what could fix that.

I am going to do a test piece for lights tonight. I want to determine the size of the whole that I need to cut. My question is whether I need to cut out the entire section where I want the light or whether the LED, glued to the plastic cover will light up the cover if the whole is only big enough to get the LED through the foam.


"I don't know what is weirder - that you're fighting a stuffed animal, or that you seem to be losing." - Suzie
 
If you are using the hole just for the light, will you have access to the batteries and switch? If not, you may consider what you mentioned. Gluing everything to the plastic cover so you can slip it in. That's what I'm doing w/ the booster lights. Turn on and slip in, forget till later.
 
I am using 3xAAA battery boxes which are located wherever I can fit them. But yes, they will all have the ability to have the batteries changed. I am also wiring in button switches for every piece so that I can switch on/off the lights without taking off the piece.

This
ab233bb38fce80c1c5ef5015d80048f3.jpg


Looks like this when on

ccc21c1ab204aae55c10f400360f91cf.jpg


"I don't know what is weirder - that you're fighting a stuffed animal, or that you seem to be losing." - Suzie
 

Attachments

  • ab233bb38fce80c1c5ef5015d80048f3.jpg
    ab233bb38fce80c1c5ef5015d80048f3.jpg
    201.2 KB · Views: 195
  • ccc21c1ab204aae55c10f400360f91cf.jpg
    ccc21c1ab204aae55c10f400360f91cf.jpg
    186.8 KB · Views: 211
For getting that part off the back (the image was broken for me) do you have a hot knife? If so you can either run the tip if the hot knife into the glue to loosen it and remove the piece (allows you to direct the heat only to the area you want to remove unlike the heat gun, which just blasts everything)).

The gloves turned out really nice, they will look amazing when you get the plate on.


"I don't know what is weirder - that you're fighting a stuffed animal, or that you seem to be losing." - Suzie

Hot knife surgery completed. Worked like a charm. The piece has now been reattached and is lined up correctly. Thanks for the advice Jme

1 step forward, 2 steps back. Now the plate for the hand keeps falling off, I scuffed up the original plate that is stitched there but the hot glue is just not holding......1 of 2 things. The easier of the 2 would be to scuff the piece even more or really gouge out a rough spot for the glue to hold or ........the more taxing route, remove the stitches and the original plate off the glove and then attach the new plate directly to the fabric. The only issue w/ that is, I don't know what is under the original plate......
 
I had a similar problem with my CQB lid, the forehead portion sagged in towards the visor. I used polyester resin, and I used a heat gun to heat up the crown of helmet, squished it together with both hands to get the front to come out, and while holding it in the shape I wanted it, held it inside of my freezer until it cooled down. I had to do it two times to ensure that it would stay where I wanted it. I'm not sure if the same process would work for epoxy resin (if that is what you used), some people have told me that it would crack my fiberglass.

Maybe try heating up a section of it and see if it becomes more pliable, then try moving it in small increments.

Is the glass in that particular section thinner? Or does it almost seem like it hasn't hardened properly? If so, maybe try removing as much as you can with sanding, or grinding, reset the section to the proper shape, then add a fresh layer of glass with a stronger mix of hardener. Hold it until it hardens so you can see if there is any warping happening and you are able to correct it before it really sets up.
Foam......not glass. Epoxy might work though.
 
Status
Not open for further replies.
Back
Top